Before


During

After

On Going
March 11, 2020
Fiddled with the TR’s linkage, and managed to get the throttles to open fully. Wow. It runs like my car, after a double cappuccino shot! Down side is go pedal is all cattywompus. Up side is Tami found my Bentley’s manual, so I’ll take a gander as to the factory linkage settings and set up.
April 7, 2020
With a toggle switch bezel serving as my needed shim, a new 8-32 screw acting as the new core to my long missing throttle linkage stop, and about .25 inch ground off one of the ball joints in the linkage, I installed the newly refurbished and improved linkage. It worked smoothly, and the carbs actually reach WOT. Whoah, where did that extra 30 hp come from?
With the new floats and a proper float level setting, the car did not load up at idle, nor stall out on a panic stop. The brakes, however, sucked even worse without the servo connected. No stopping power, a spongy feel and a ton of pressure necessary to engage the stoppers. I’ll reconnect the servo to ease the effort, and install the rear adjuster to see if that helps the pedal feel. It certainly can’t hurt.
I wonder how Kas Kastner got the competition TR6 to stop?
April 30, 2020
On the TR front, I painted the sills with a chip resistant paint, and reinstalled the stainless trim strips. Applying black paint to yorange car a second time went fine. Installing the strips, however, resulted in several chips, as the paint on the mounting clips sheared off when the trim piece slid over them. Time for a little touch up. Now all that remains are the rear wing decals, the BL badges on the front wings, and the door handles. A niggling fuel leak in the rear carb drove me to remove the carb again and closely examine the Grose Jet. Although both balls were free, the ball on the valve seat was not making a leak free seal. So, over to ebay for a set of original design ZS needle valves. The buzz I see is simply not to let fuel sit in them – if that’s avoided they are fine. I can do that, and the fuel leak from the overflow pipe is a thing of the past, allowing the yorange submarine to idle smoothly, regardless of time or temp. Huzzah!
Staying Cool in August in Alabama
Tue, 28 Jul 2020
Did your TR3 have an oil cooler installed? Every B I have seen came with one from the factory, but I have only seen one on a Triumph, that’s Bill’s.The mounting holes are there, I am guessing it was penny pinching in Coventry that kept them off. I am replacing my radiator shroud, and I opted for the cut out to allow oil cooler lines to pass through. Maybe I should buy the cooler and fulfill the shroud’s destiny?
Wed, 5 Aug 2020
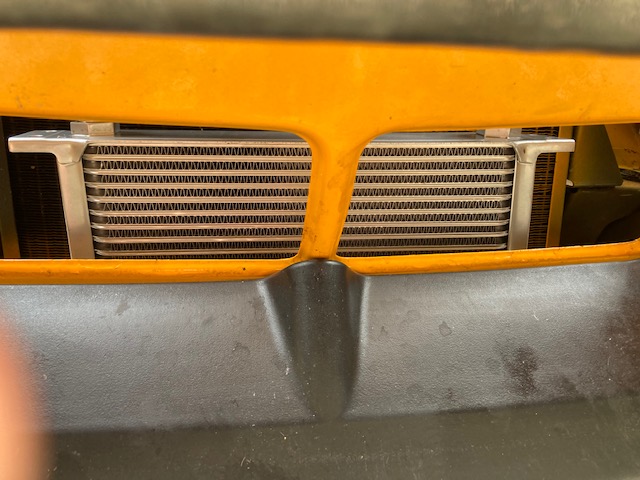 My oil cooler kit arrived yesterday. The cooler is bolted in place, now I just have to get my nerve up and get to removing the canister filter, installing the adapter, and the hoses, and routing them forward. Surprising absolutely no Triumph owner, it looks to be a tedious job with tight clearances and poor access. Huzzah!
Monday, August 17, 2020
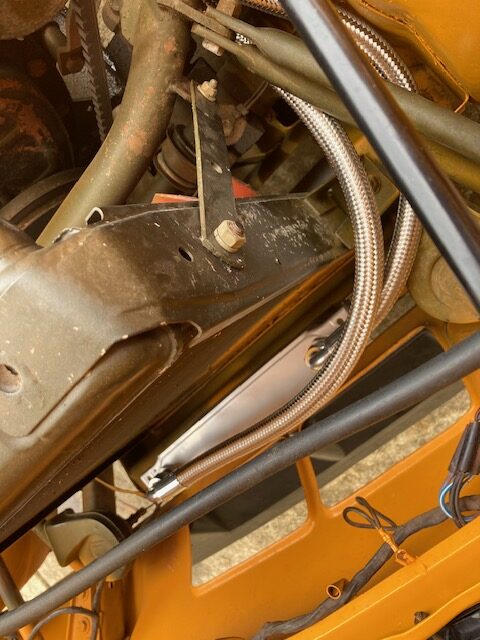 Wellll . . . Guilt finally outweighed sultry heat. Off my ass and, well, onto my ass on the driveway, preparing for the great oil cooling leap forward (thanks Chairman Mao!) aka MG/Triumph cooler parity. (how about mutually assured engine oil cooling?) Canister removal was as expected, tough. I removed the oil pressure sender and fuel line to provide critically needed wiggle room. I also thought the driveway could always use a good petrol wash-down! The can just squeezed out between the inner fender and the steering column. The adapter, surprisingly slipped right in, requiring only a little grease to hold the inner seal in place. It took some time working alone, but I was able to tighten the unit down about 95%, allowing it to pivot to facilitate the hose mounting. Routing the lines was less
 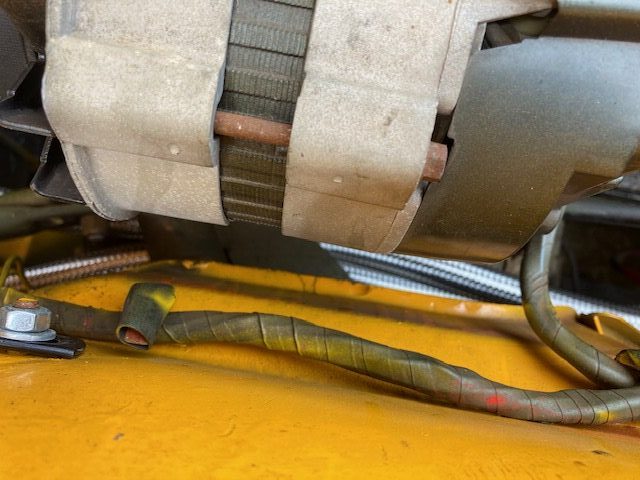 challenging than expected, as they both slipped under the removable cross member, and should fit in the pocket Mr. Good cut into my rad shroud, once I install it, inshalllah. Connecting them was done one end at a time, first the adapter, which I twisted to present an easy threading profile. Once finger tight, it was off to the valance to thread the lines onto the cooler. After completion, I had to swap line locations at the adapter to allow the hoses to route freely. Imminent rain stopped my progress today, but tomorrow it should be a quick finish, with only tightening of fittings, reinstalling the sender, and adding her new spin on (!) oil filter before the acid test of actual engine oil pressure. Fingers crossed!
Date: Tue, 18 Aug 2020 16:02:18 -0500: Oil Pressure test
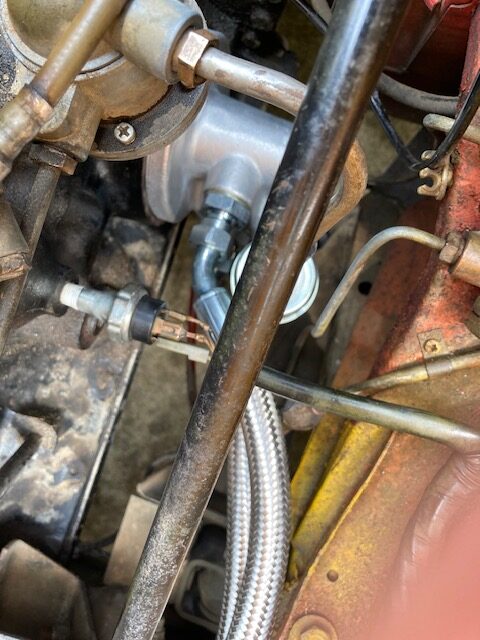 The cooler and allied hoses add about a quart of oil capacity – more oil, more heat transfer. Not surprisingly, the first startup revealed some leakage at the joints, easy at the cooler end, far less so at the filter head. I had to purchase some Harbor Freight wrenches with an odd offset to tighten the fittings in situ. All leaks appear to be resolved, but I will test it for a day before assembling and installing the fan shroud.
Once all is assembled, I’ll pass on the results, although it appears to be keeping the car cooler during extended idling. The spin on filter will be one hell of a lot easier to change than its predecessor.