| 1980 Triumph TR8 | 1962 Triumph TR3B |
| 1980 Triumph TR7 | 1975 Triumph TR6 |
1965 Triumph TR4A
(current project)

Mike is a Triumph guy with deep Irish/Scottish roots. Mike came to the British Motoring Club of Montgomery in August, 2017 from the Dayton Ohio area where he was a member of the Miami Valley Triumphs Club.
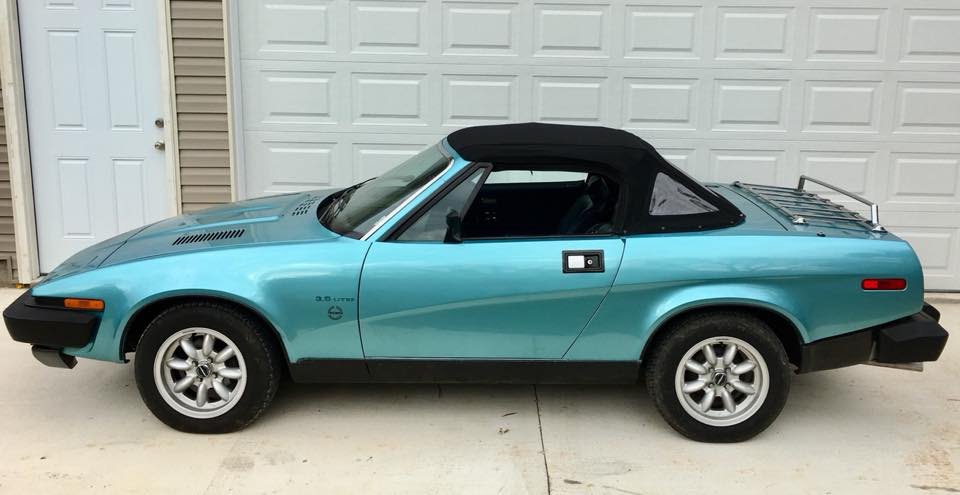
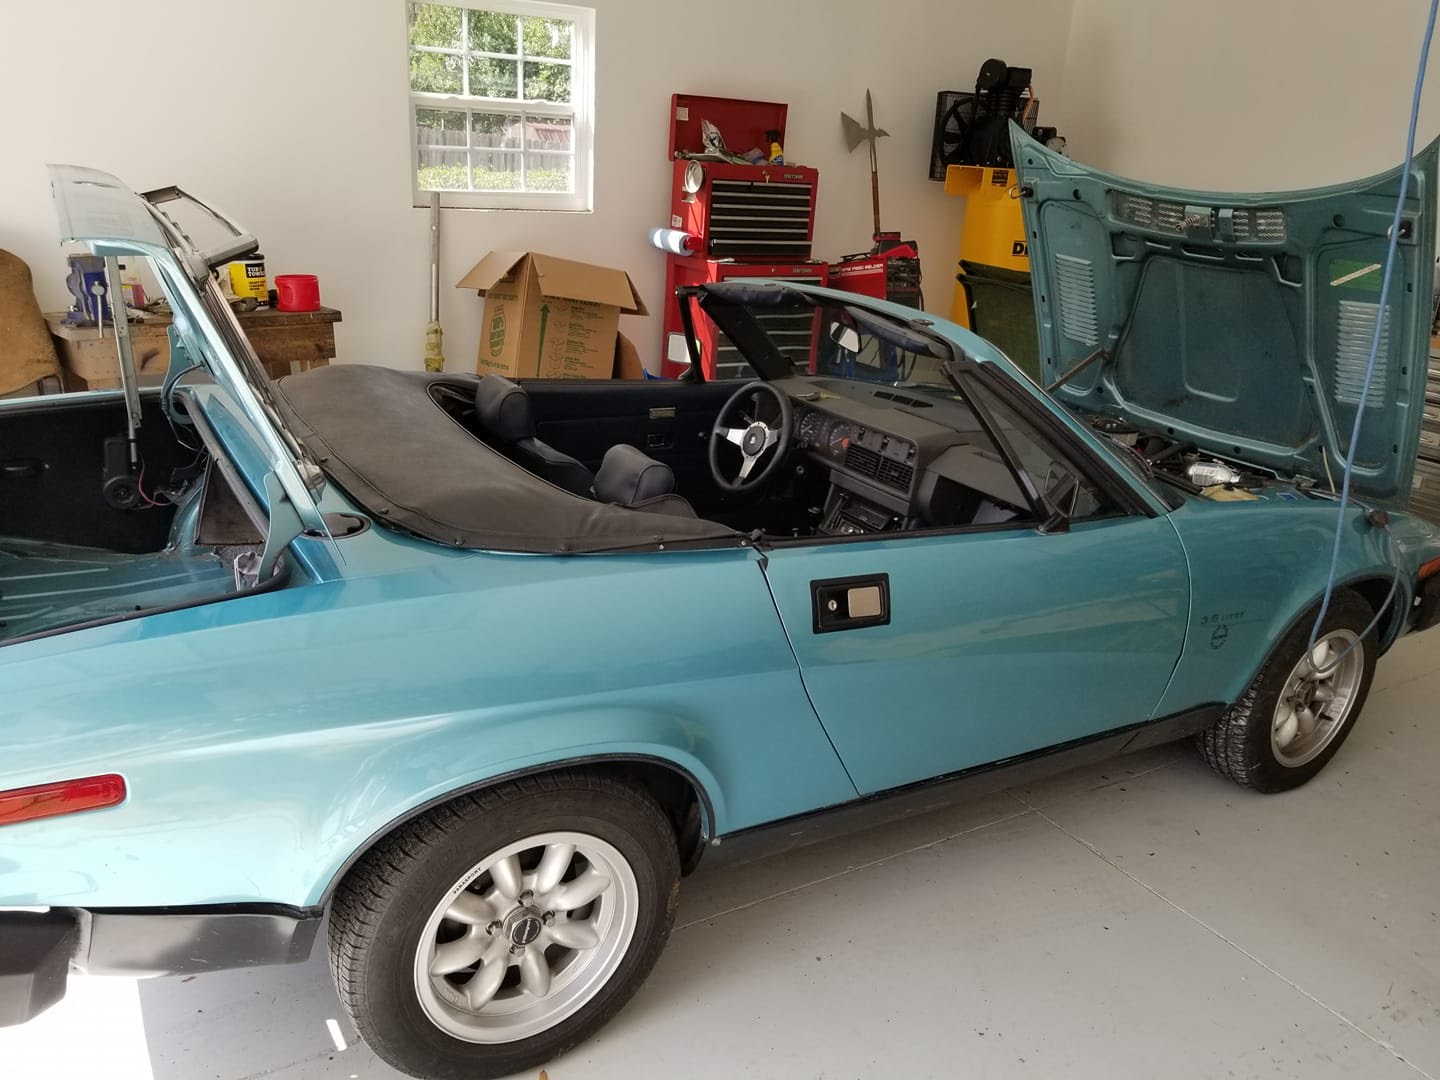
1980 TR8
December 7, 2017: New home for my “new” Triumph TR8!
Mike brought his talents with him to BMC in the form of this beautiful 1980 TR8.
Here’s the Bring A Trailer ad for the TR8.

1980 TR7
Purchased the TR7 in 2004. It sat in my garage for 2 years before I started a complete rebuild. In 2006 after I sold my 1975 TR6. Completely stripped the car down and rebuilt the suspension, interior, body, suspension & completely rebuilt the 3.5 Liter TR8 engine. Originally a horrible dark red, I sprayed the TR7 in base/clear; GM galaxy silver.
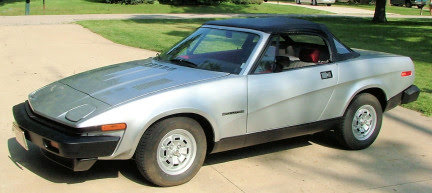 Mike’s 1980, TR7 V8
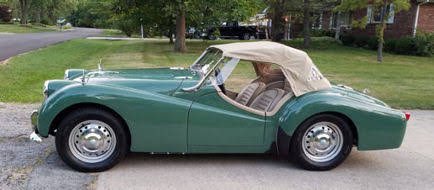
1962 TR3B
I acquired the 1962 TR3B as partial payment for the 1970 TR7 in 2013.
Stripped the car down and did a full rebuild on body, interior and frame. Looks original but ignition and electrics were updated along with electric door locks/poppers with remote control. Added a rebuilt OD transmission. Color is single stage epoxy MG/Rover Apple green.
Sold it to a fellow club member February 2017 in preparation of moving south.
1975 TR6
 Purchased in 1992 in Springfield, OH I drove it home hoping my feet didn’t push through the floor. Disassembled the entire car and rebuilt virtually everything. Originally Yellow, Color is 1993 Jaguar Brooklands Racing green base/clear & painted in my garage.
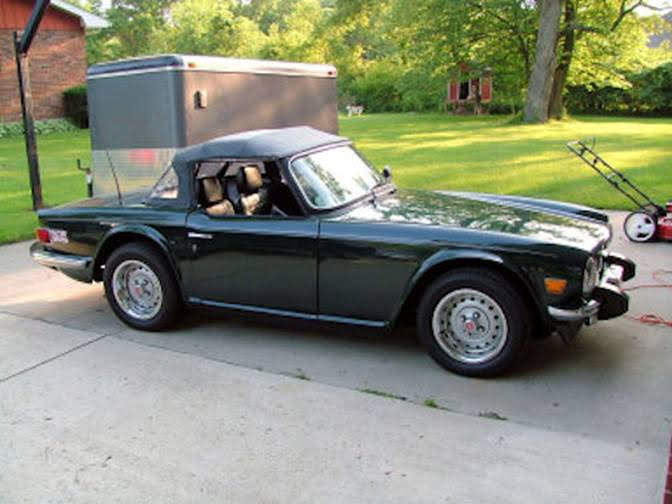
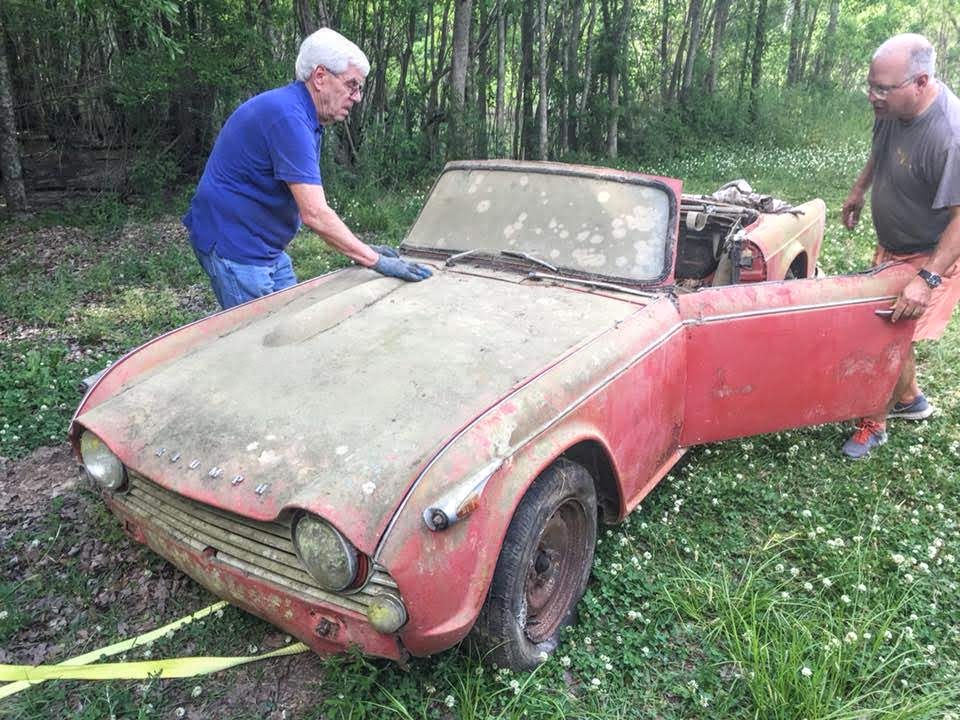
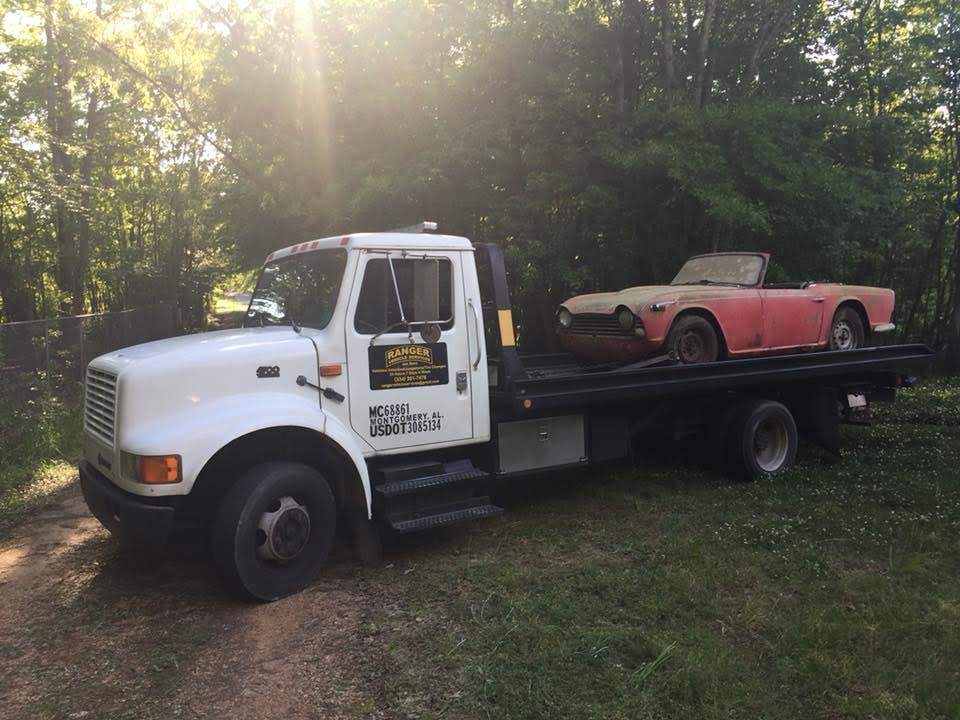
Mike’s “Rusty Red” 1965 TR4A
Mike McKitrick British Motoring Club of Montgomery
Progress Updates:
| May 2018 | Mar 2020 | Jul 2020 |
| Jun 2018 | May 2020 | Sep 2020 |
| Dec 2019 | Jun 2020 | Oct 2020 |
May 1, 2018
Thanks guys for the help in retrieving the TR4A from Hamer’s! Now I really have my work cut out for me. And, thanks to Jon of Ranger Vehicle Services for getting the TR4 home
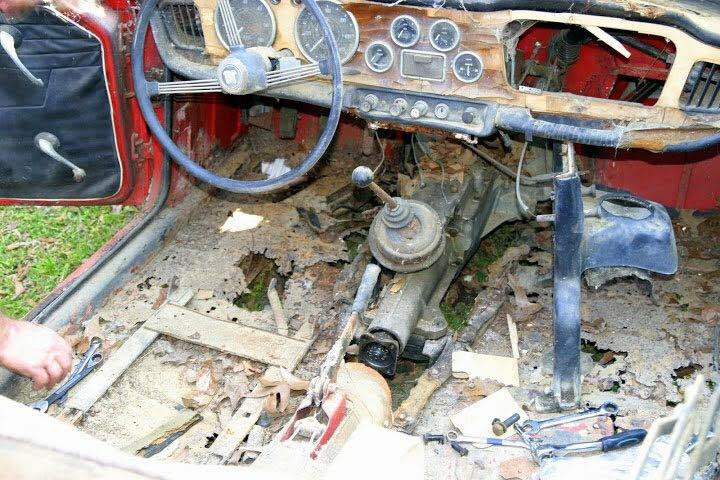
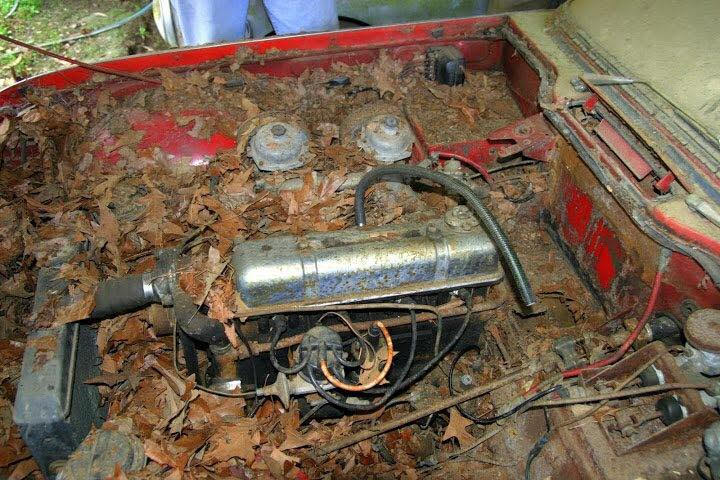
June 2018
Well, after about a month, I’ve stripped the body of nearly everything; including a half dozen of large black/brown spiders that appeared very vicious looking.
Yep, rust is present.
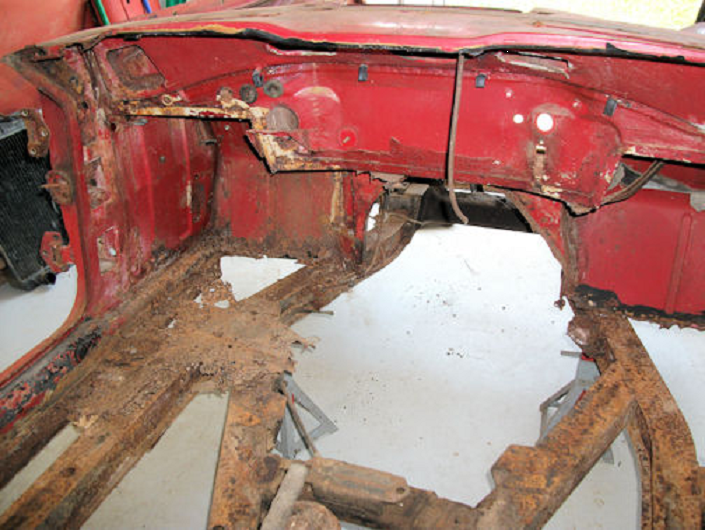
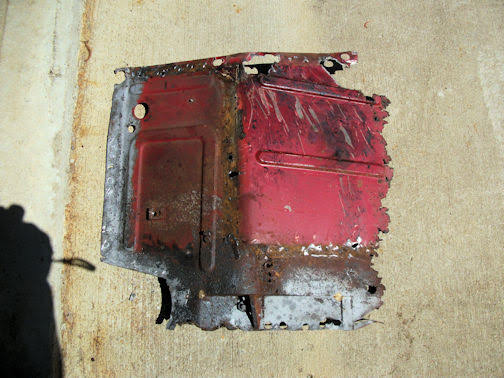
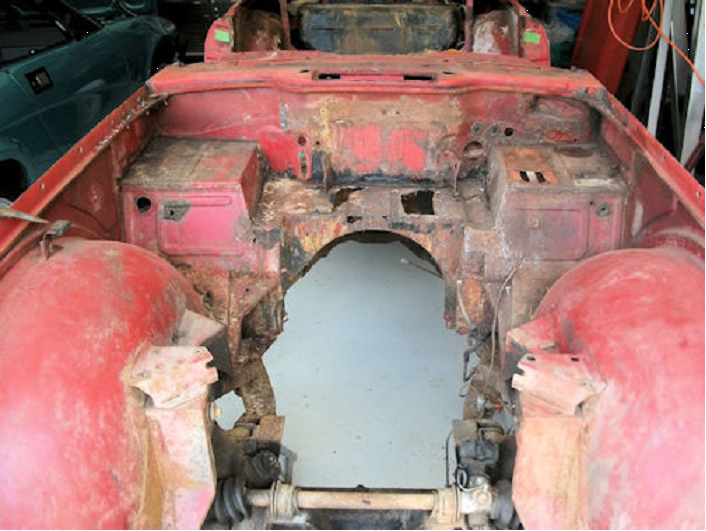 Front: Battery shelf rusted
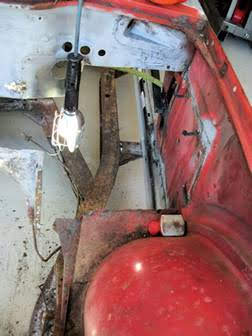
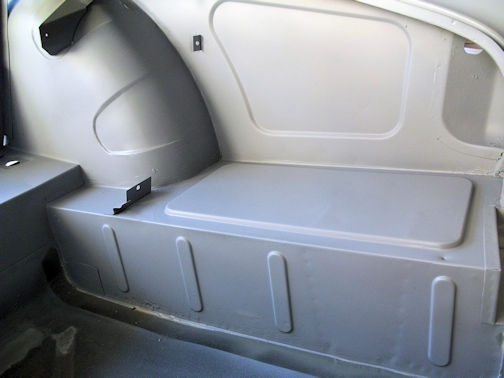
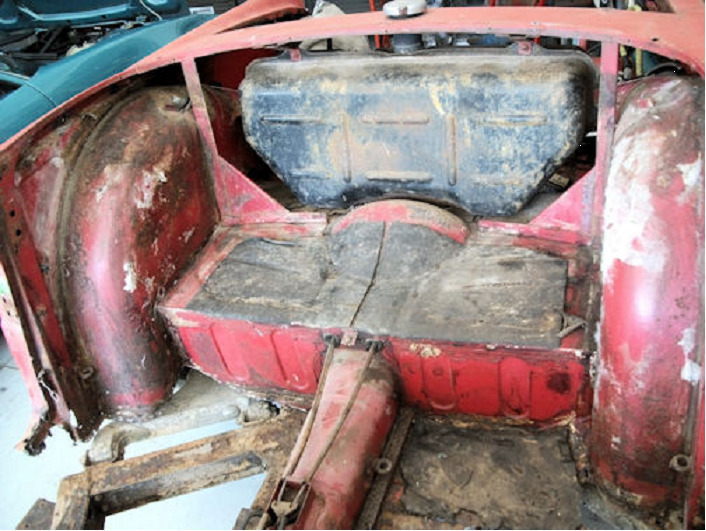 Rear of cabin/cockpit Both Floors rusted
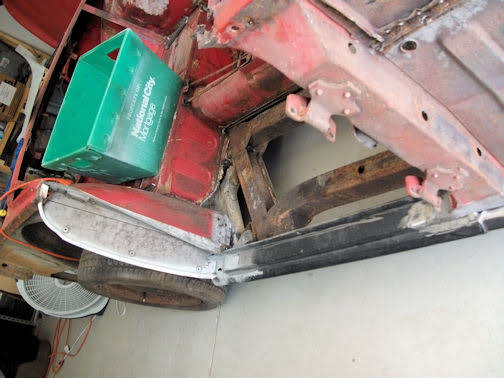
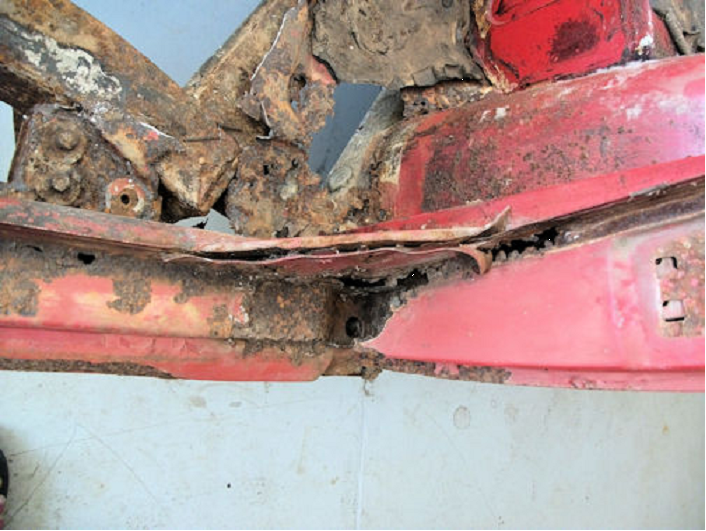 Left side-B post rusted at bottom & up inside
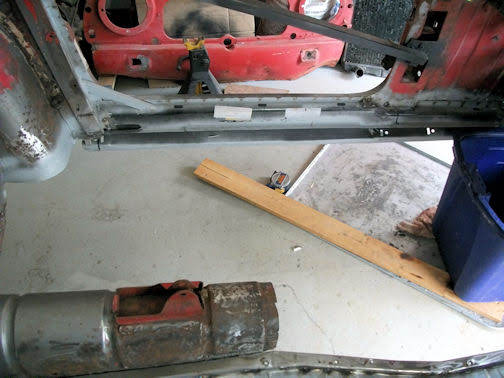
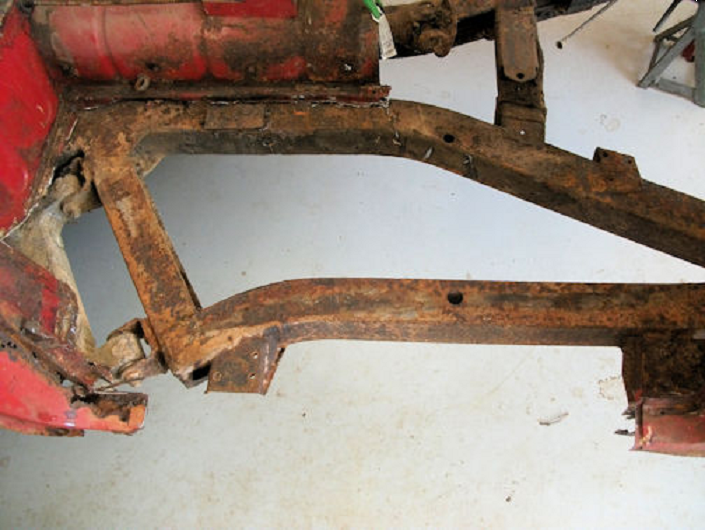 Right side-Floor is mostly out along with the sills. Frame has surface rust, so far.
 Front of floors- Left side didn’t require much persuasion to remove but several of the bolts installed in floor area don’t want to leave, yet.
So far, The Roadster Factory has back-ordered my new battery shelf (on sale but not in stock at all?). I’ll try to order the sills as they’re the first thing requiring installation before I can remove the body from the frame. Long summer ahead 🙂 .
Mike McKitrick
December 2019
Well, after more than a year since my last update (above), I’ve made some progress on the body shell.
 Replaced the inner and outer sills and the front of both B posts. I did this with the body shell on the frame to keep everything lined up. Sand blasted areas where new parts would be fitted.
 POR 15 applied to inside of B Posts.
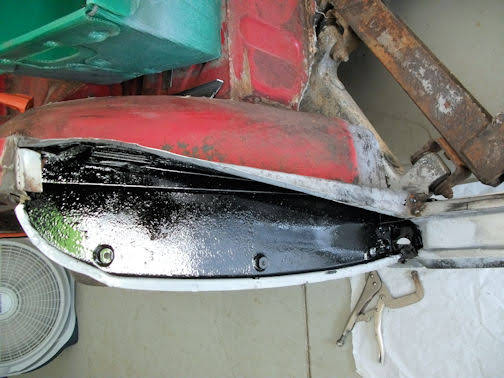
 Driver’s side sills in place.
Also had to cut and replace bottom of inner rear fender wells, and bottom of left Knee Panel for floor and sill replacement.
After replacing the sills it was time to get to the front cowl area. With the floors still out it was much easier to remove the left Toe Board for replacement.
 Left Toe Board removed.
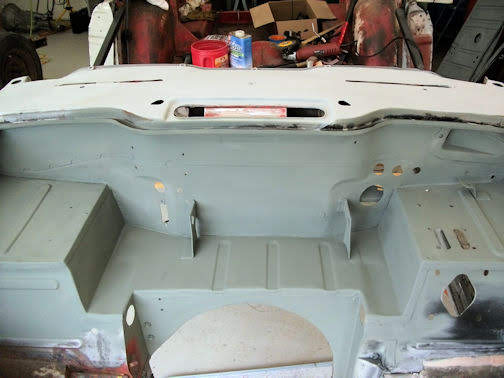
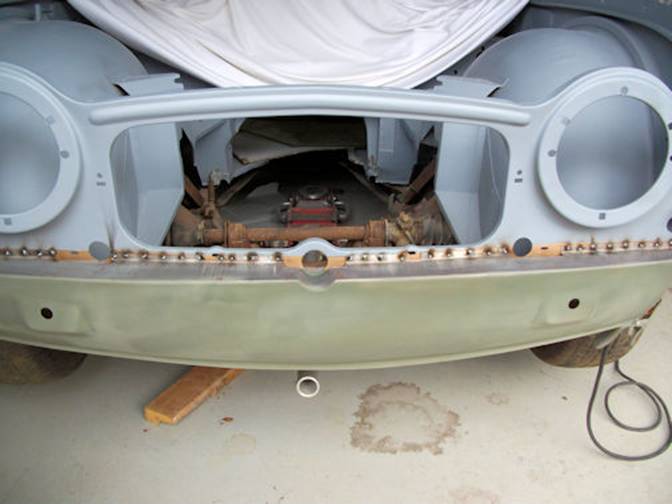
 No Toe Board and front of cowl sand blasted & ready for new battery tray and side panels.
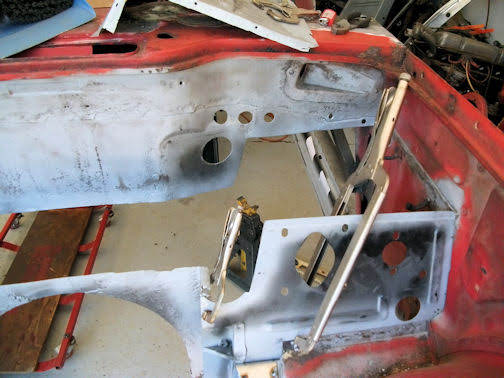 New Toe Board, sadly TR6 type as TR4 type NLA.
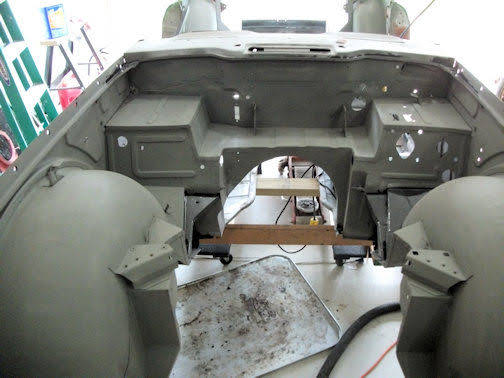
 New battery tray and side panels (from the donor TR4) installed. Now to decide if I use TR4A or TR6 brake pedals.
 Engine bay blasted and primed, ready for seam sealer and epoxy primer.
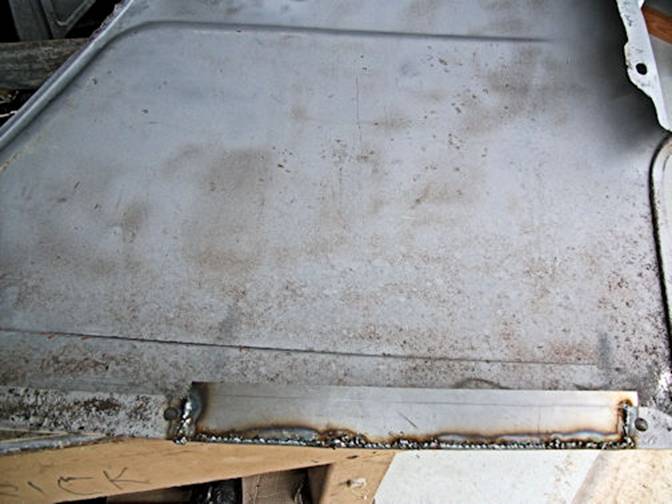
Next came the floors.
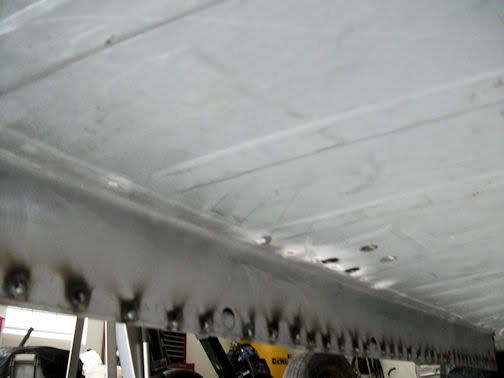 Bottom of floors spot welded.
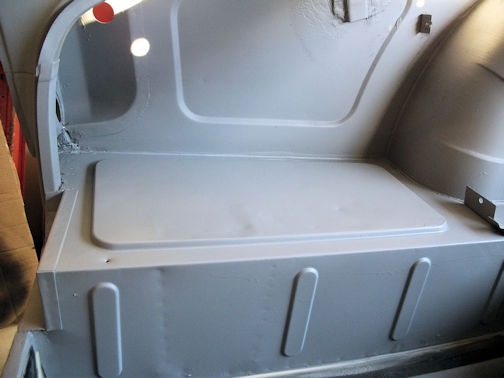
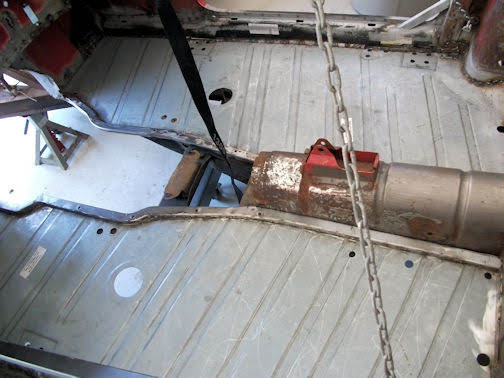 Both floors installed.
Tackled the front & rear of the body shell with sand blasting and some pre-primer prep of self etching primer and POR15 application.
 Rear inner fender areas blasted.
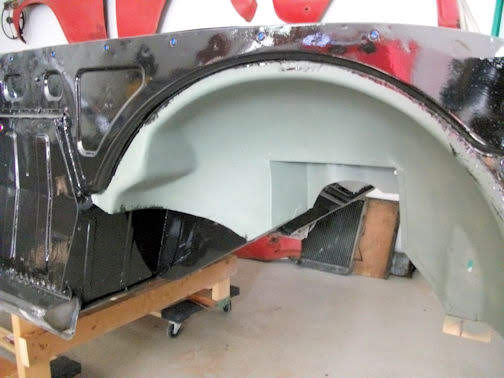 Inner front fender blasted & primed. POR15 gets to be scuffed and primed later.
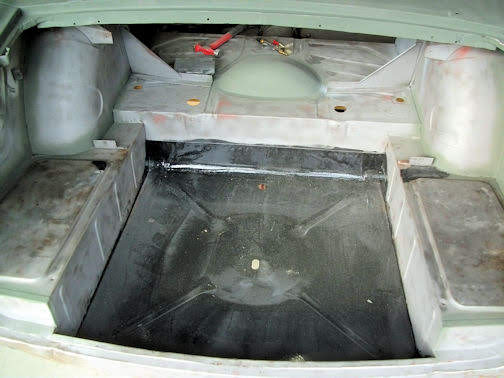 Trunk lid seal lip replaced and primed. Spare tire area blasted and coated with POR15. Rest of trunk area gets epoxy primer.
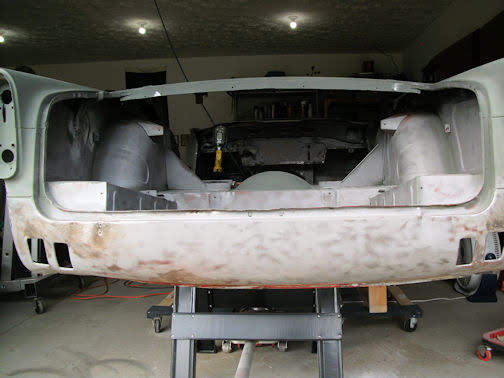 Rear valance needs dent removal (several).
Next up: More grinding, sanding, seam sealing and primer. Then I can get on with body panels and the TR4 Frame. Guess I won’t be entering any concurs shows with a TR4A body and TR4 frame, but should be interesting.
Happy New Year to All!
Mike McKitrick
To be continued…
March 2020
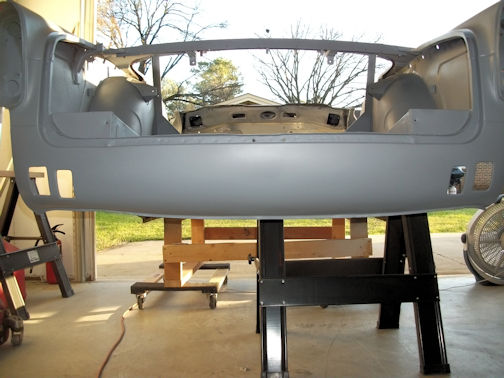 Photo doesn’t show it, but I had to slice a section on both sides, near the trunk opening, to get two dents out. Minor amount of filler which made me happy.
 Right side of trunk area with epoxy primer.
 Left side of trunk area with epoxy primer.
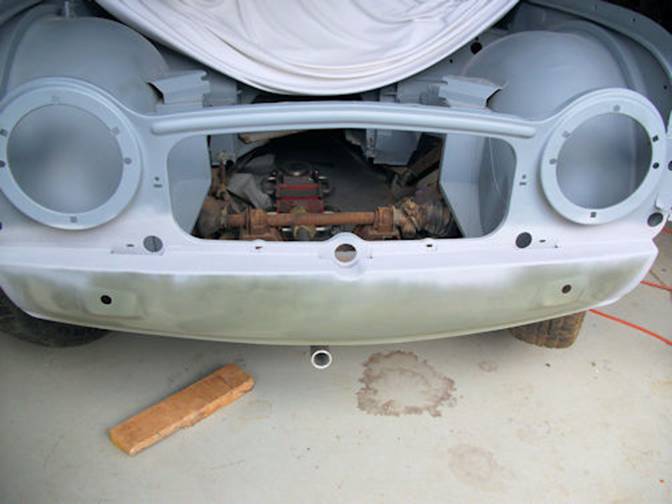
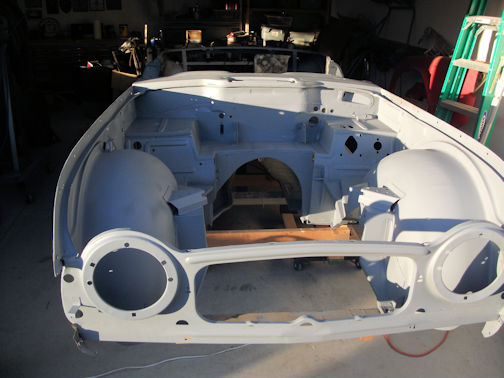 Epoxy primer on front with the upper valance in place. Ran out of primer to finish top of floors and under the dash. Have to order the lower valance and weld it in place.
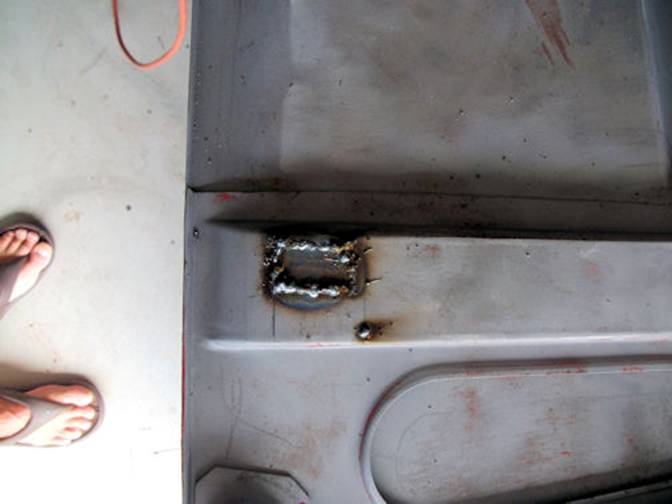
May 3, 2020
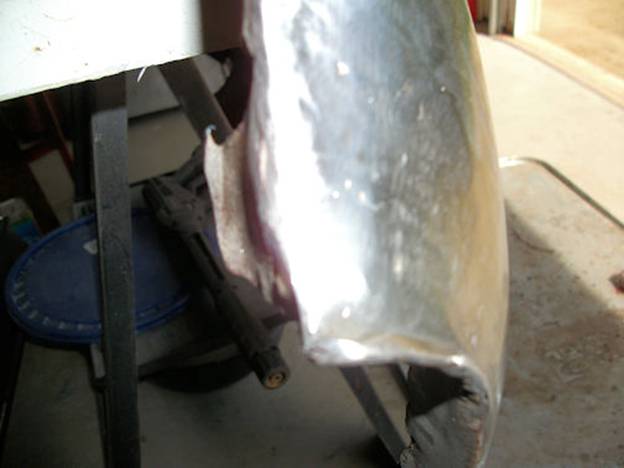
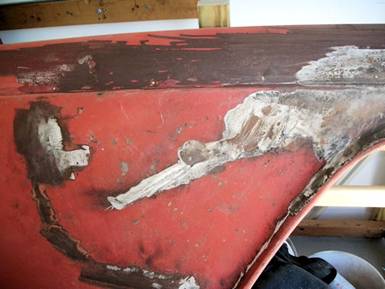
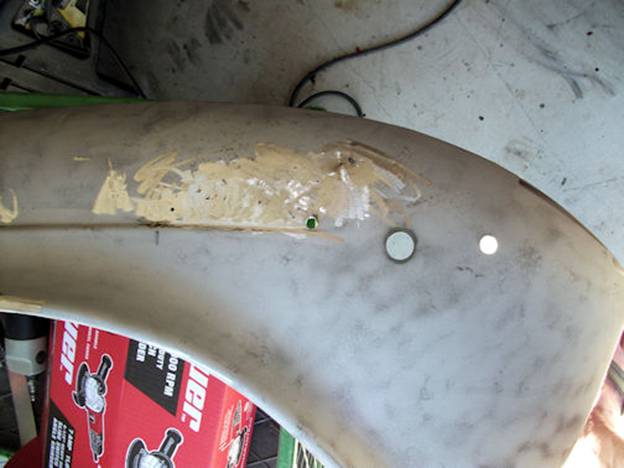
It’s been a little slow since my last update on 6th March, what with the virus, weather and a lot to do on the TR4. After media blasting the front fenders I sanded the bare metal with 80 then 180 grit and dug out filler from the holes added to keep the filler in place.
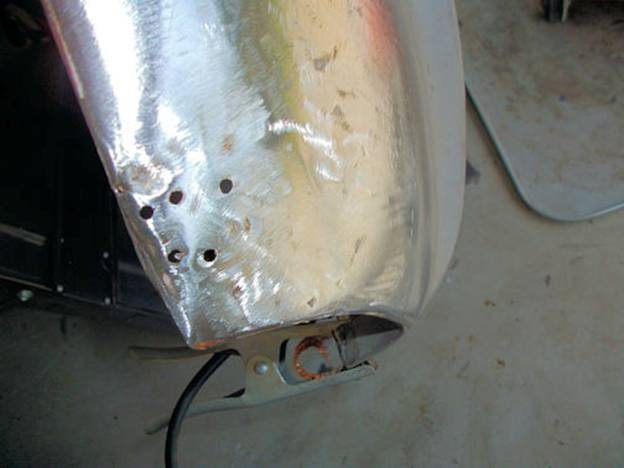 Here is just such an example of holes drilled to anchor the Bondo on top of the left front fender.
 Welded the Bondo holes closed.
 Ground down the welds….skimmed the section with filler to smooth out the rough metal.
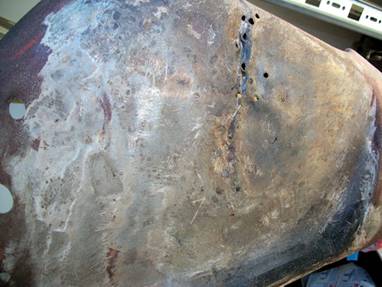
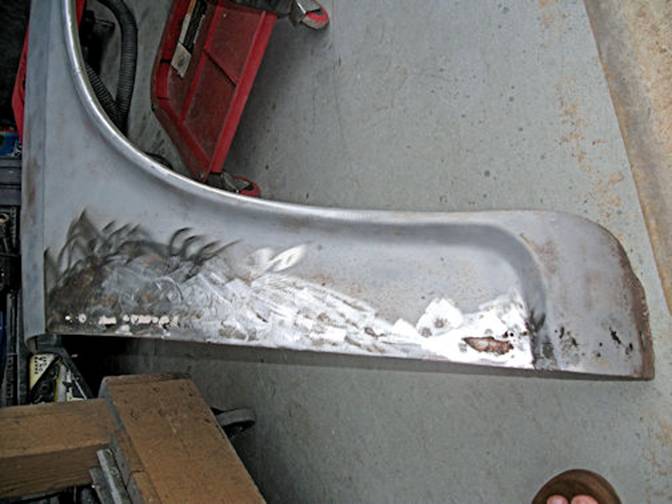
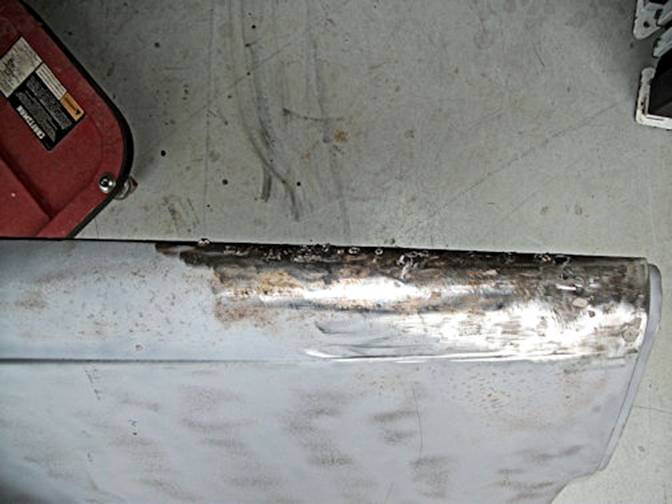
 The bottom of the fender had its own problems with numerous rust-thru holes which I attempted to weld also. Ground down the welds and skimmed this entire section with filler & sanded it all down.
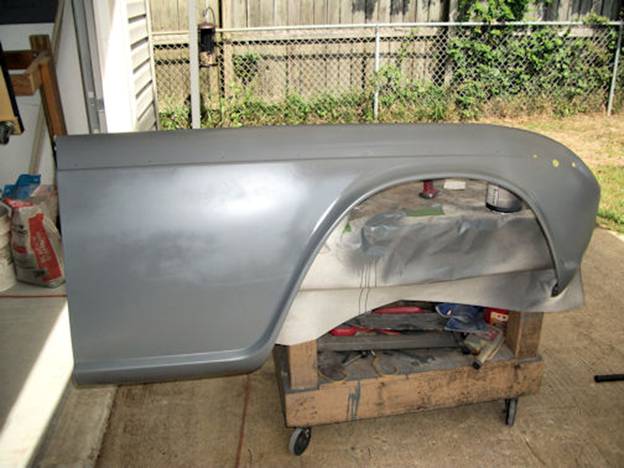
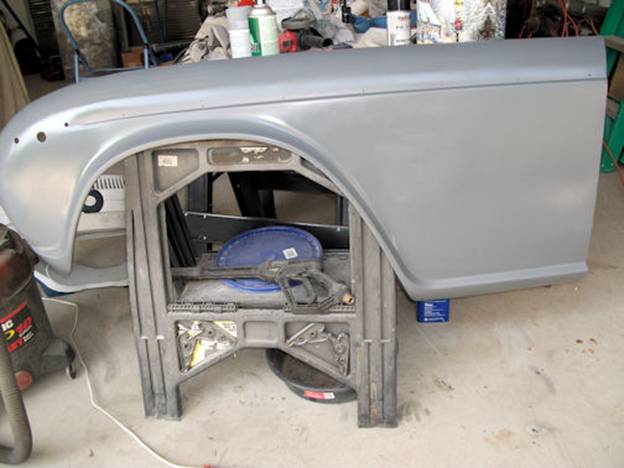 After more sanding and finessing the metal with hammer/dolly, I actually got to prime the fender using epoxy primer.
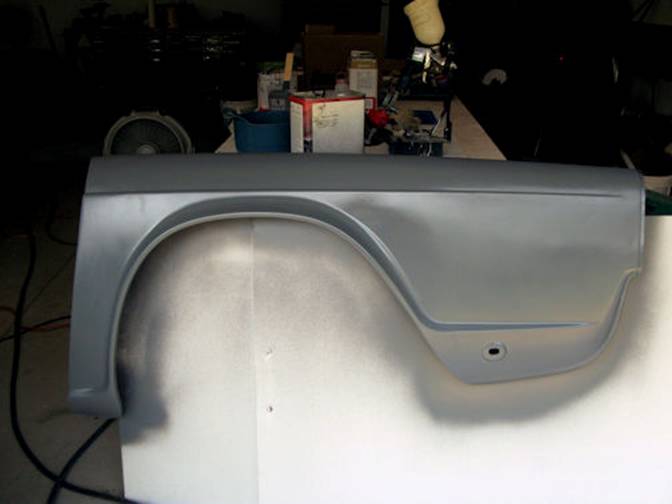
 Replaced the original right front fender (above)
 with the fender from the “donor” TR4.
 Major Bondo added to the original fender and it weighted twice the donor fender.
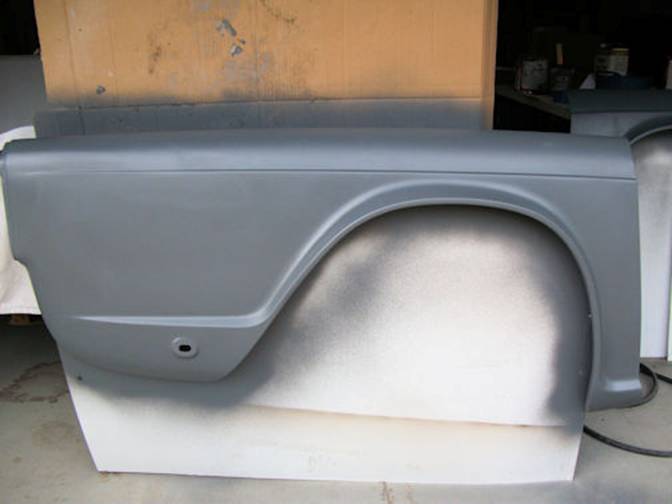
 Though the donor fender was in much better shape, it had its own problems with the bottom portion. Purchased a repair panel and pressed on.
 Repair panel welded in place ready for weld grinding.
 Welds ground and filler added to blend in the two pieces of metal, then primed to make sure I got it all.
 This fender also had some holes added for Bondo filling which were welded close. Had to add the three larger holes for the light and seven 1/8” holes for the chrome trim.
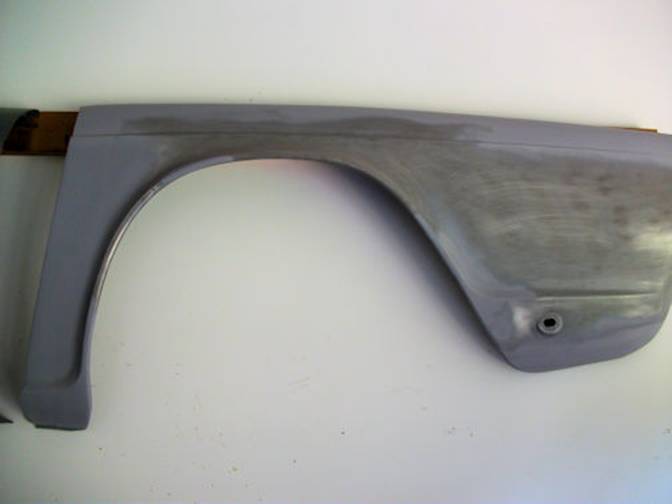
 More sanding, a very small amount of filler to smooth out a couple of dings and the fender got its coat of epoxy primer.
June 27, 2020
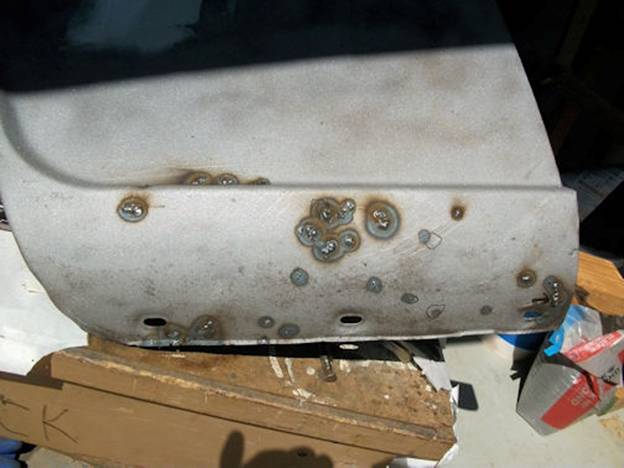
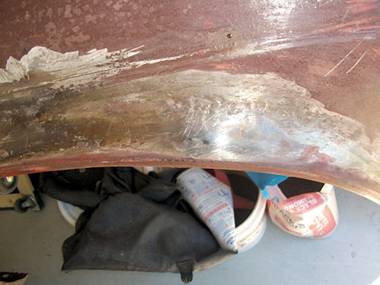
It’s been slow since my last update on 3rd May, what with the virus, weather and a lot to do on the TR4. Also its warmer and the pool beckons, a lot! After media blasting the rear fenders I dug out filler from the holes/screen added to keep the filler in place. Below is just such an example of the screen to anchor the bondo on top of the right rear fender.
 Holes and weak metal on top of left rear fender. Removed the bondo.
 Cut out and replaced this section of the lip that holds fender to body. I’ll grind it down later.
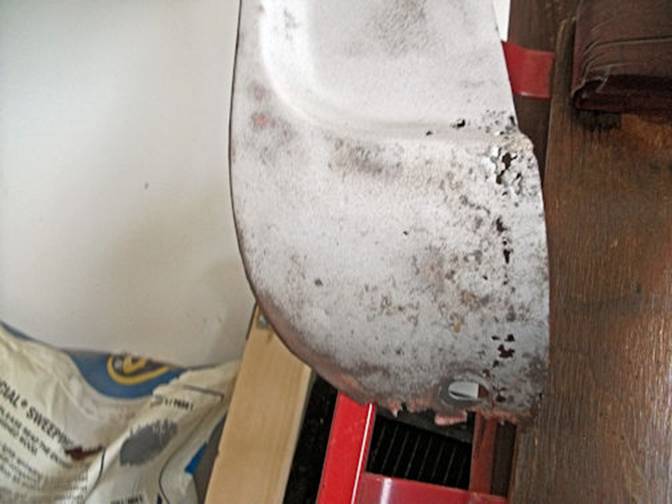 Lower right rear fender with rust and holes. Left was same condition. Purchased repair panels for both fenders to weld in place.
 Leading edge of left rear fender is a mess. Rust and added holes for bondo took several hours to clean up. Added metal strips on backside to weld to the original area and help keep the shape.
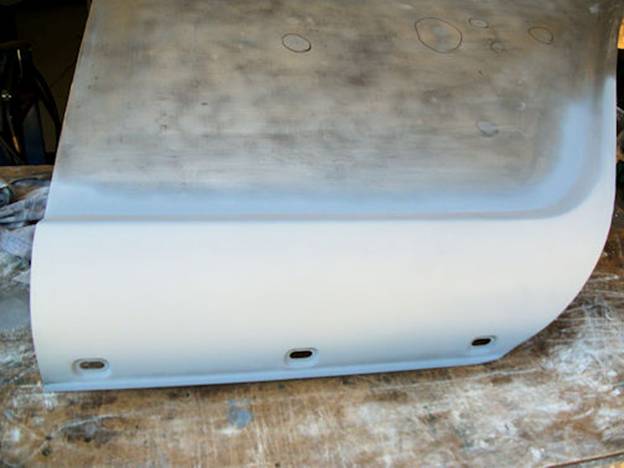
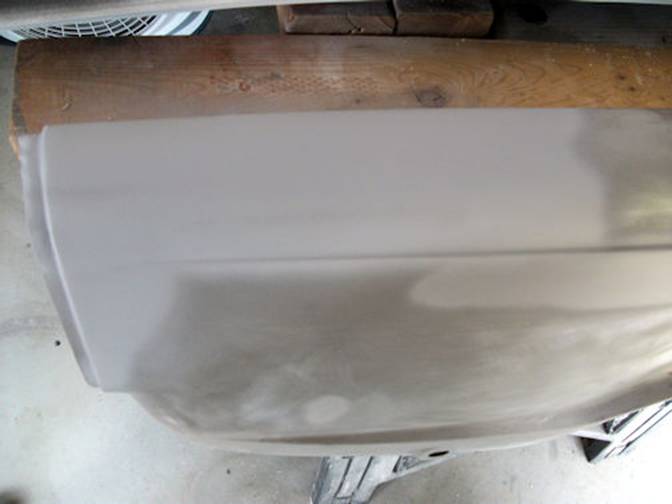
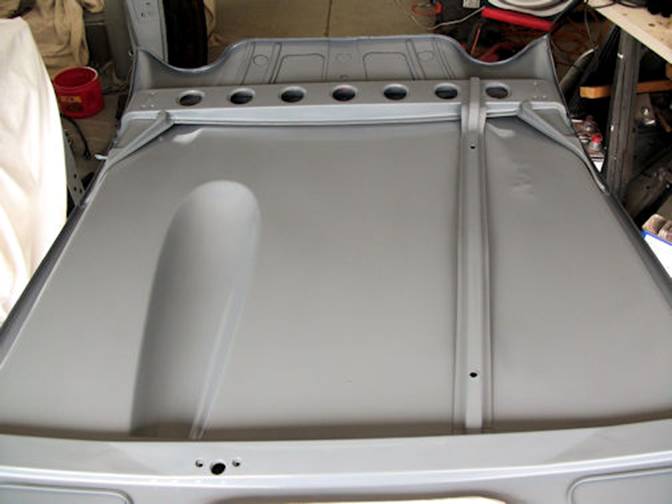
 Top side of the trunk/boot lid. Won’t know how it really looks until the color goes on.
 Spent days and days working on the donor trunk lid. Welded “bondo” holes, added two holes to accommodate the “A” in TR4A, media blasted both sides, sanded, sanded and sanded. The lid looked good in original blue paint but when the paint came off nothing but beat-up metal was left. I think the lid was used as a Frisbee at one time. My ears are still ringing from the hammer and dolly, but, in the end had to resort to some filler to smooth things out. Then more sanding! When I finally said “enough”, I sprayed the epoxy primer which of course took two days to dry due to the humidity.
Now back to the rear fenders!
July 2020
 Just received a new front lower valance from TRF for the TR4A. Initial trial fit looks good.
Rear Fenders, Continued
 Top of Left rear fender was filled with bondo and nothing else. Welded holes
closed and of course sanded it all down, added a skim coat of filler, etc.
 Here’s the left rear fender with bottom panel fitted, leading edge and top rear of fender in primer.
 Top rear of right rear fender was same as the left fender. Gutted the
bondo and applied a skim coat of filler, sanded and primed the area.
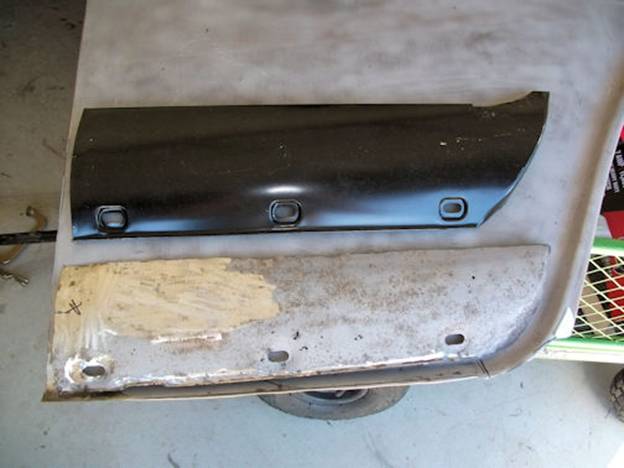
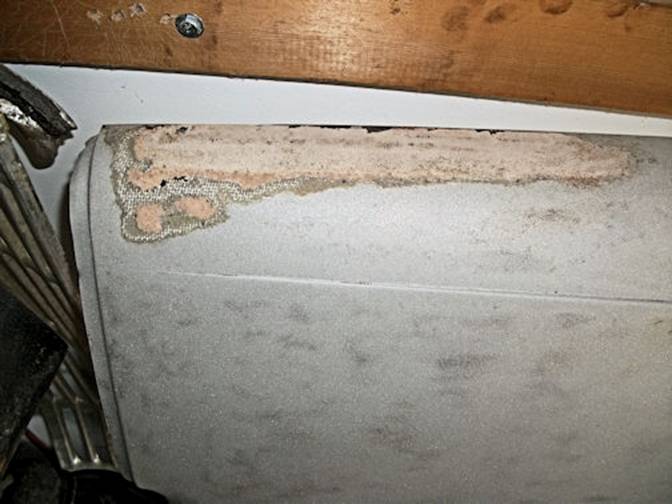
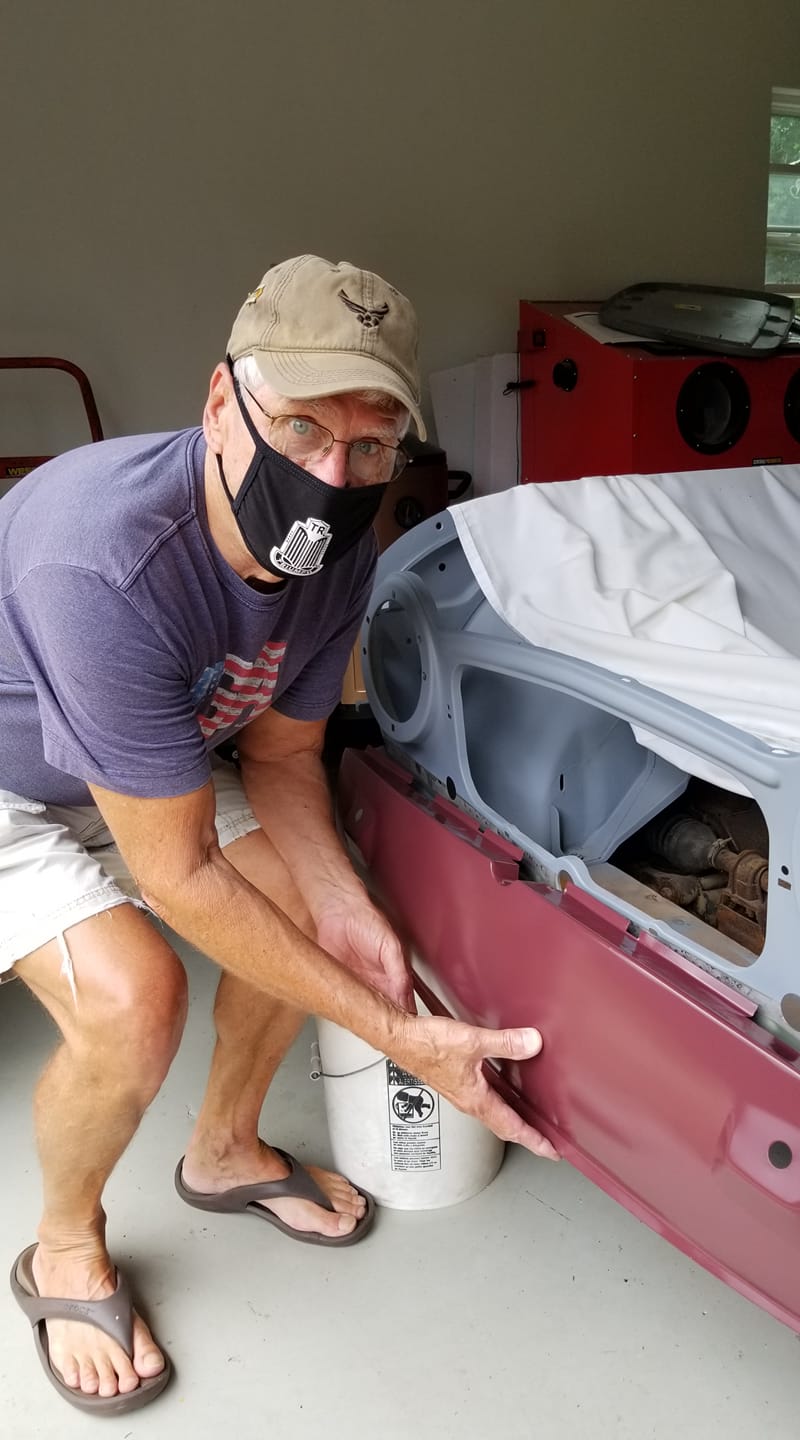
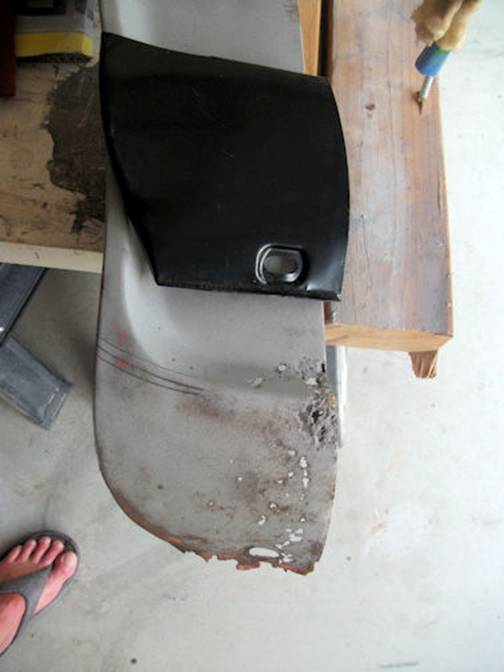 Both rear fenders had to have the front bottom section replaced. The repair
panel (in black) is above the rusted section. The trick is to hang the fender
on the body, place the new panel over the old section and mark where the new
panel is to be fitted. As you can see I have 3 lines marked for cutting the old
panel off. I actually cut between the top two while not thinking too hard about
what I’d do if I cut too much off.
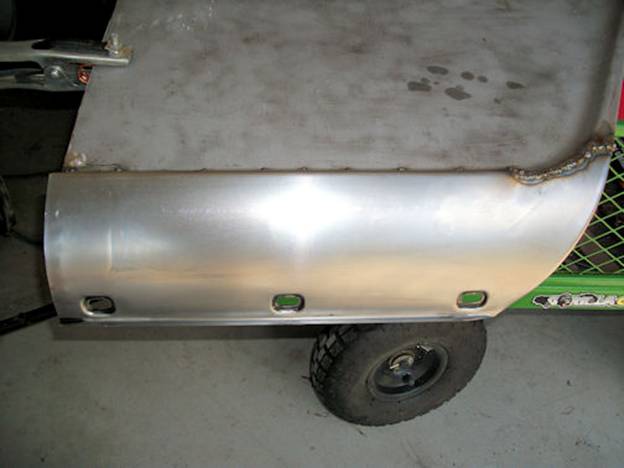
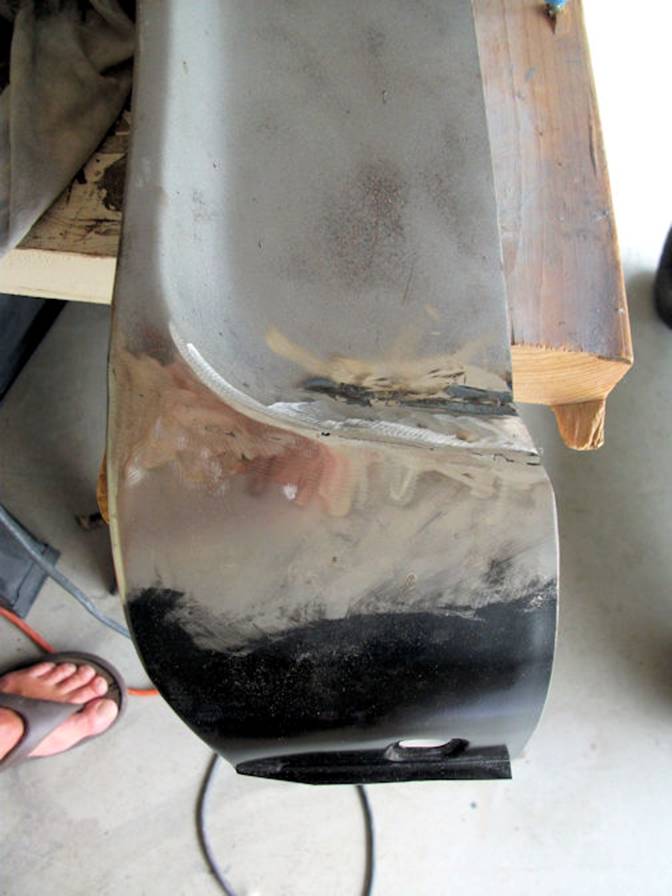 This photo shows the new panel welded to the fender after I added a new section
of metal above the repair panel and ground down the welds. Also
wiped off the remaining e-coat(not a good idea to leave it on).
 After a skim coat of filler was applied, I sanded it all down and primed the area.
 Left rear fender sanded and primed with epoxy primer.
 Right rear fender sanded and primed with epoxy primer. Under sides of both
fenders were coated with POR15 after sanding the bare metal.
Next up: Doors, hood and new front lower valance. I’m shooting for end of August (2020) to have it all under primer and then trial fitment of everything.
September 01, 2020
This episode deals with the lower front valance.
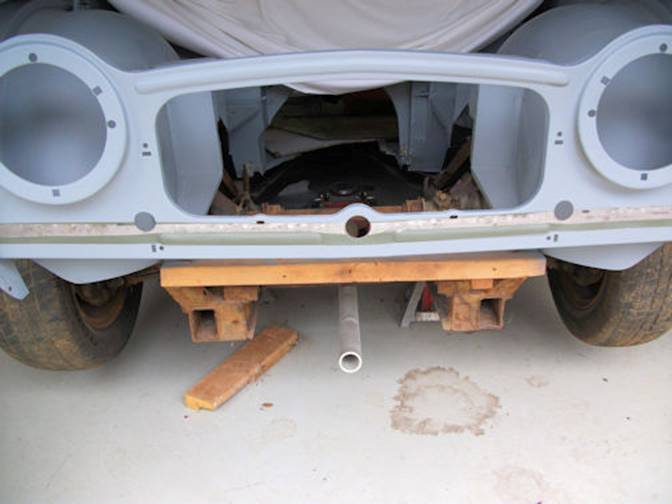 When I primed the shell, I masked off the area I knew I would need to keep bare to attach the new valance.
 Then I sprayed weld-thru primer on the bare strip.
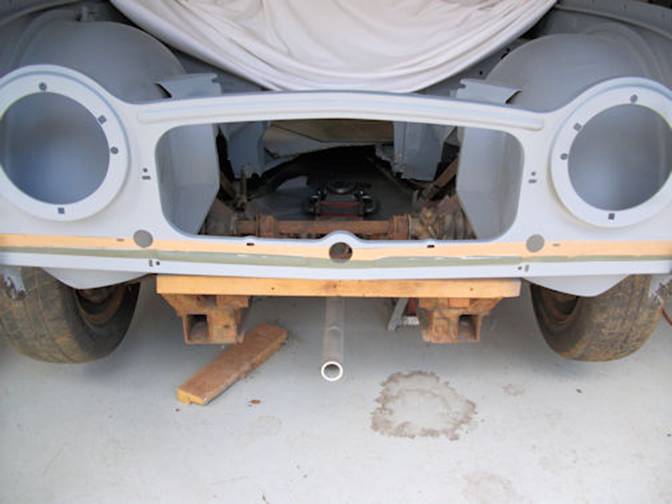
 Aligned and clamped the valance in place. I stripped the valance of the “fucia” e-coat and primed with bare metal primer, except for the welding strip across the top.
 The tongs on my spot welder are too short to reach the valance so I had to plug weld the holes I punched with the pneumatic hole punch. After it all cooled down I wiped away any visible weld-thru primed as regular paint doesn’t like it.
 After welding everything up, I carefully ground down the welds and sprayed the primer. And that’s finished for now.
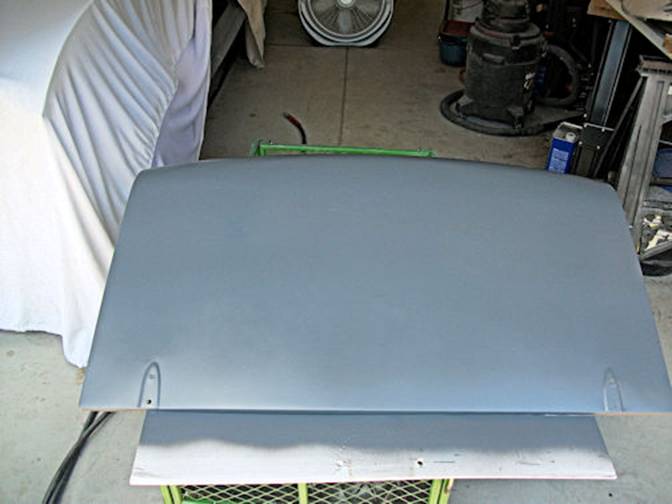
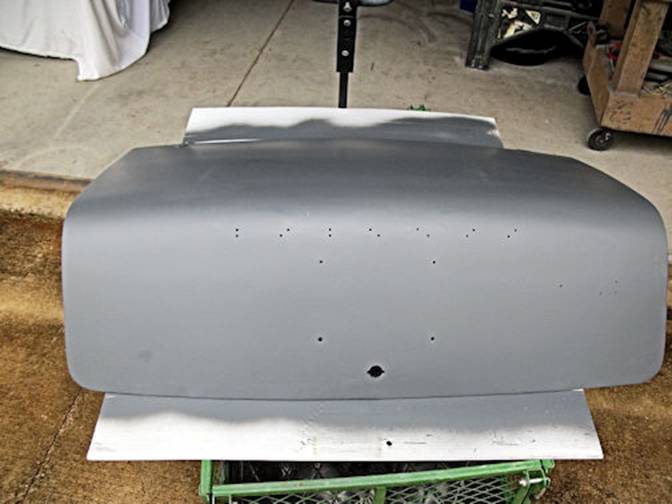
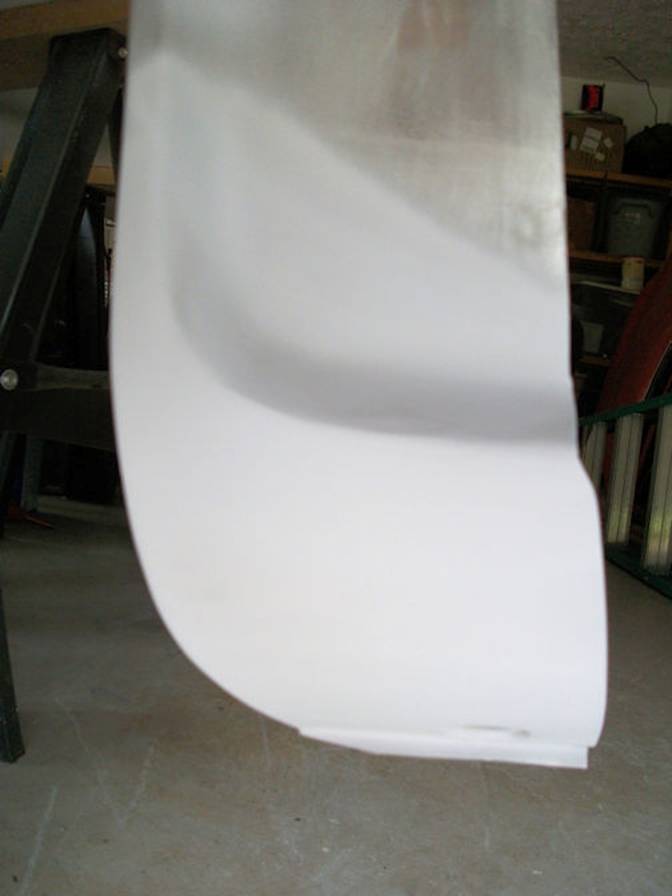
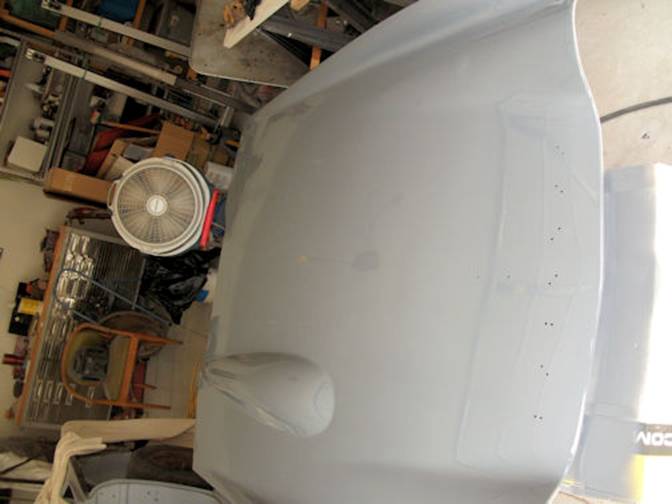
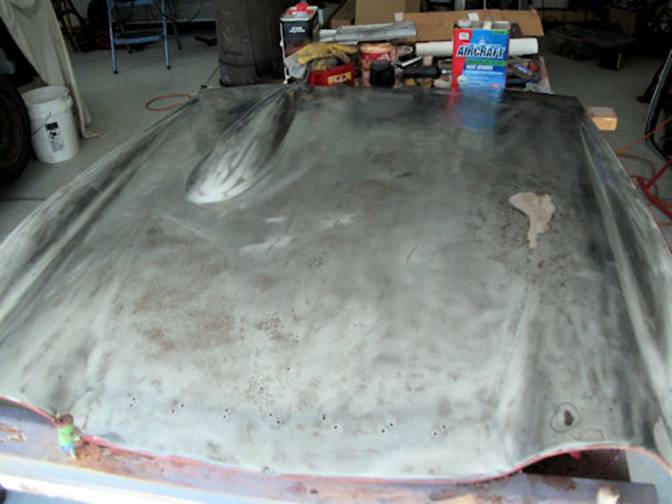 The weather has been too nasty to sand blast, which I didn’t really want to do on the hood anyway (I probably would have warped it). Instead I used Aircraft paint stripper (nasty stuff) on the 5 coats of paint I discovered the hood had then 180 grit sandpaper on the DA. Yep, a couple places to fix before the primer gets applied. Since this photo was taken, I had a chance to sand blast under the hood. It’s about 75% finished. After about an hour, the high humidity stopped me with wet air that nearly solidified the silica crystals in the moisture trap in the air line.
October 14, 2020
I’m about a month late finishing up the sand blasting and primer of the body panels.
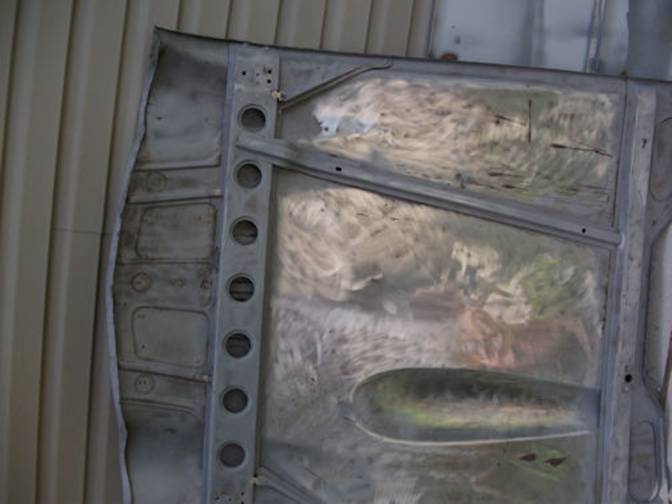 Sand blasted only the frame work of the hood. Stripped flat underhood areas with the DA and 180 grit paper.
 Didn’t get away without welding up a rust spot.
 Flipped hood over on its top and primed the bottom with epoxy after hand sanding with 180 grit paper.
 I actually didn’t like the result of all the sanding with the filler so I coated the top with Slick Sand to level everything out, after 2 more days of drying then sanded and primed again.
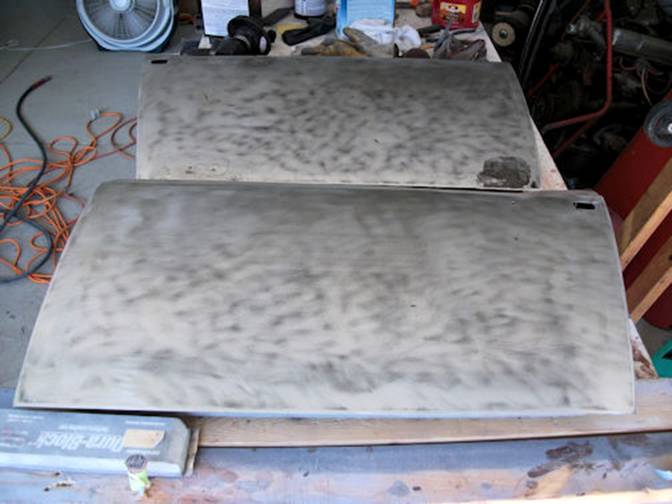 Sand blasted the doors and sanded with 180 grit paper.
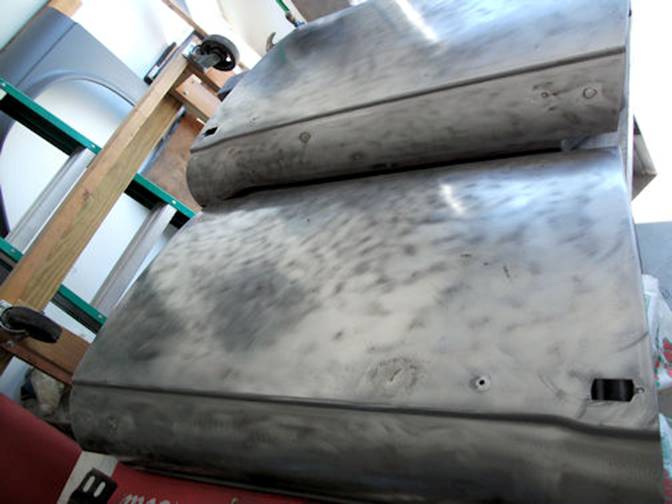 Couldn’t get away without some filler. At least the spots were minor.
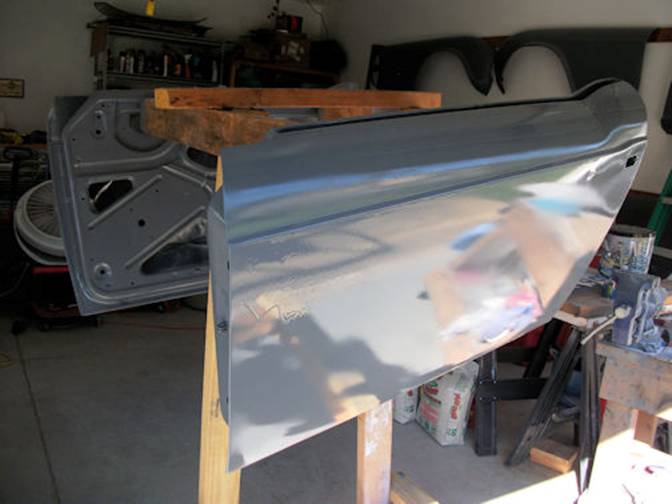 Don’t look at the run in the epoxy primer on the front edge of the door LOL. Photo taken minutes after I sprayed it.
 Inside got epoxy primer too.
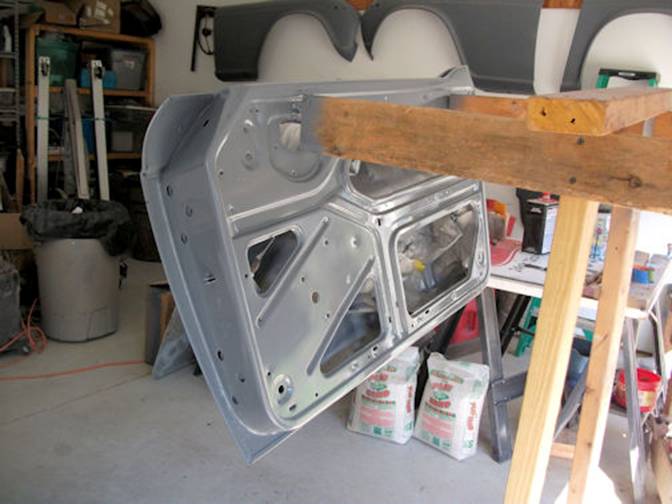
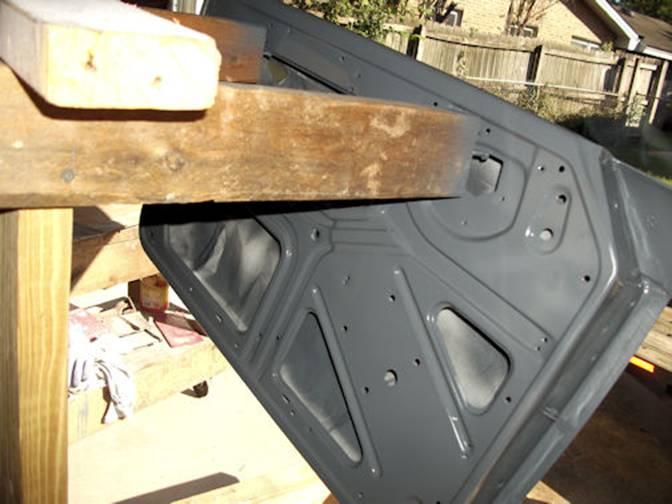 Masking paper on inside of the doors. Used POR15 to completely cover the inside.
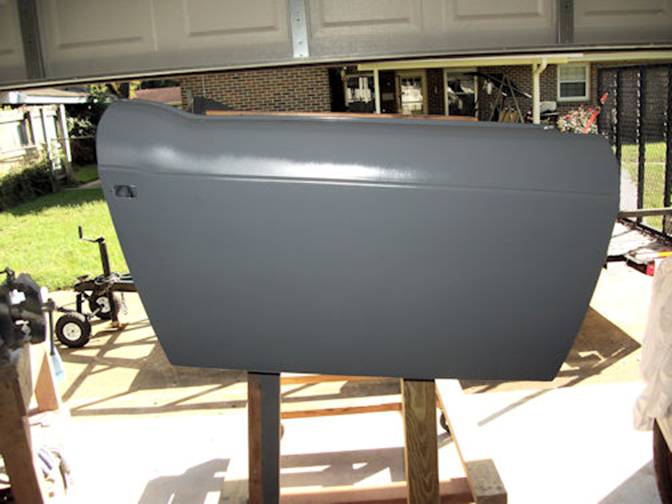 No runs on this door after 2nd coat of primer.
What’s Next?: Clean up the garage and get ready to tackle the frame.
No more work on body panels until frame and engine are completed.
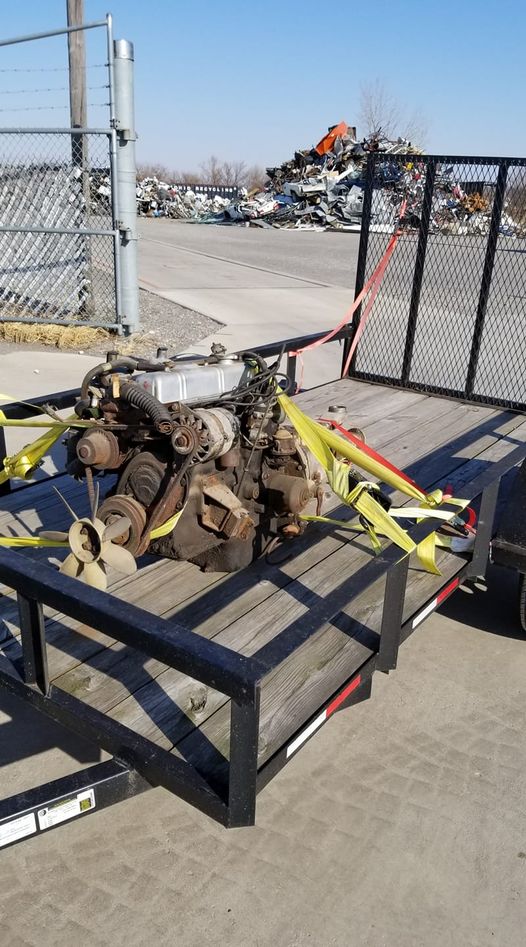
I found my replacement engine for the TR4A and after 1500 + miles it’s now in the garage. Complete “71 TR6 engine/transmission.
July-September 2021
I disassembled the engine, took it to the machine shop, cleaned everything up, ordered parts (took about 2 months) and began reassembly. Luckily the crank and cylinder bores stayed stock; just polishing and honing. The block was decked 10 thou to even it up.

Shown is the block with crank, rods/pistons, ARP head studs and Payden head gasket awaiting the cylinder head to be installed.

This is a regrind camshaft (the original) which I sent to TSI Automotive in Pandora, OH. Looks like a brand new unit,
Mostly completed engine on frame. Still need the accessories, carbs and etc.
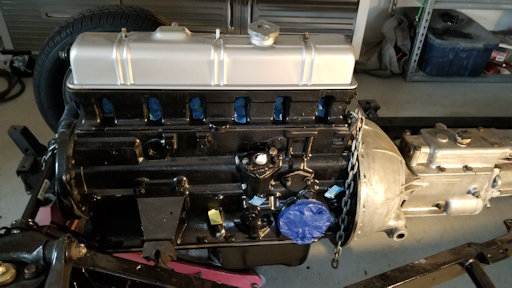
Under the valve cover, the entire valve train is new; rocker arm shaft, rocker arms, valve springs, push rods, hardened lifters and cam.
After getting the engine and tranny home, I started looking for a machine shop to do the usual work they do to refurbish an engine block, crankshaft, rods and etc. I decided to use Southern Performance Automotive Machine, 714 S. Foster St., Dothan, AL. [334-447-4086]