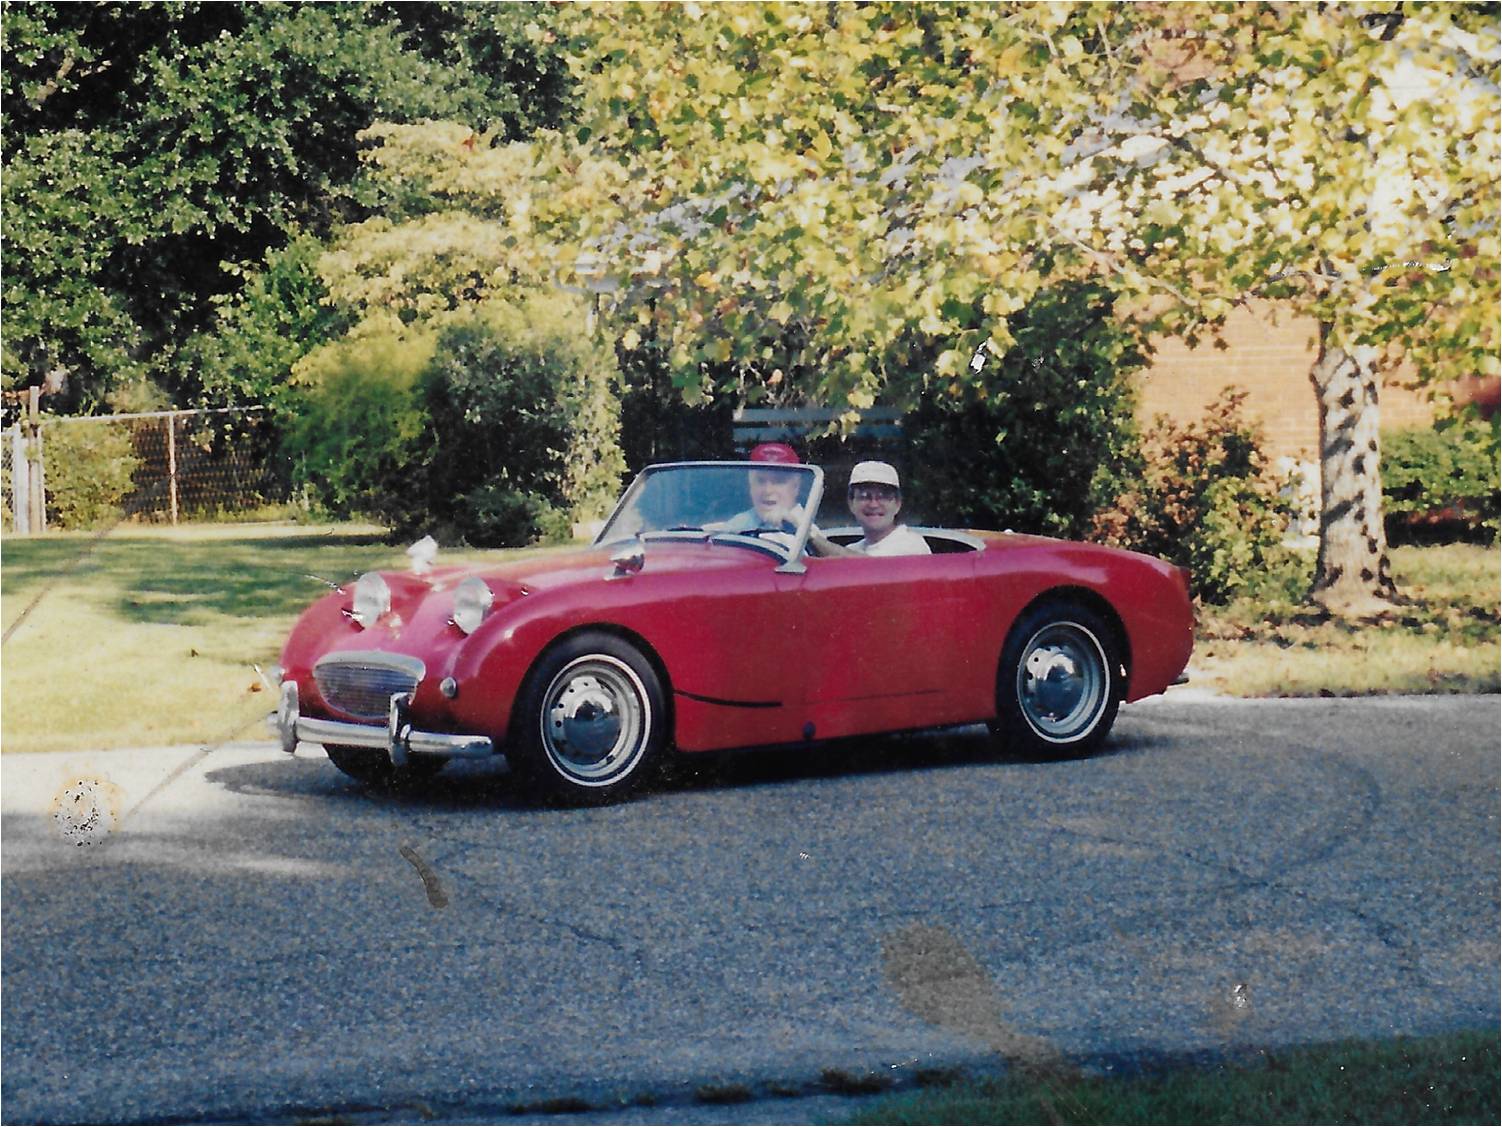
The Sprite in 1998, just after restoration.
Dawson Hastings and his wife Elaine live in Selma. He knew George Needham, Scott Patterson, and Jim Rutledge from the old days. His brother Dennis bought the 1959 Austin-Healey Mk I Sprite in the early 1970’s and brought the car to their family farm. It was a fun car to play with there for the whole family. Dawson’s father, Amos Hastings, must have liked that the Sprite had his initials on the hubcaps.
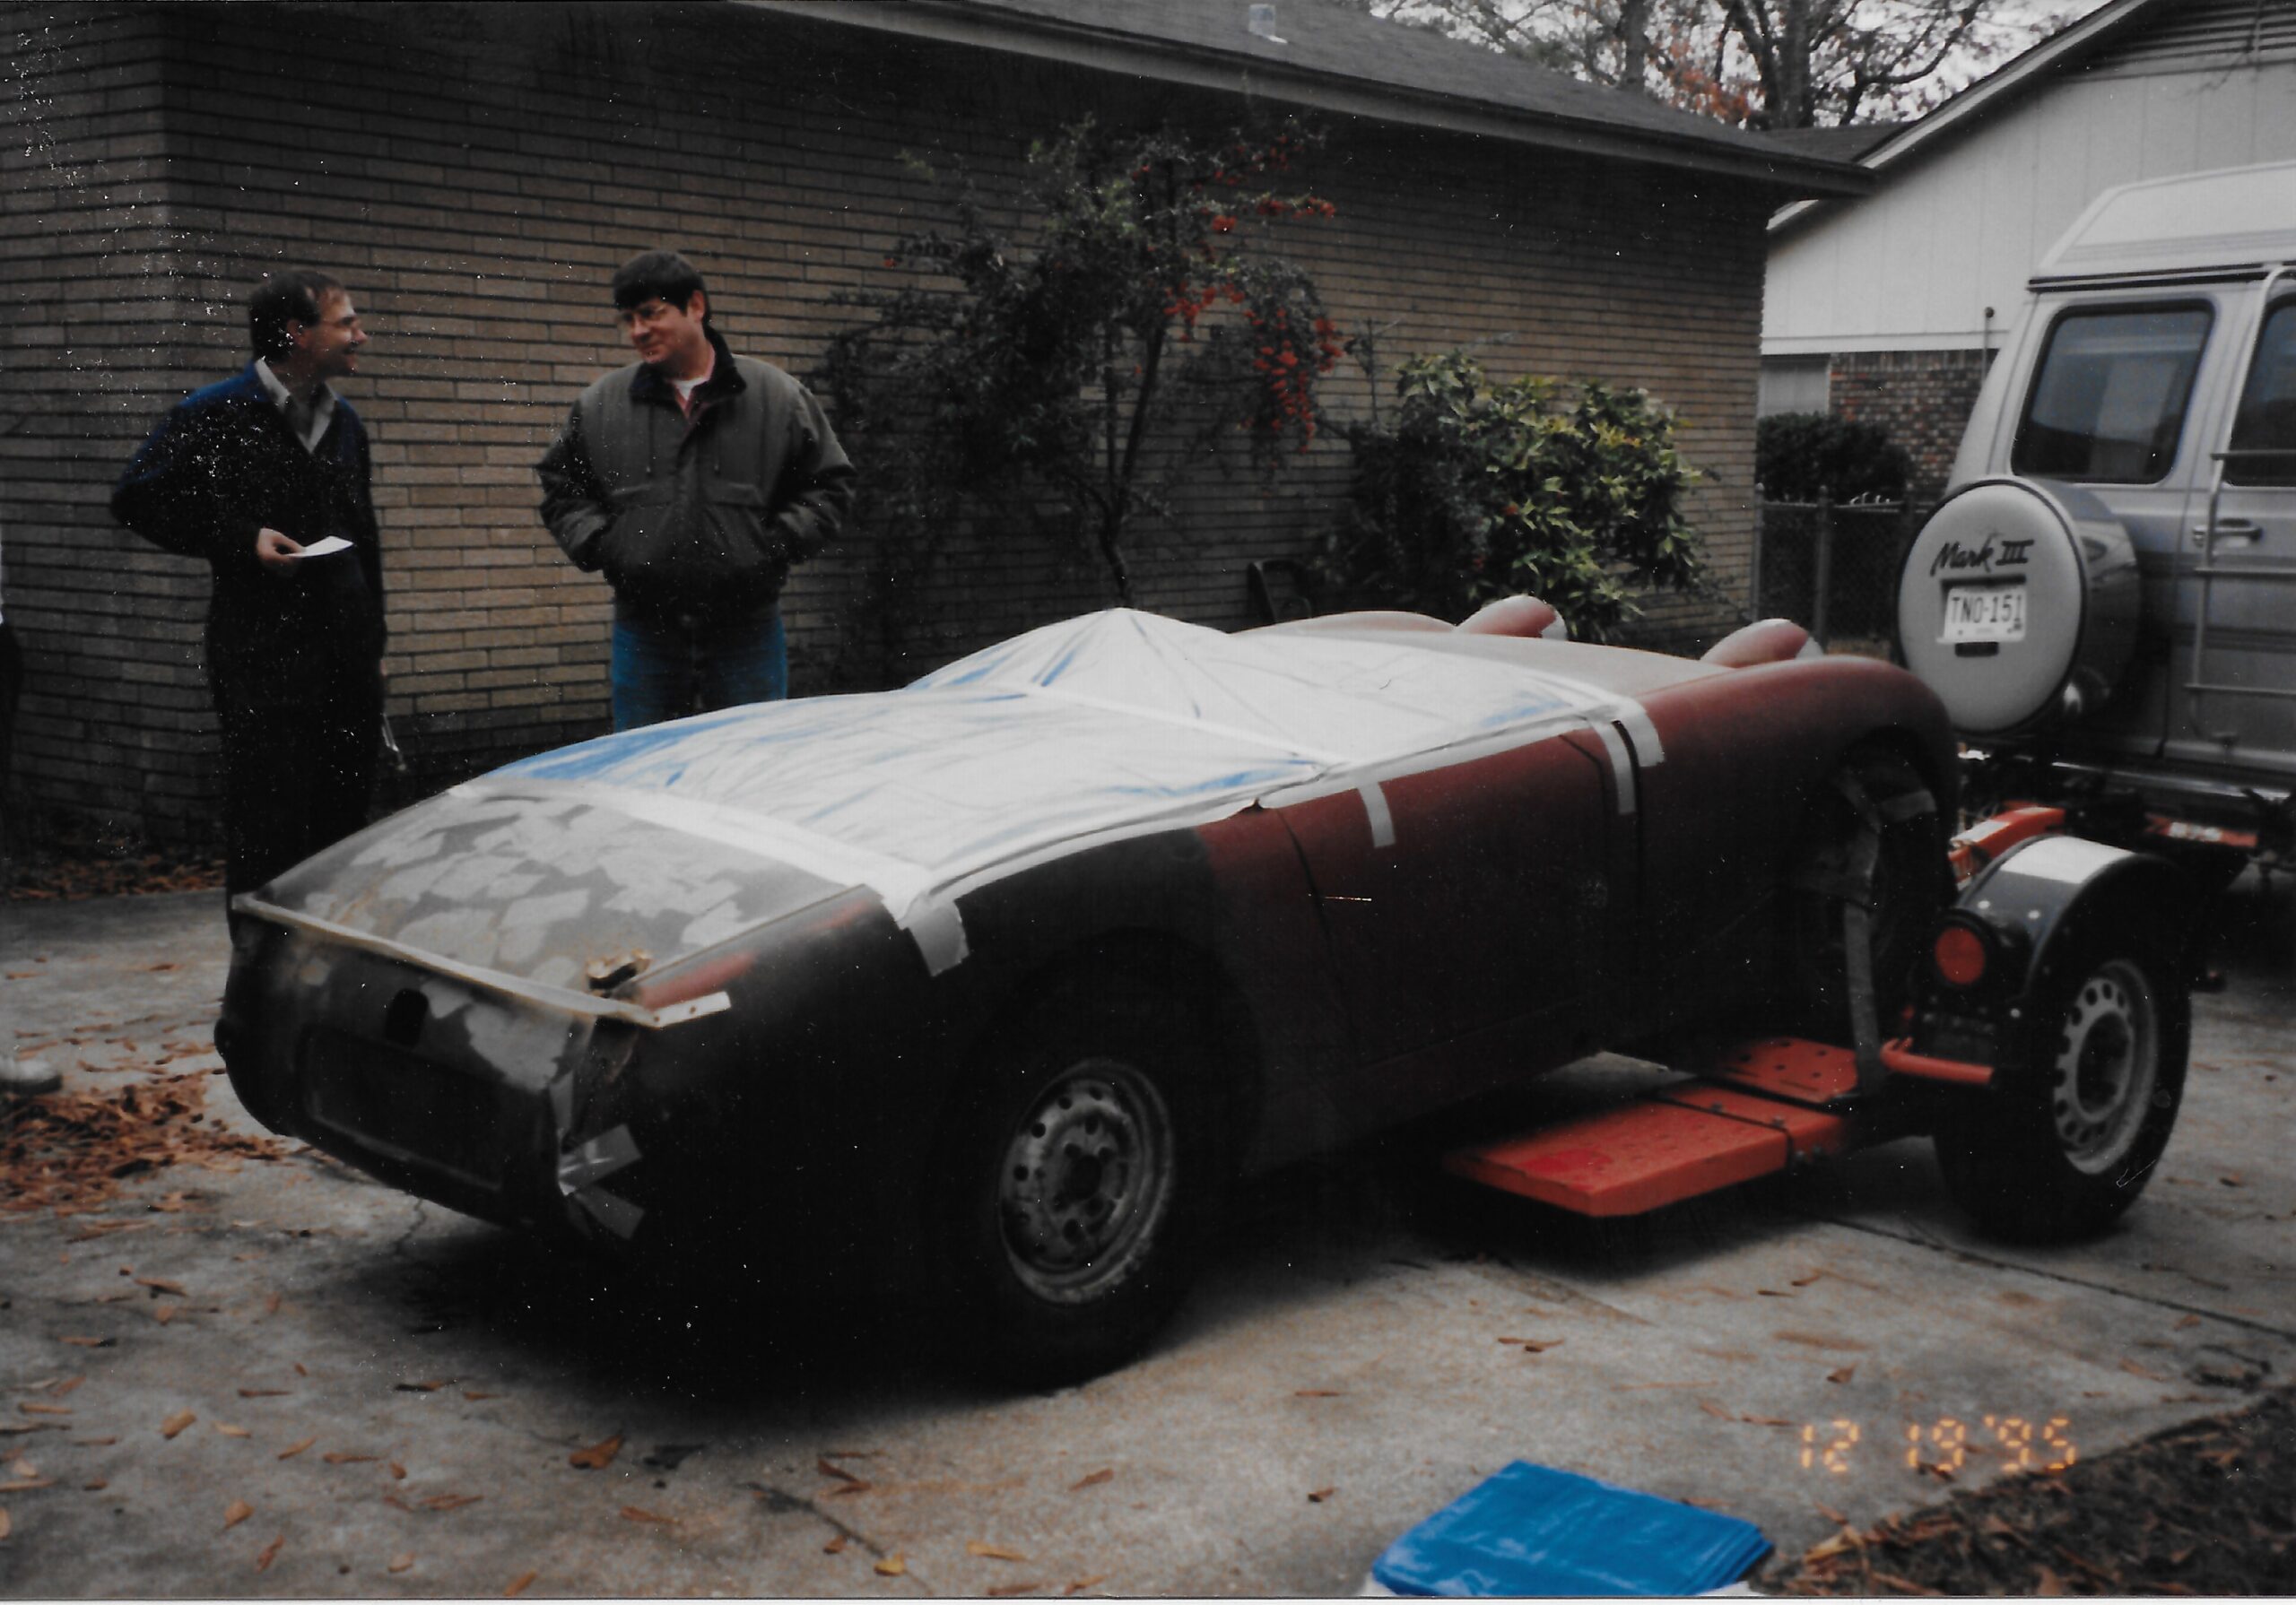 The Bugeye in 1995 when we were sending her off to be restored. I forgot what she looked like back then.
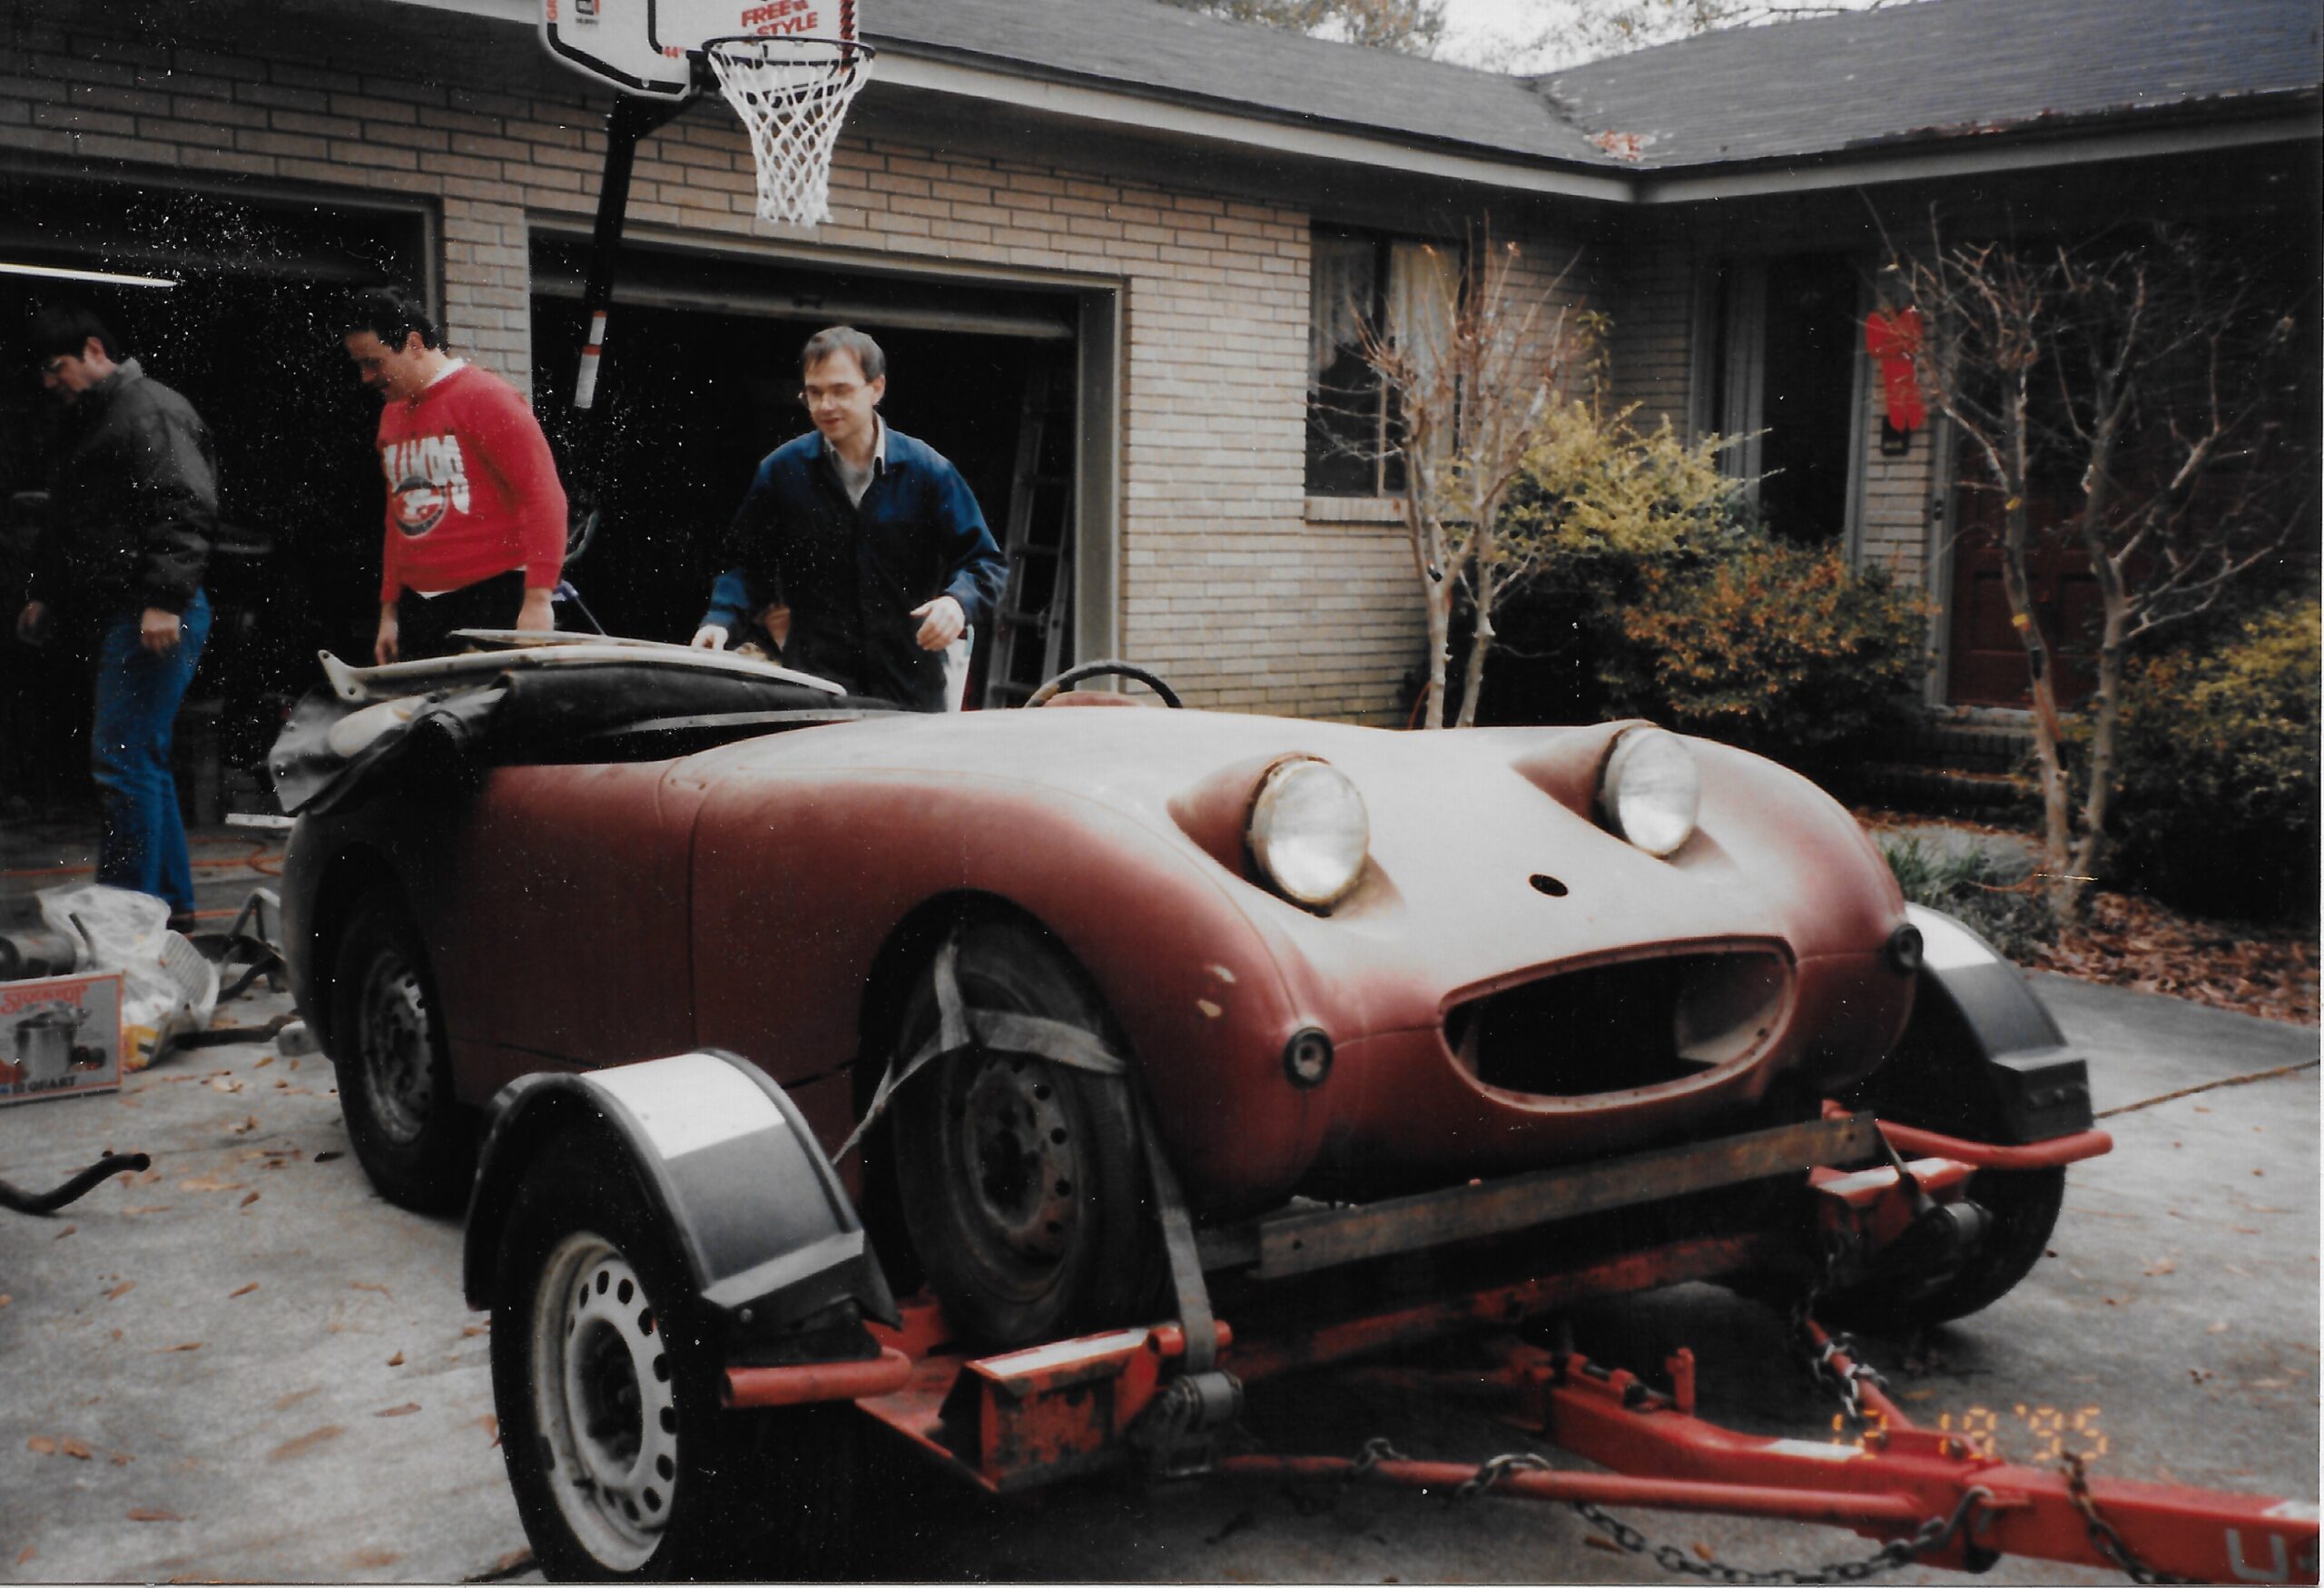 The guy in the coveralls is me. We were looking for pictures of our daughter for a wedding shower when we found these. It would be nice to find some of the Bugeye pictures from back on the farm, but I don’t think I have any.
.
Dawson will be the father of the bride for his daughter’s wedding this fall and has made that date his goal for having the bugeye running for the big day. The bodywork and paint are in excellent condition. He joined BMC in January, 2020 in hopes of getting a little help with the mechanical issues for his years dormant Sprite. The following is a timeline of the mechanical restoration: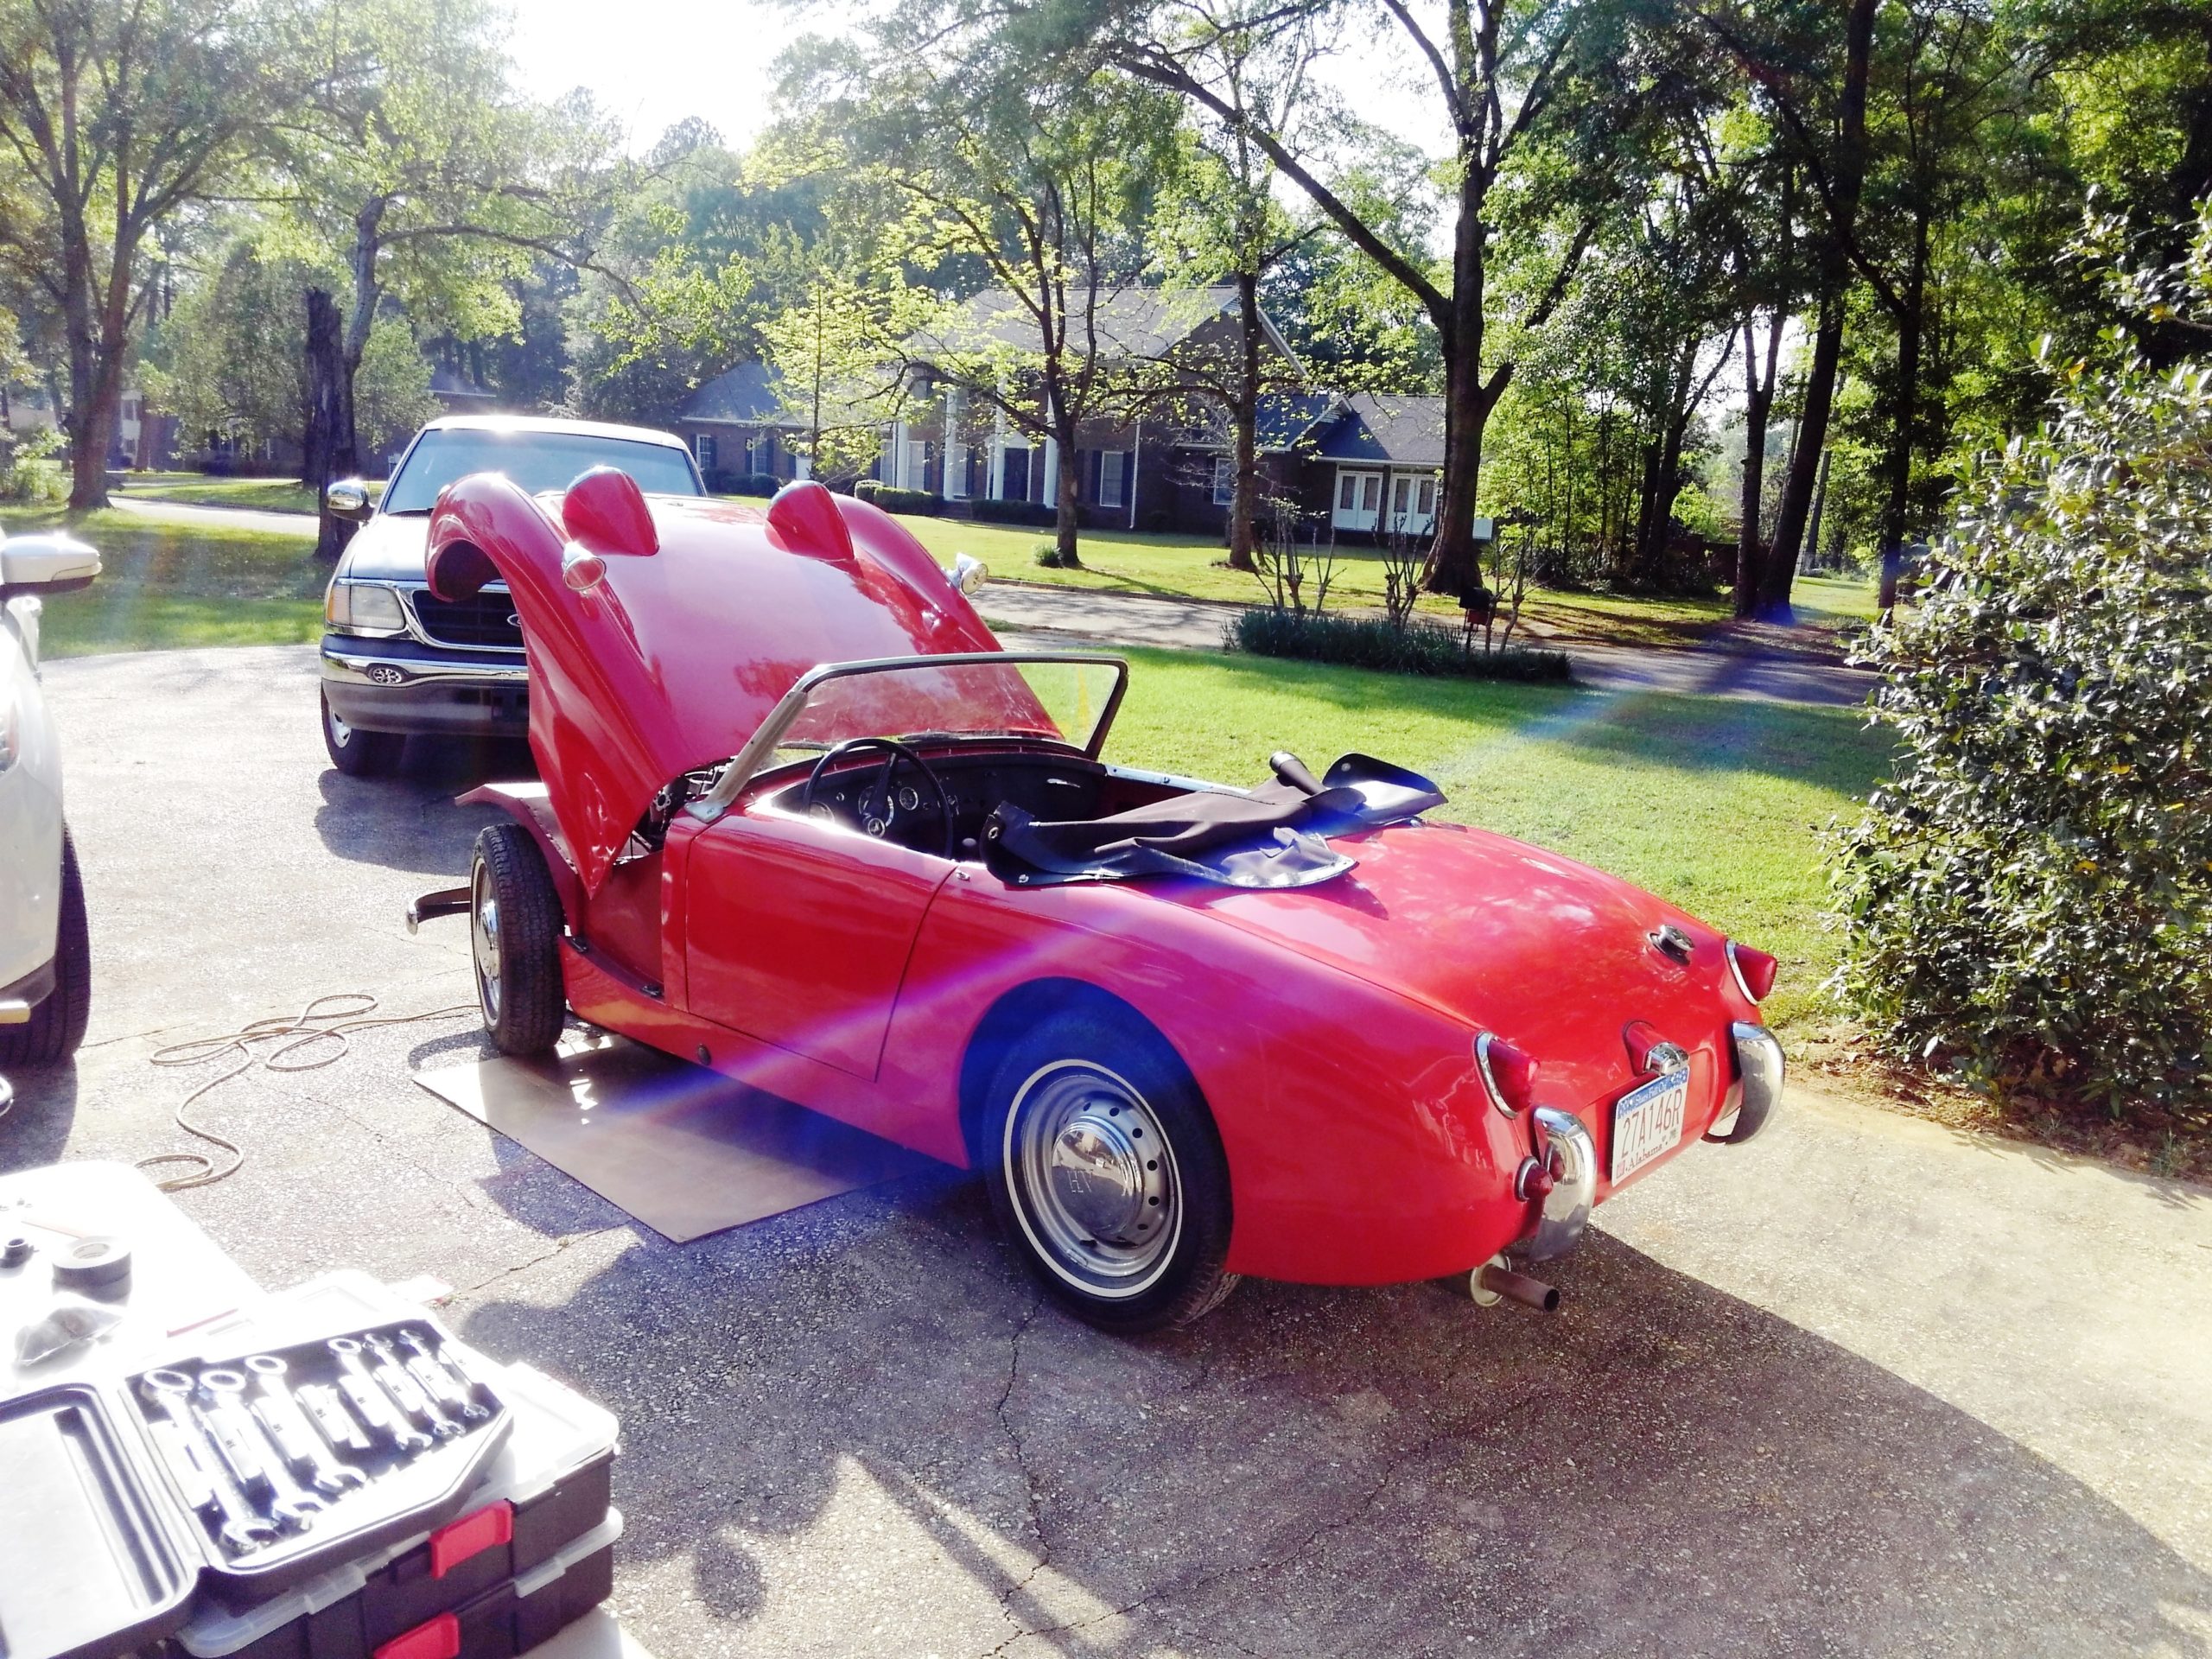
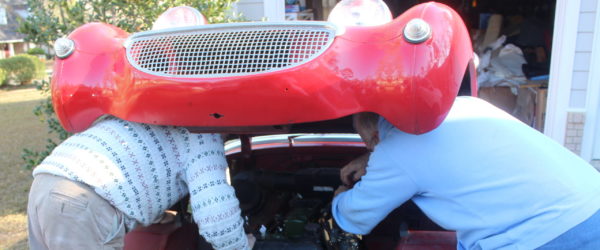
 Saturday January 25, 2020 – Tom and Russell drove over to assess the situation. Dawson had already replaced the battery with a new one and the upgraded 1275 turns over, but had no fuel or spark. Tom made Dawson a parts shopping list with the promise of a return visit after all of his bonnet-to-pate collisions had healed.
 April 1, 2020
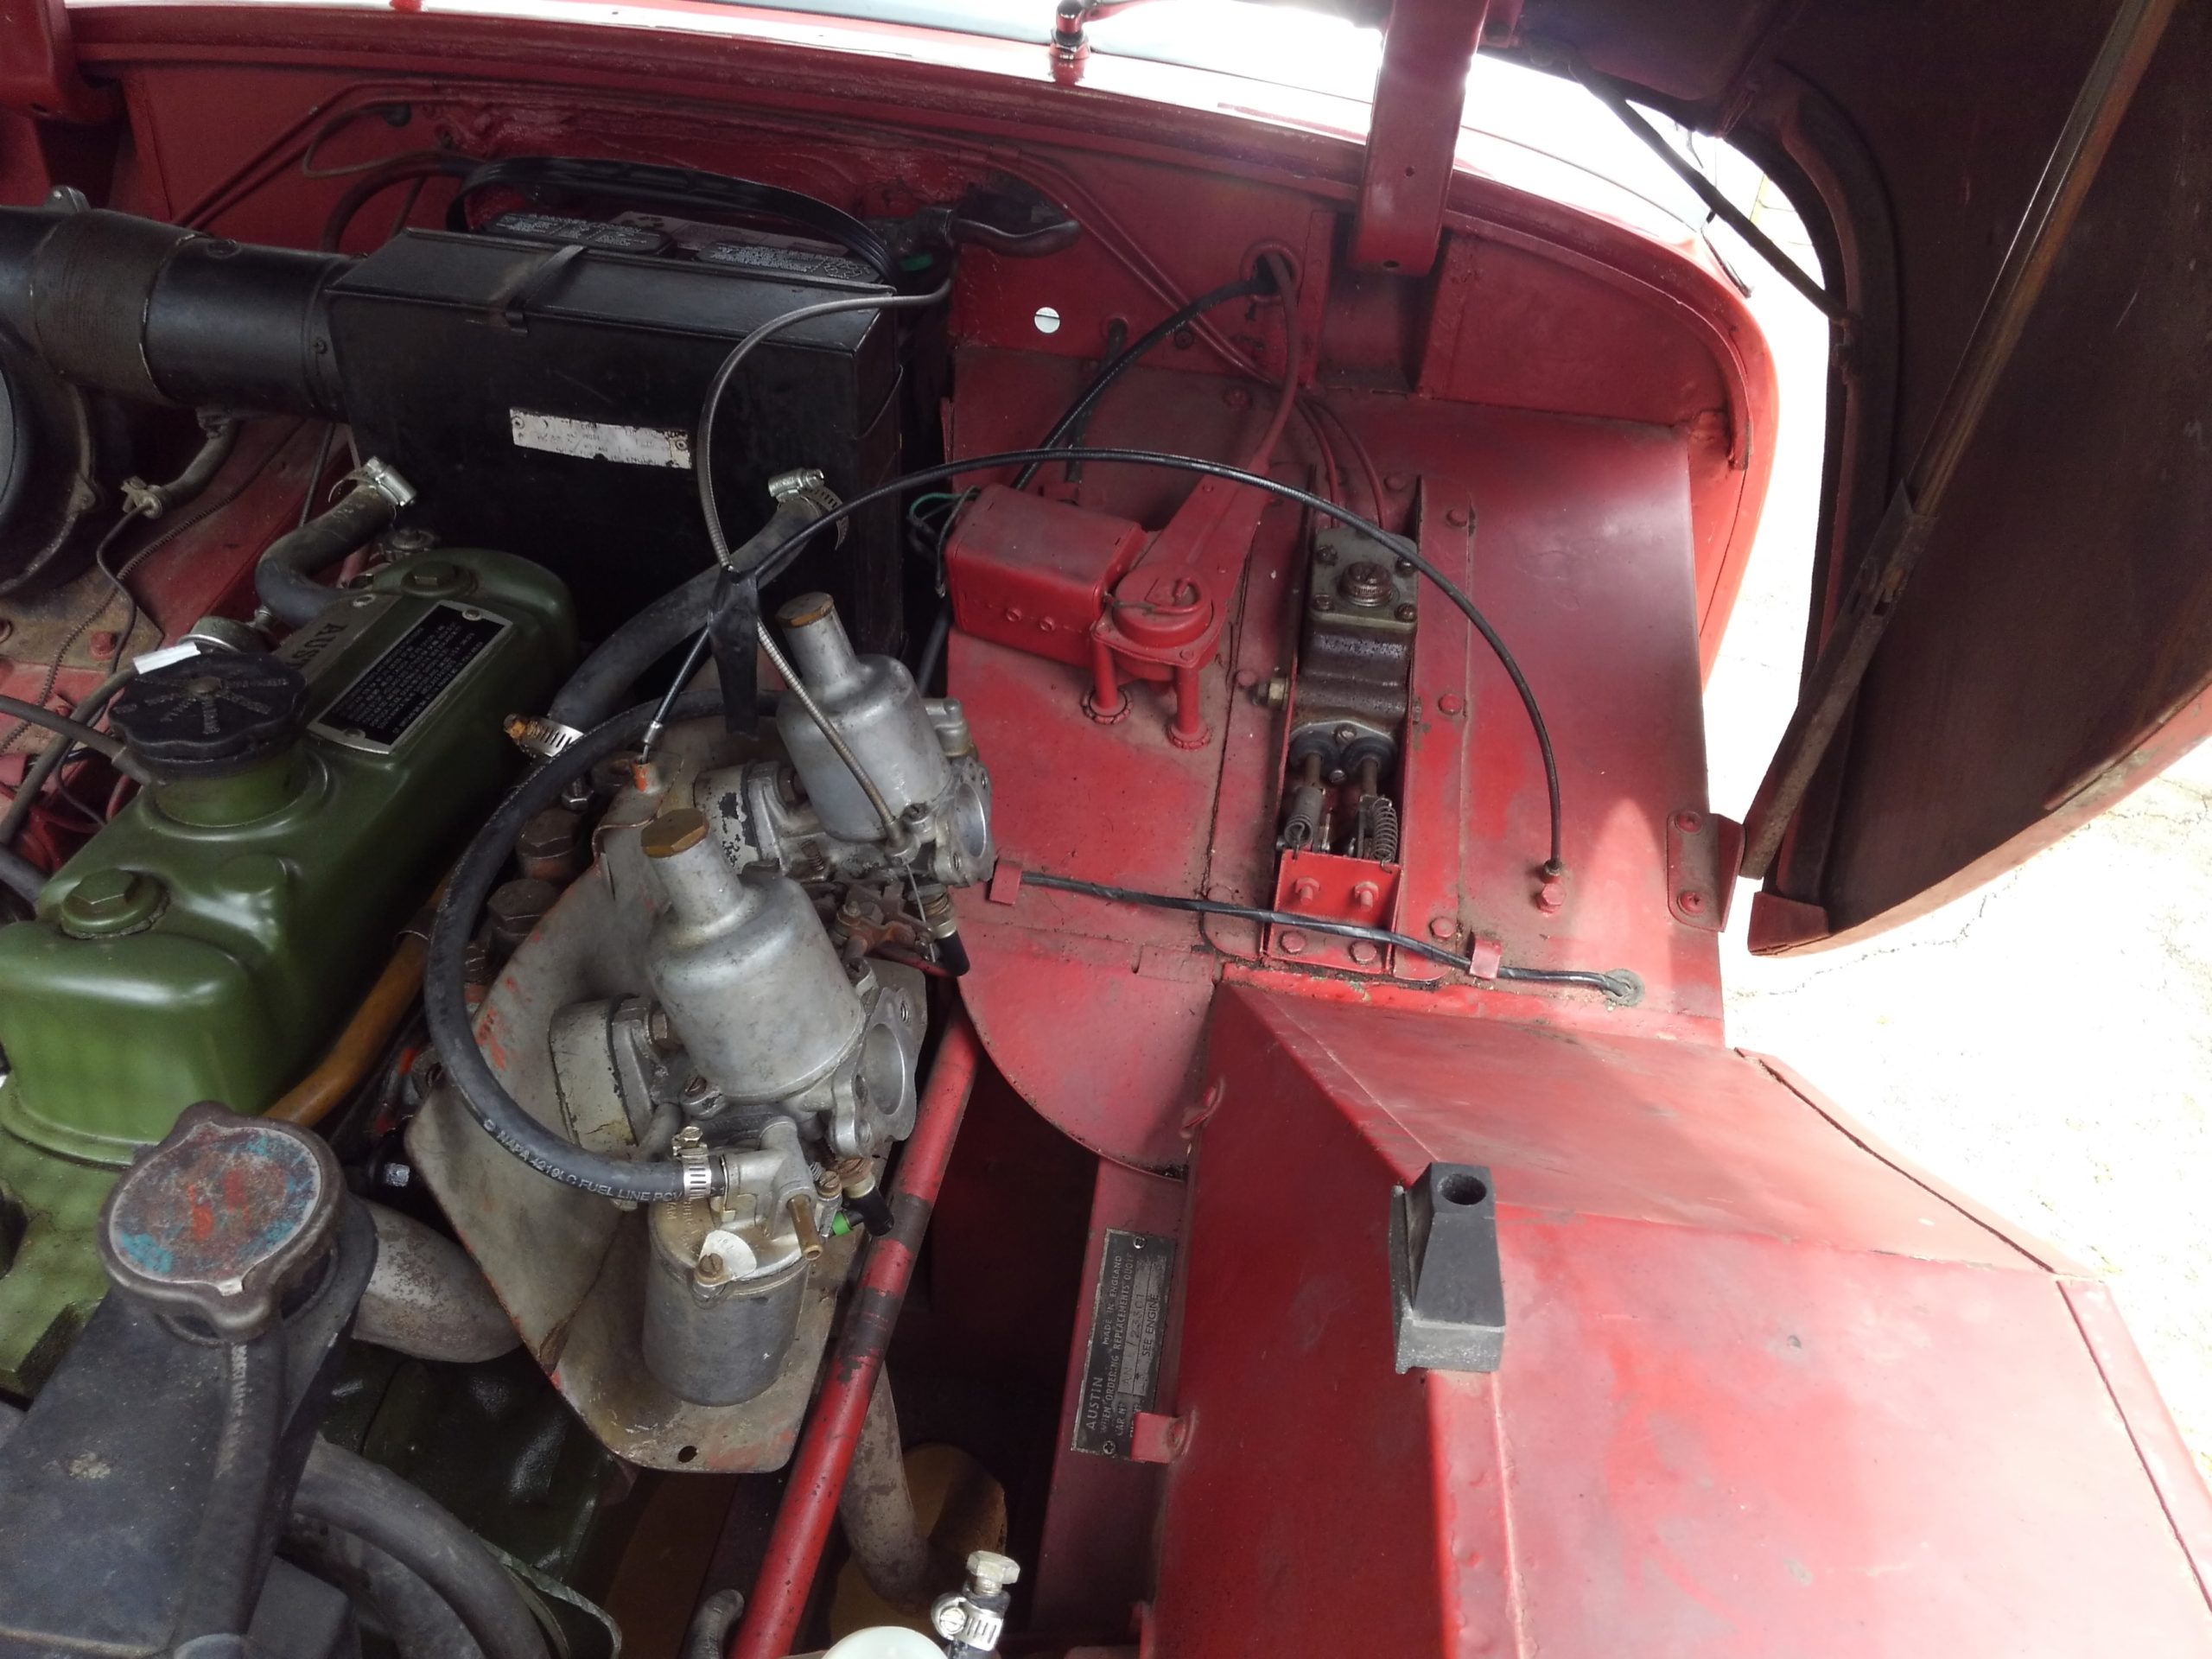
Those SU HS2 devils, you may recall varnish had stuck the jets in the up position, rendering the choke inoperative. Try as I might with acetone, carb cleaner, and even (gasp!) dishwashing powder, the clearances between the jet and its surrounding bearing were simply too close to permit even the thinnest of solvents to penetrate. It took a little, and I mean just a little, warming with a propane torch to soften the varnish enough to pull the jet out and complete the disassembly of the jet unit – all looks good, so far. Surprising no one, well, at least not me, both the carb needle and the float bowl pivot are also fairly stuck in their moorings. Ah well, off for some P’Blaster and crossed fingers. I am recalling dosing the float valve and needle in situ, because the stubborn pivot prevented me from removing the float. Interestingly, and especially after our hassles with leaks from Bill’s H6 carbs, the more modern HS carbs use no gaskets or seals at all in the jet unit. I don’t get it either. The previous rebuilder used a seal at the bottom of the jet nut, along with some teflon tape that was stubborn in removal, but every exploded diagram I have reviewed of these carbs shows none. I am gonna follow the factory’s lead here, and go gasket optional.
Tom
April 3, 2020
It took a light pass with a propane torch to soften the varnish enough to allow me to pull the jet out of the jet bearing. The stuck needle needed a vice to hold it tight while I pulled up on the carb piston to separate them. No damage to either bearing nor piston, and the new parts fit with no problem, but just to be sure I dosed the &&^% out of both with Berryman’s carb cleaner. Old parts don’t look awful, but I am glad to have new needles and jets. Float pivot pins took P’Blaster and pressure, but came around eventually with no damage. Again, glad we have new needle valves. I’ll keep you apprised. He said he’d work on it over Easter. I hope to return Dawson’s carbies to him tomorrow. They work, well, like they should! Maybe the little beast will fire for him.
Tom
Russell
Tom
.
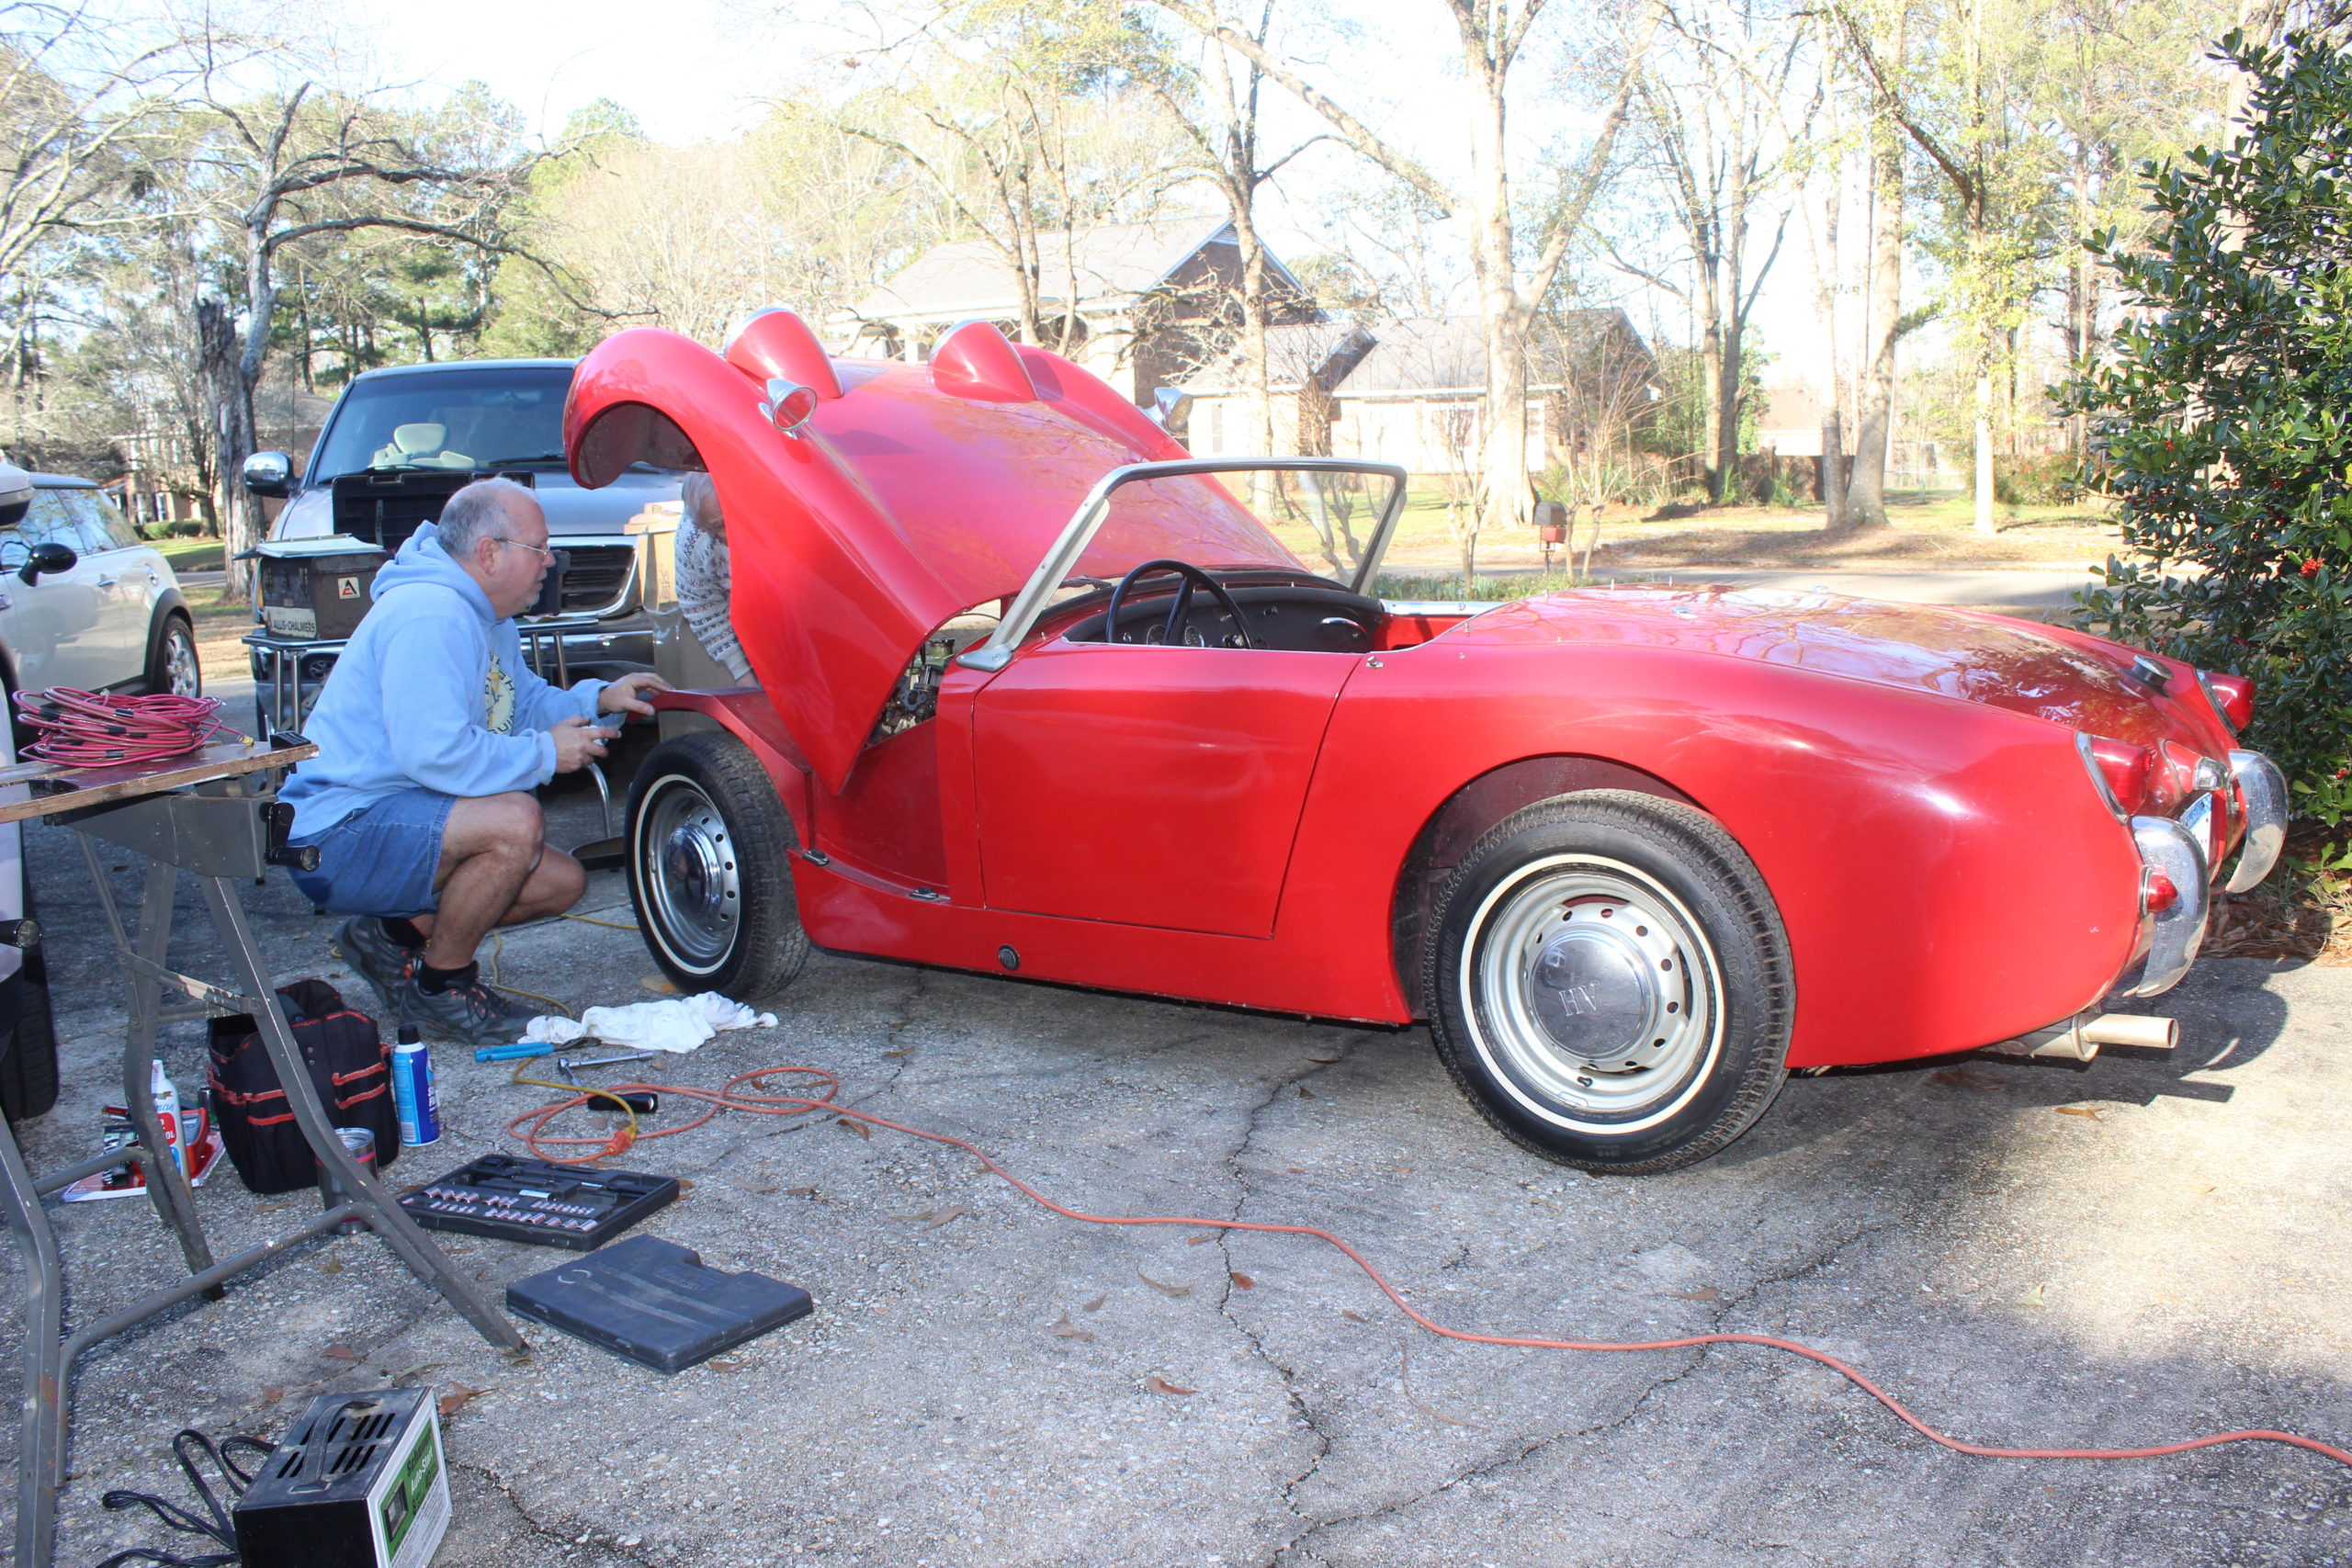
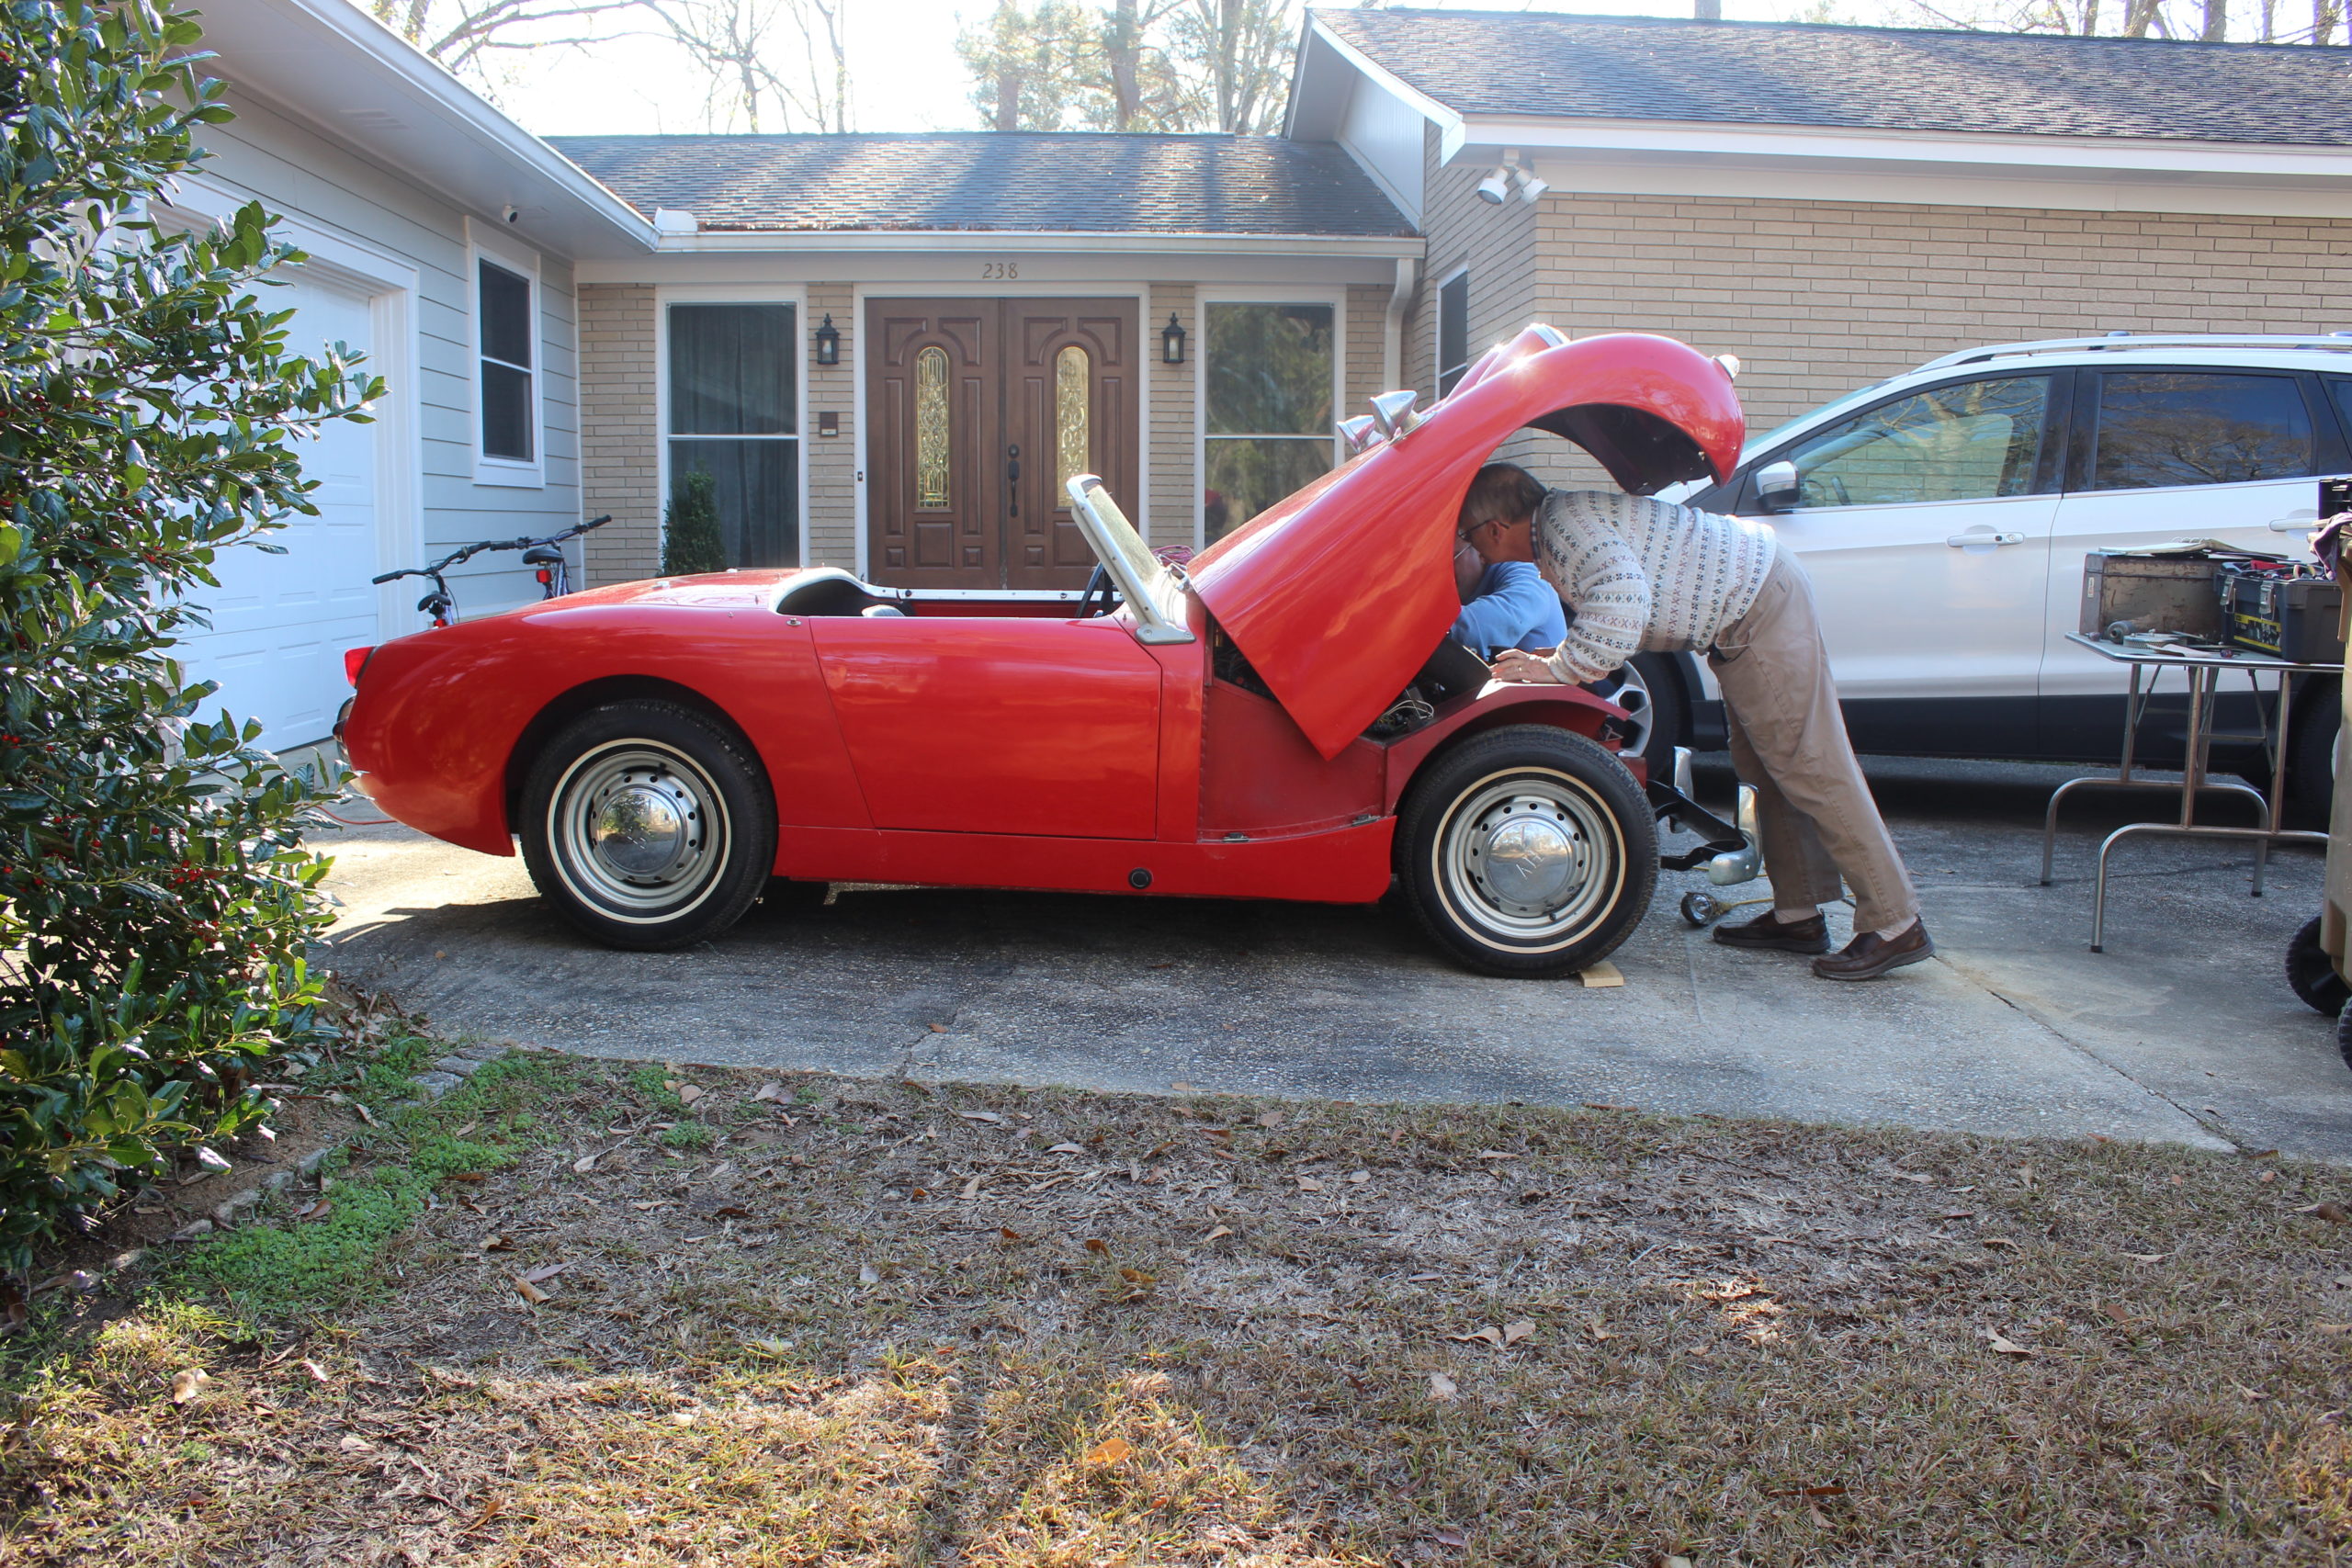
 April 11, 2020
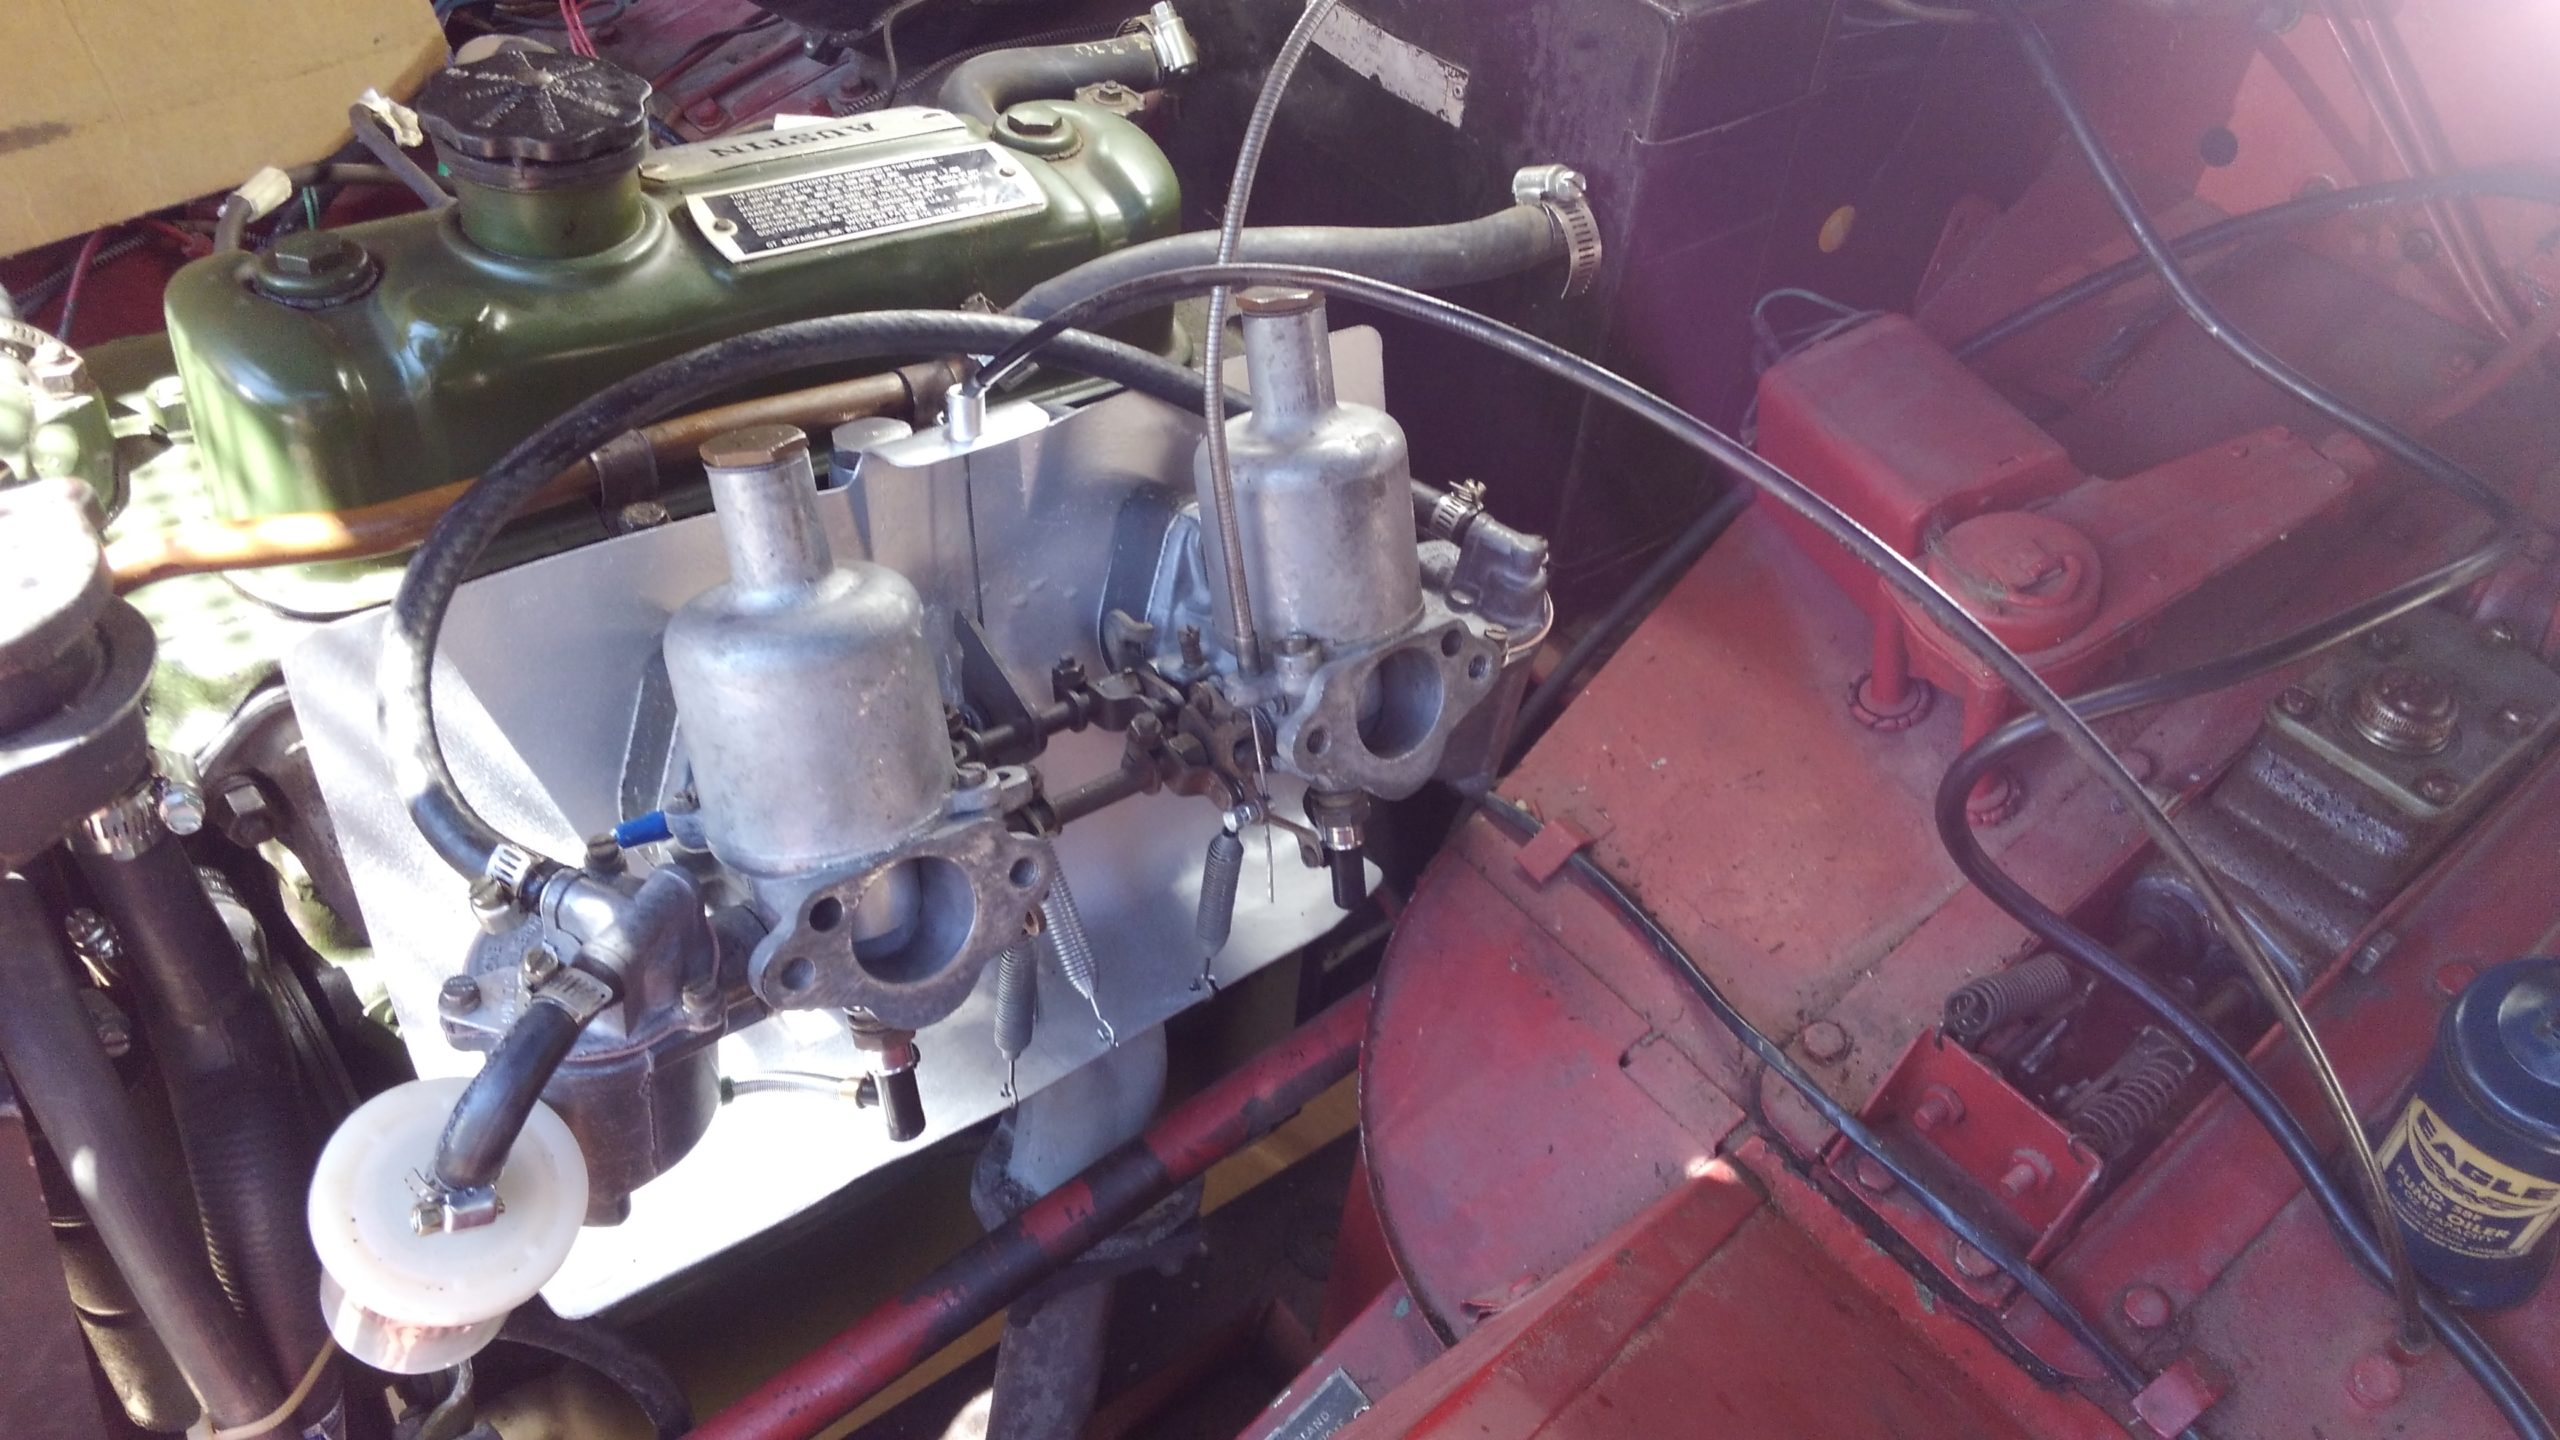
Tom’s rebuild carbs are installed (left) complete with a new throttle return spring. Getting the washers and nuts on the manifold studs are difficult because of the heat shield. I had the outside nuts on and snug and could not find a way to get the washers and nuts on the center studs. Elaine had the solution. By loosening the outside nuts (right) and letting the carburetors droop, 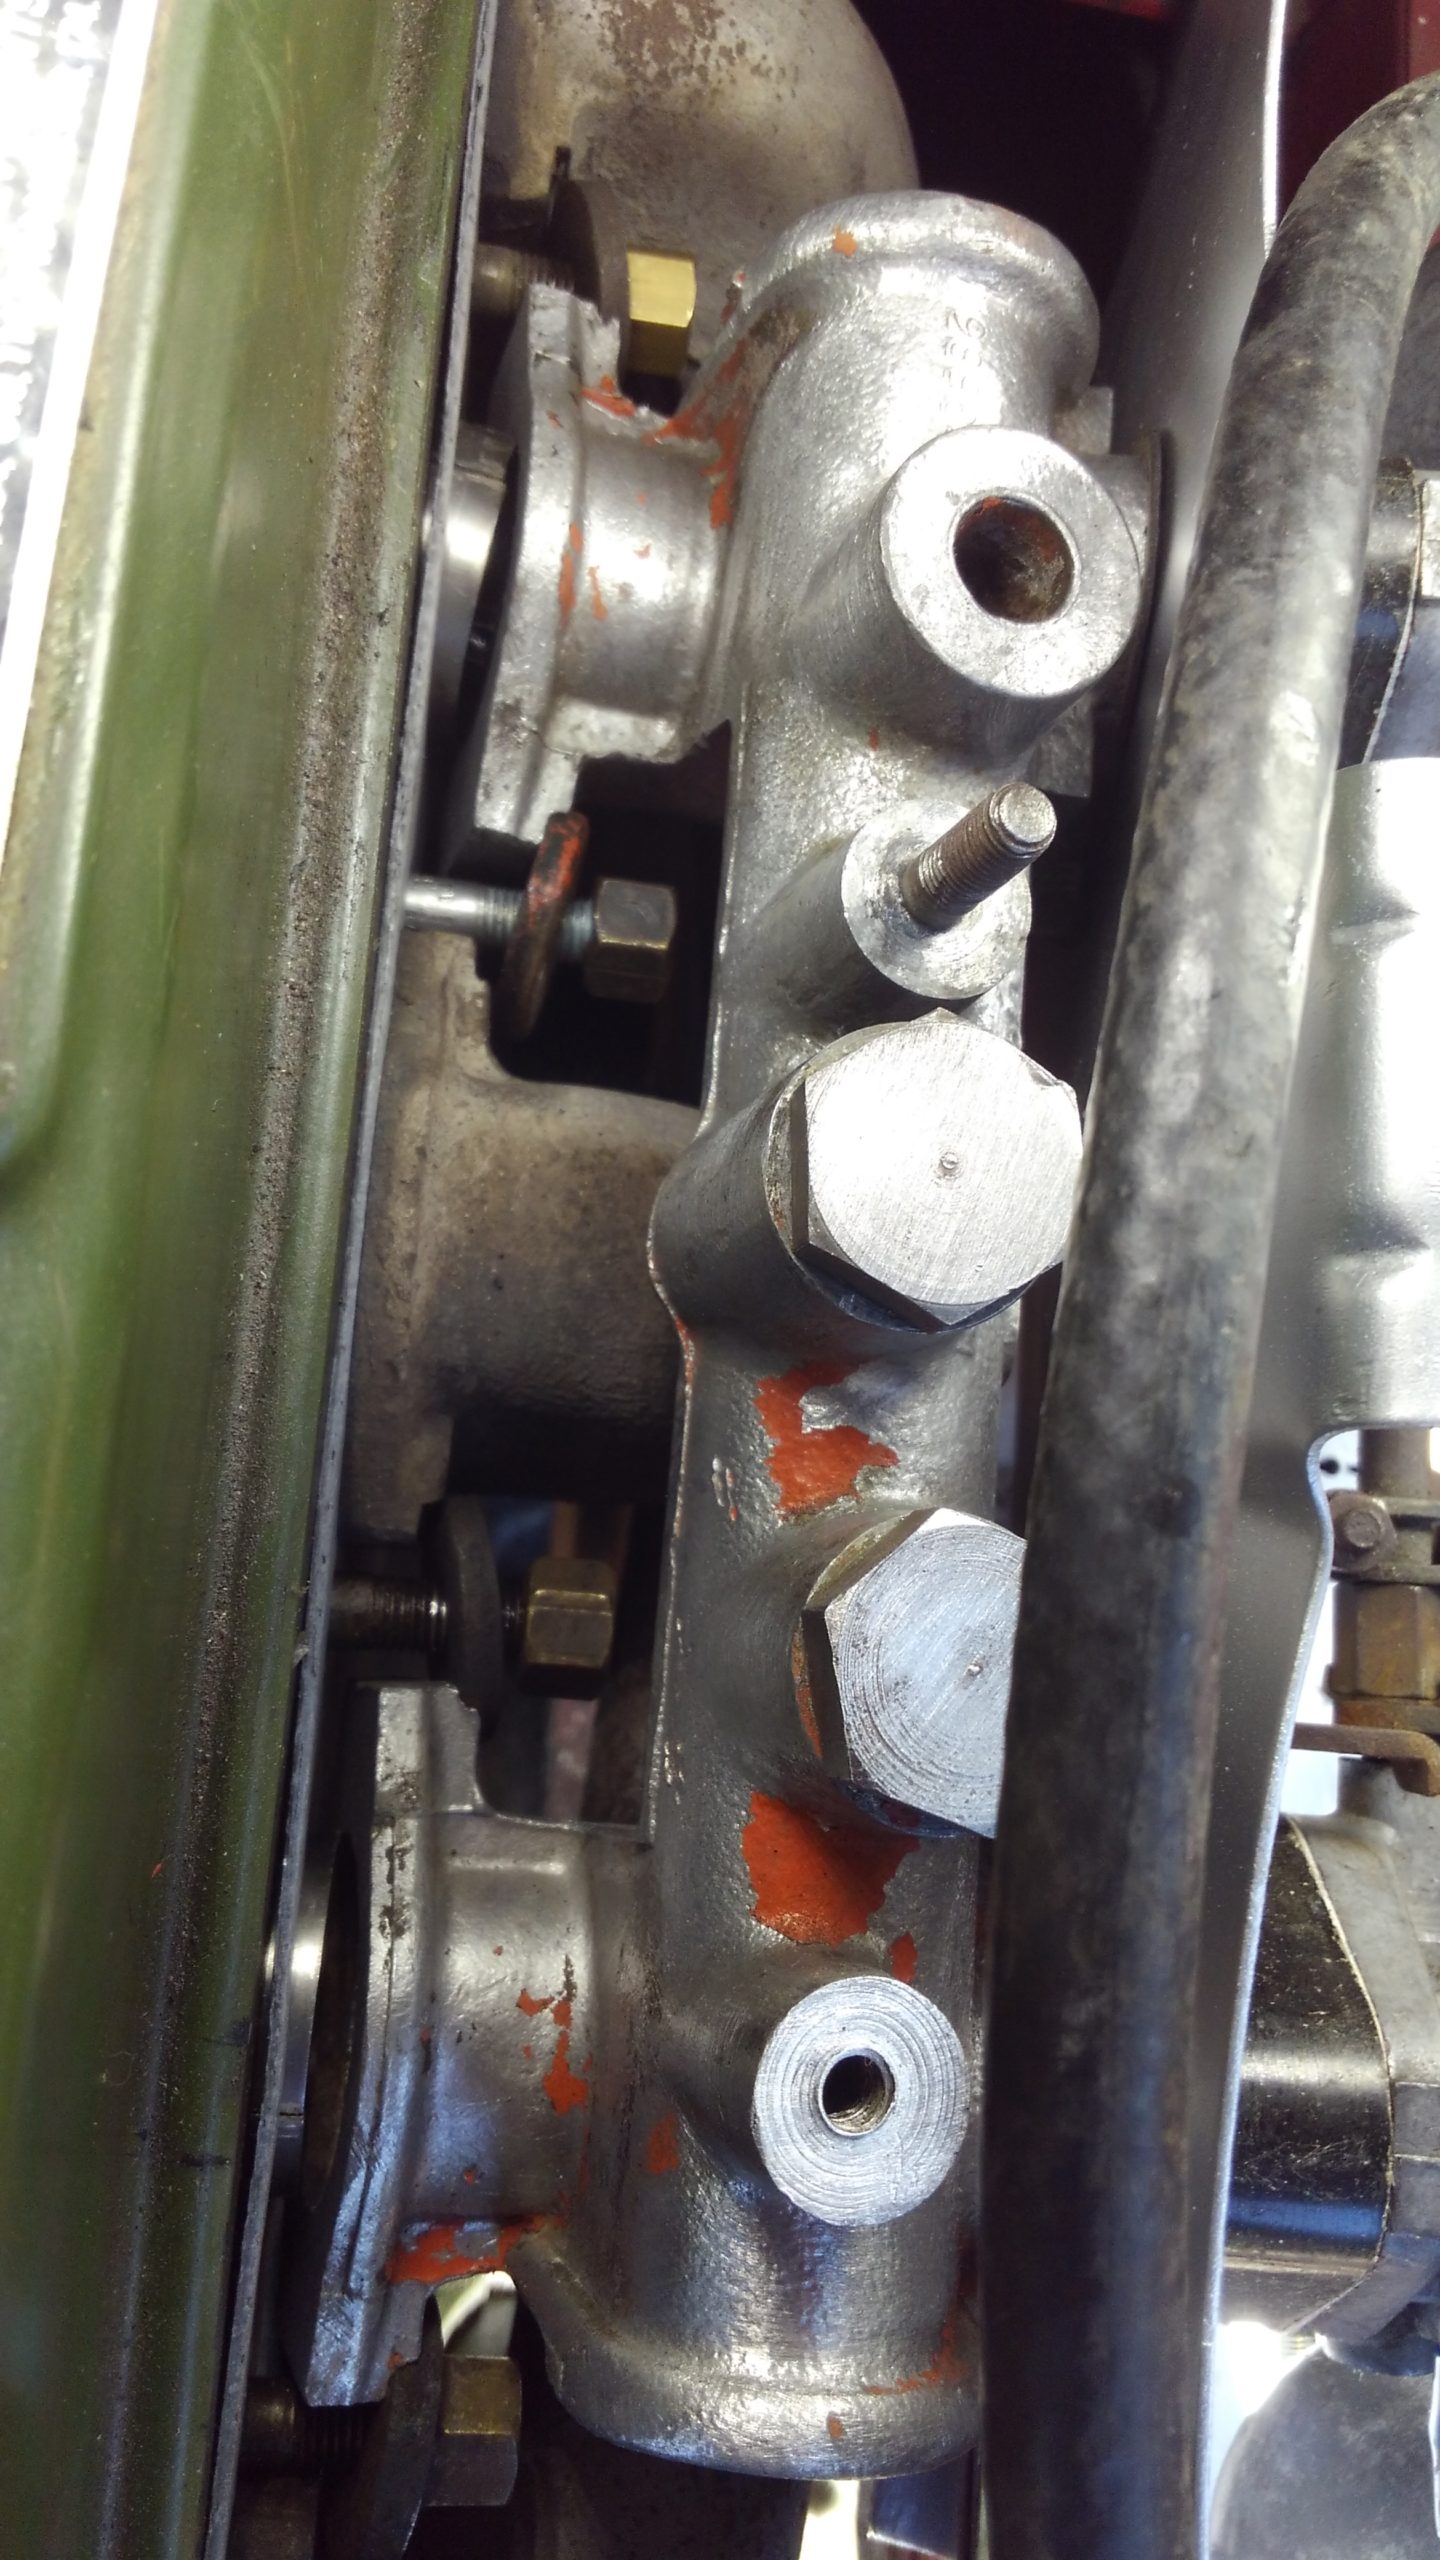 there is more room to install the center washers and nuts. The By-Pass hose (below) installed okay with everything else out of the way.
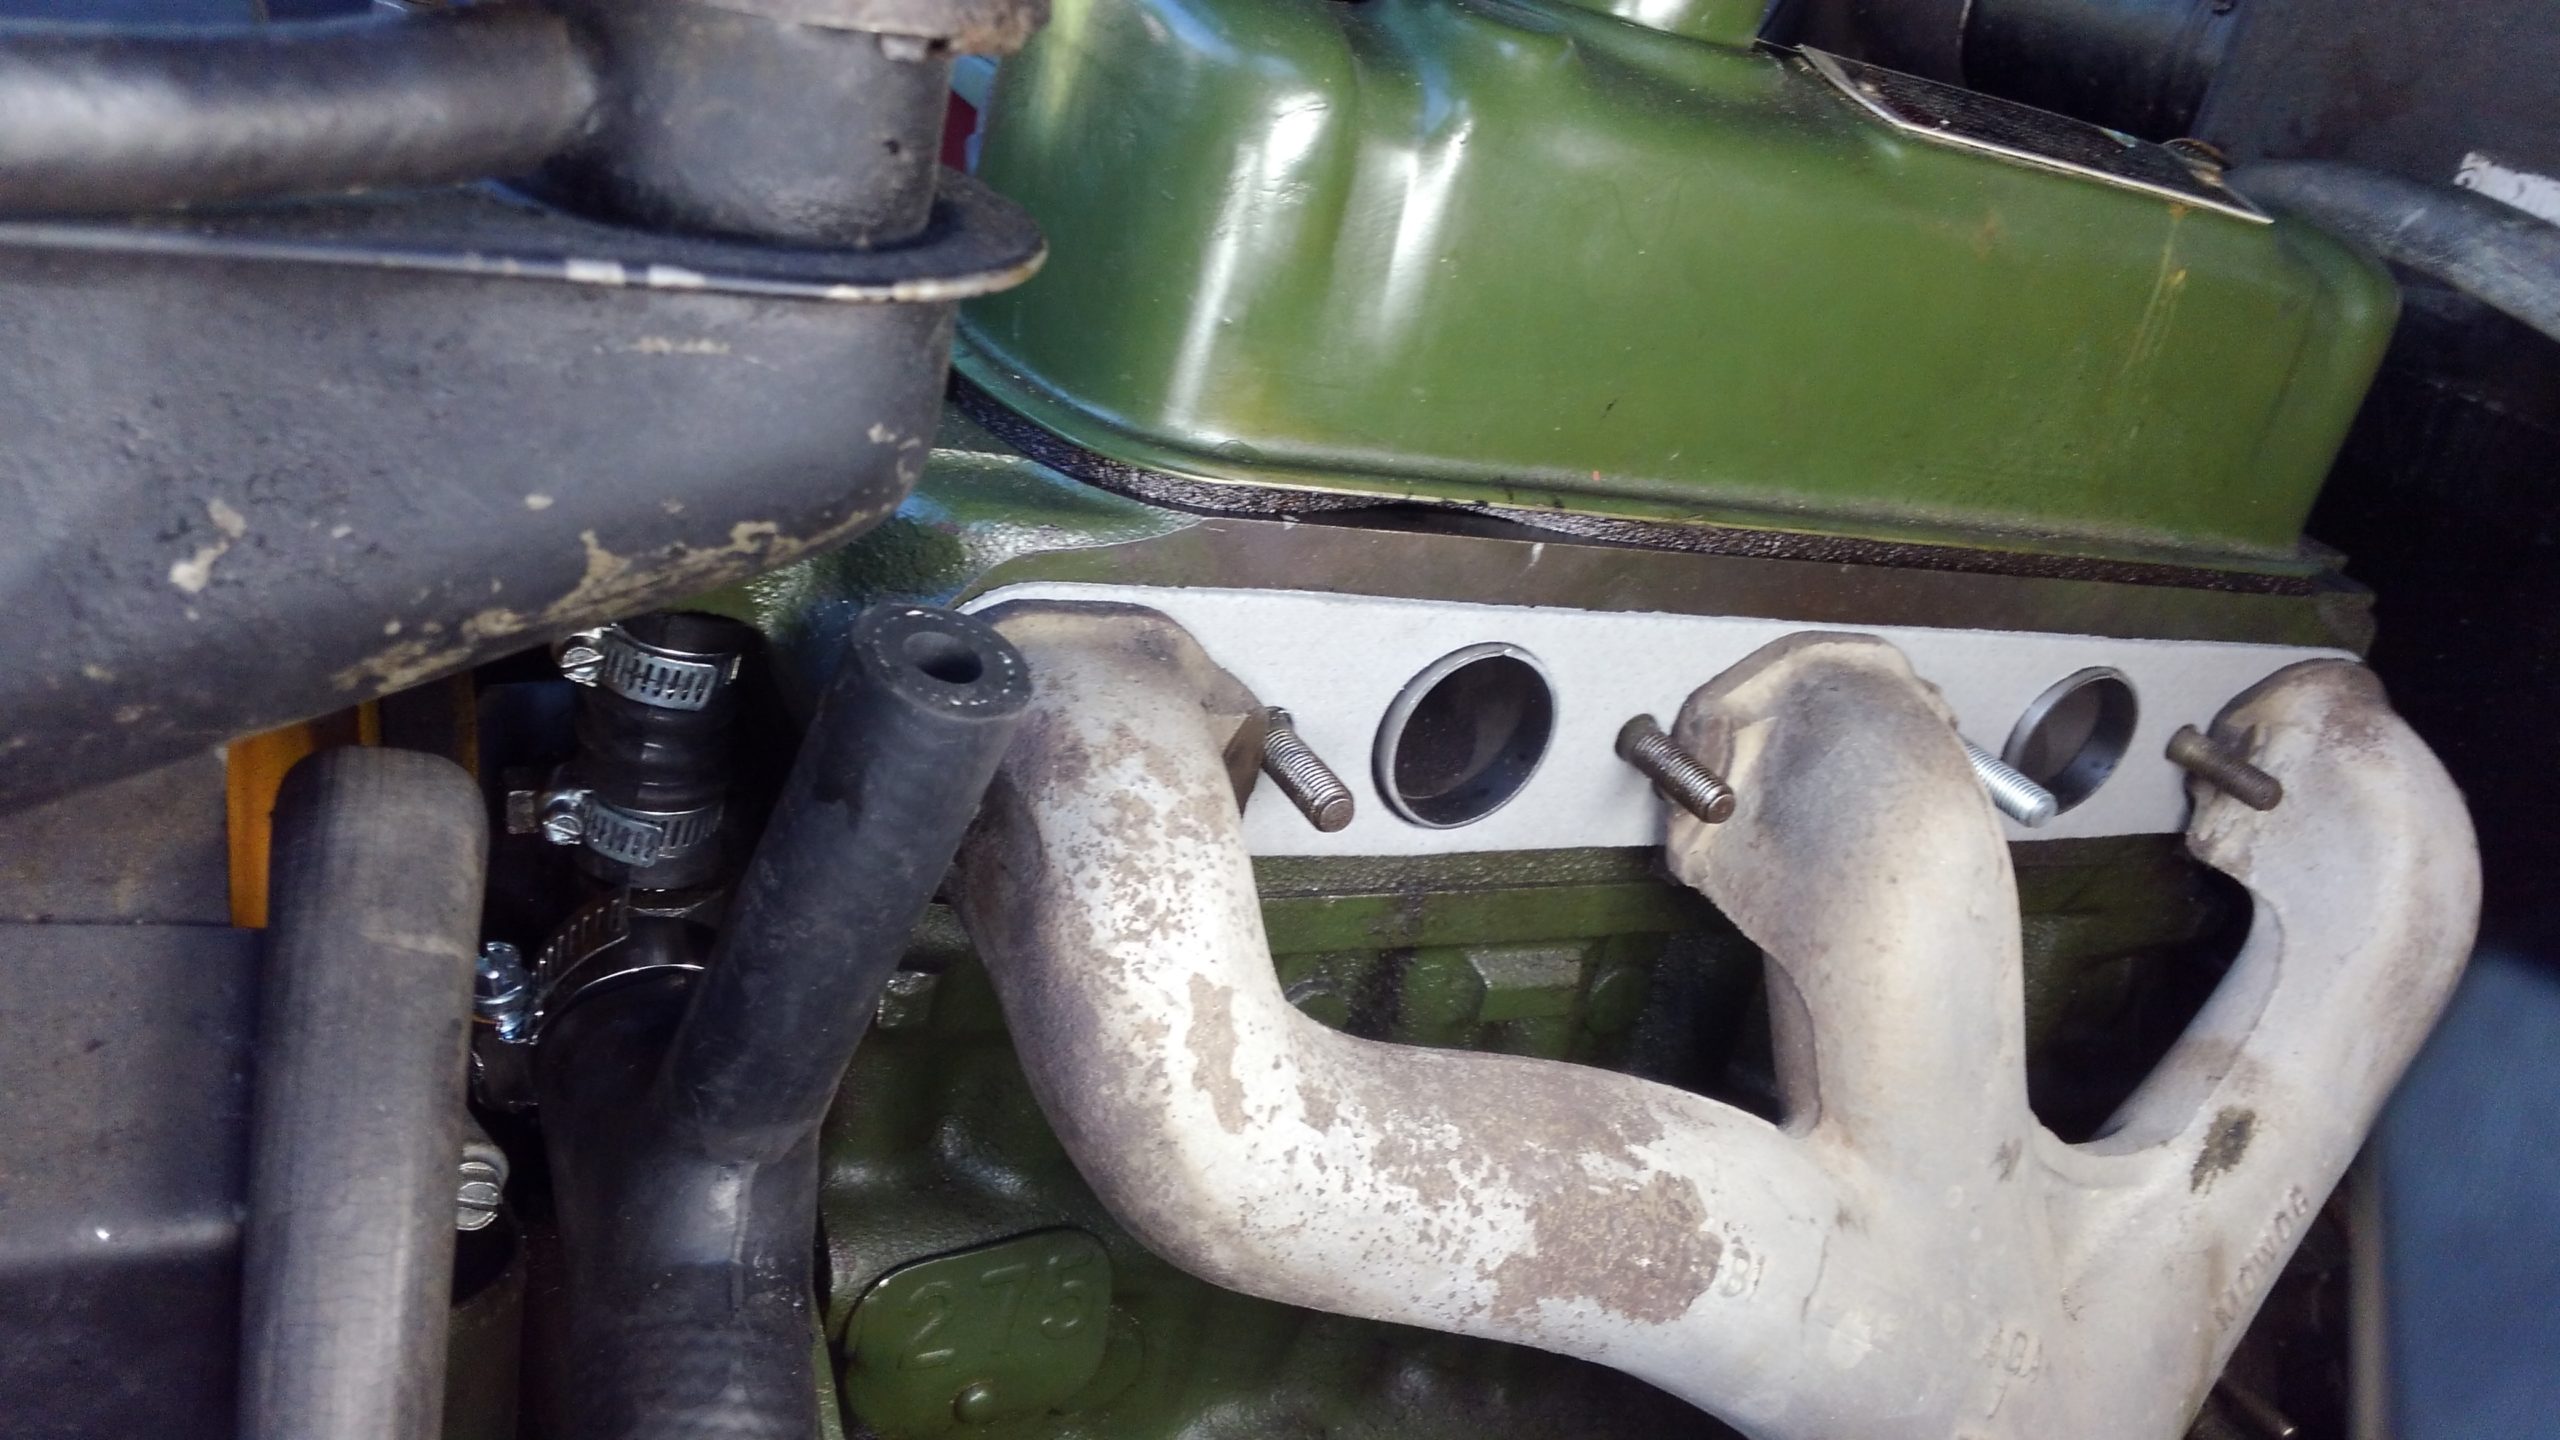
Ready for coolant and then I hope to start her up. Hoping for success after sitting all these years.
I appreciate all your help. Not sure how the master cylinder and brakes will go.
Dawson
Start-Up
April 13, 2020
Bugeye startup. Both the throttle and choke cables are out of adjustment but she runs [Start-Up Video (36 seconds)]. I have a significant coolant leak I need to chase down. All the hoses appear to be okay. Looks like I need to look at the pump housing.
Dawson
Water Pump
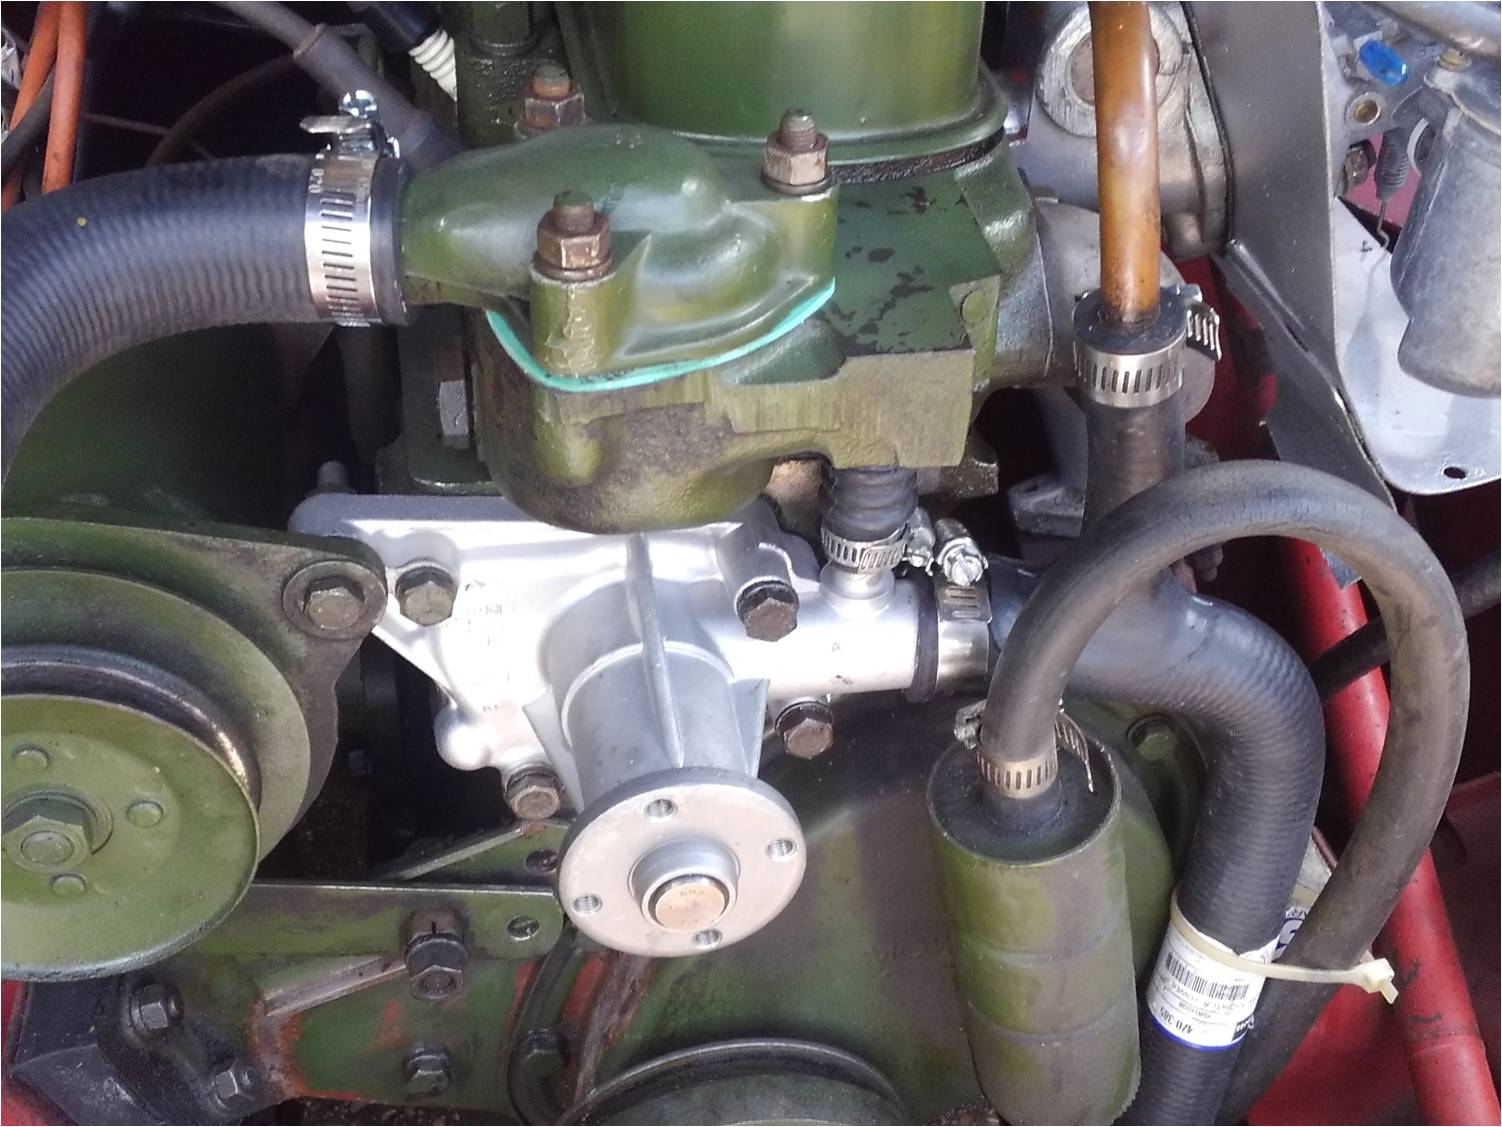
![]() April 16, 2020
April 16, 2020
After a close inspection my leak is coming from the drain hole in the pump housing. Looks like my pump seal is bad. The shaft and bearing feel okay, but the drain hole is definitely the source of the leak. A little more than just a gasket.
Dawson
Tom
Brakes
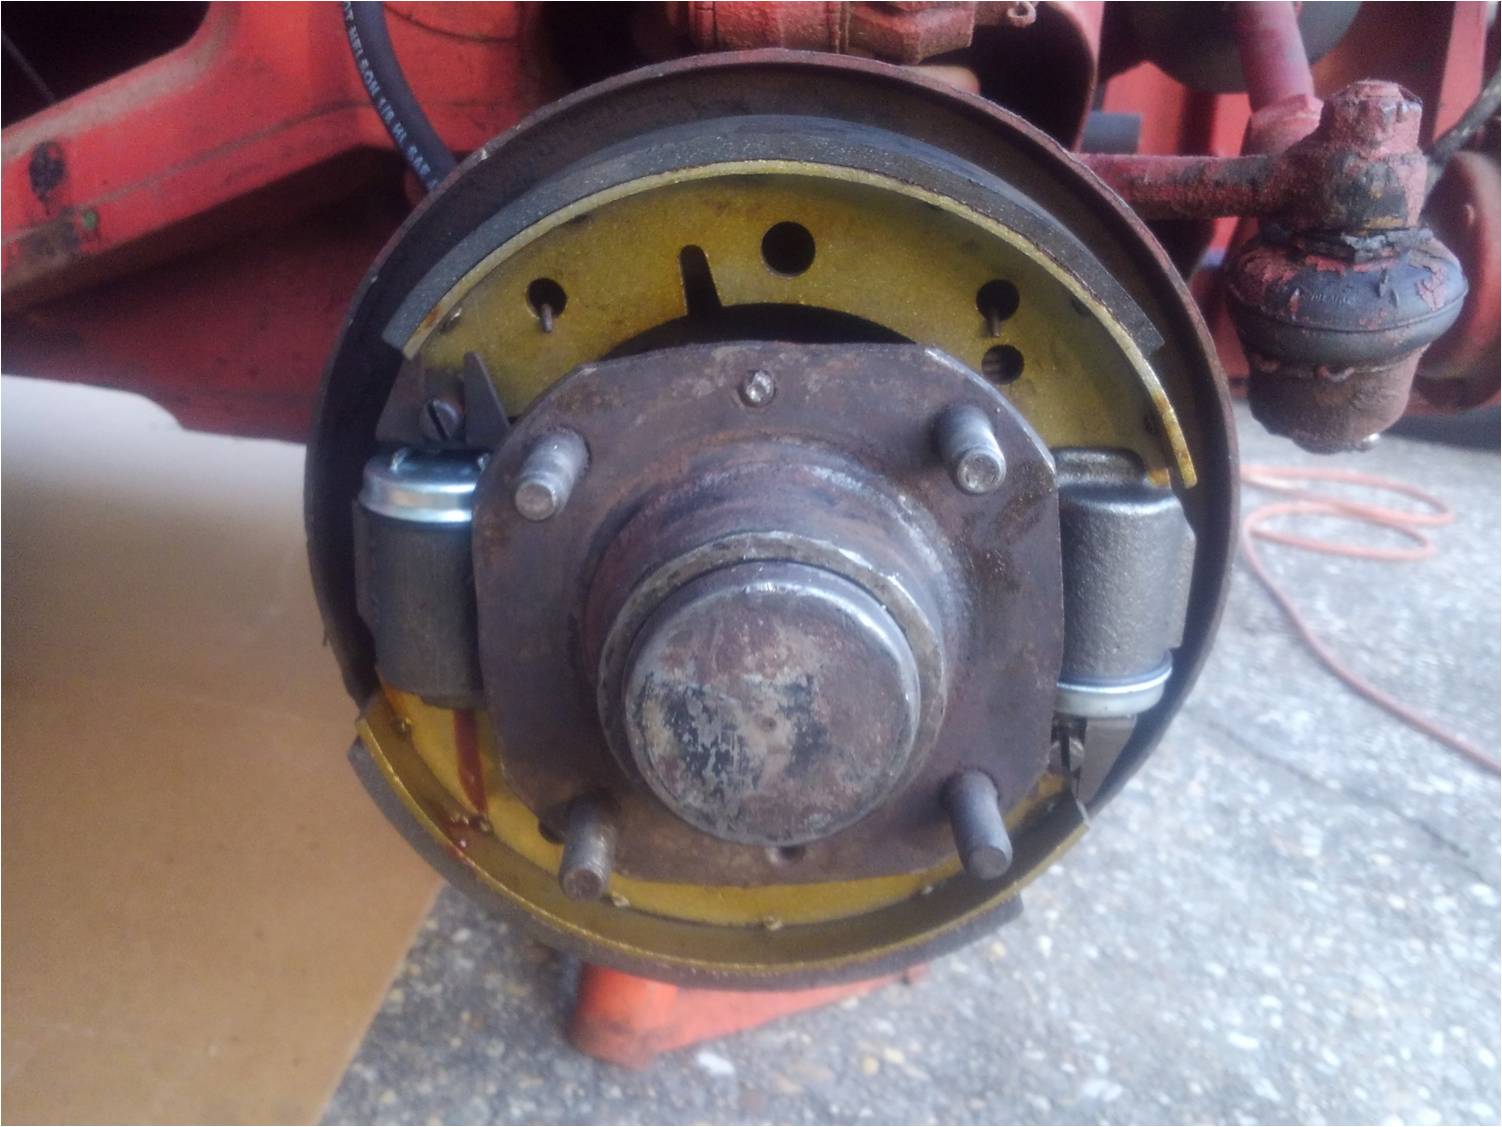
Front Left
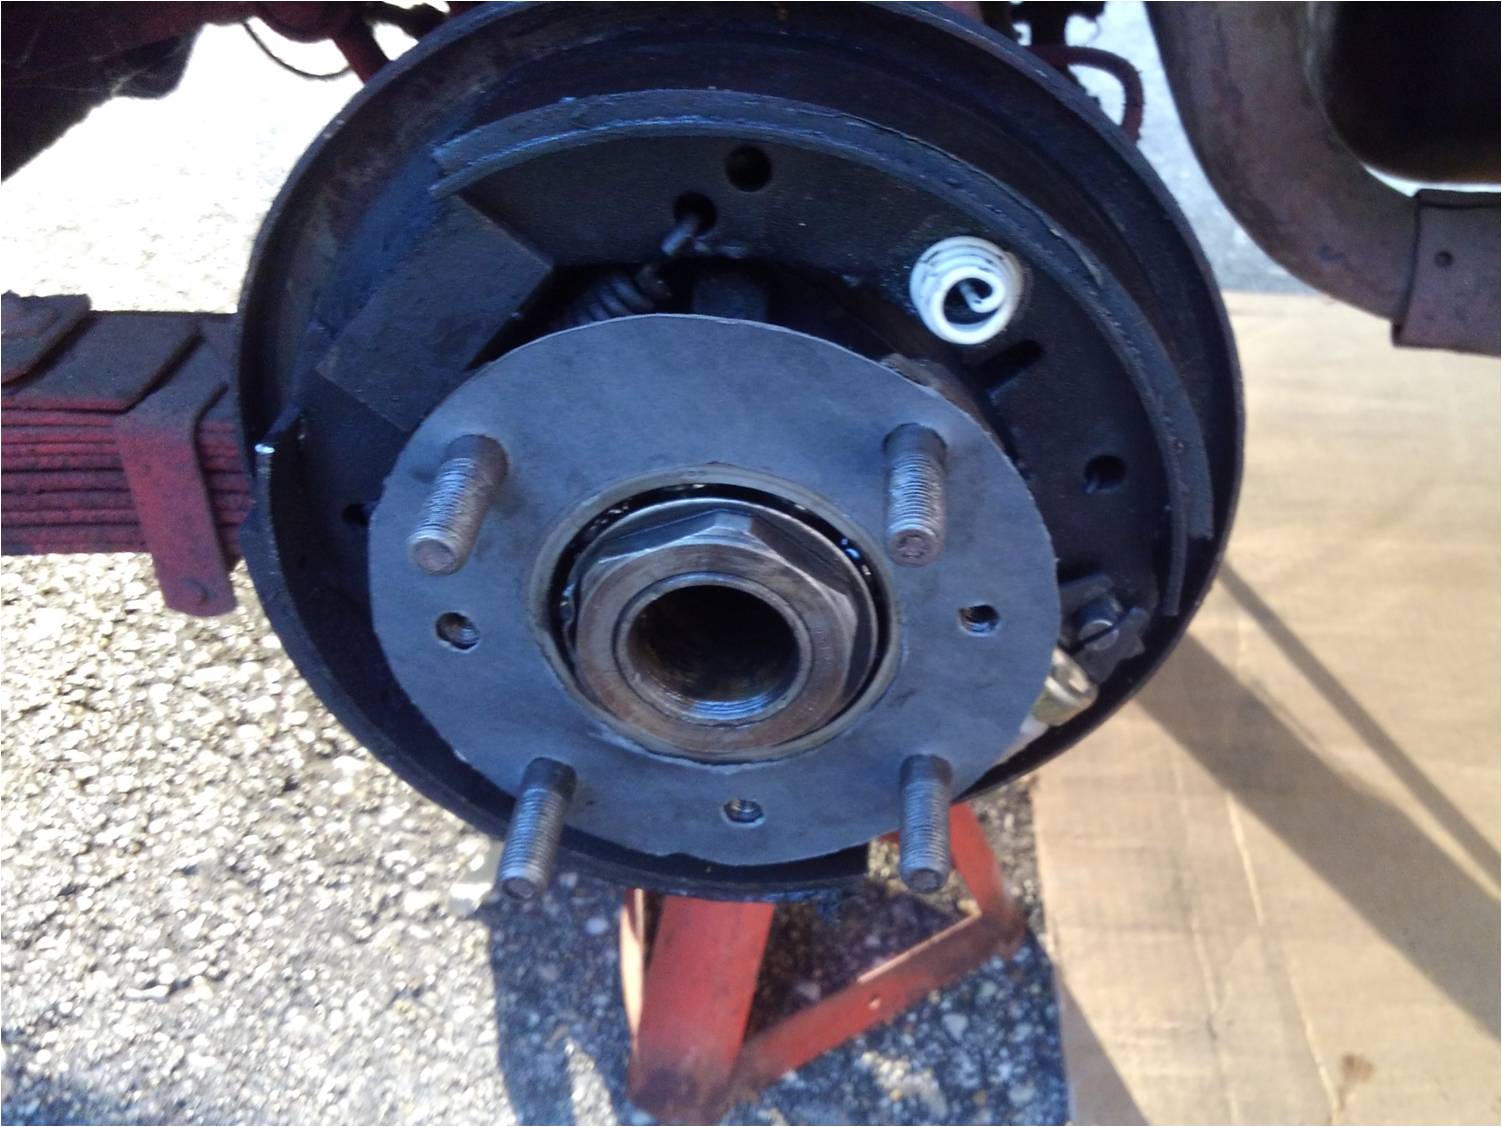
Left Rear – Gasket
Left Rear
April 28, 2020
Making some progress. Still working on the brakes. Changing the front slave cylinders and hoses went okay. The rear is a little more trouble. The LH axle shaft had no gasket between the flange and the hub and resulted in a lot of oil leakage into the brake drum and out to the wheel. I couldn’t see the bango fitting on the back of the slave cylinder until I got it cleaned up a little. I made a new gasket for the axle shaft and hub and I ordered a new boot for the rear slave cylinder. Also, I soaked the seat belt webbing in dishwashing soap and scrubbed them to get ride of the oil. I think I can use them now. I attached a few pictures. A side note for Tom, after I removed the front bumper I am able to back away from the engine compartment much easier now and this results in fewer bumps with my head hitting the hood.
Dawson.
Left Rear
failed rear axle seal. I took a look at the job on the net – A-H had an interesting approach to axle oil control – apparently a seal, an o-ring and a gasket. It is amazing how straight forward the disassembly appears. If the seal is bad, that housing will fill with oil and, being British, will most likely leak past the gasket and o-ring into the braking area again. Fingers crossed.
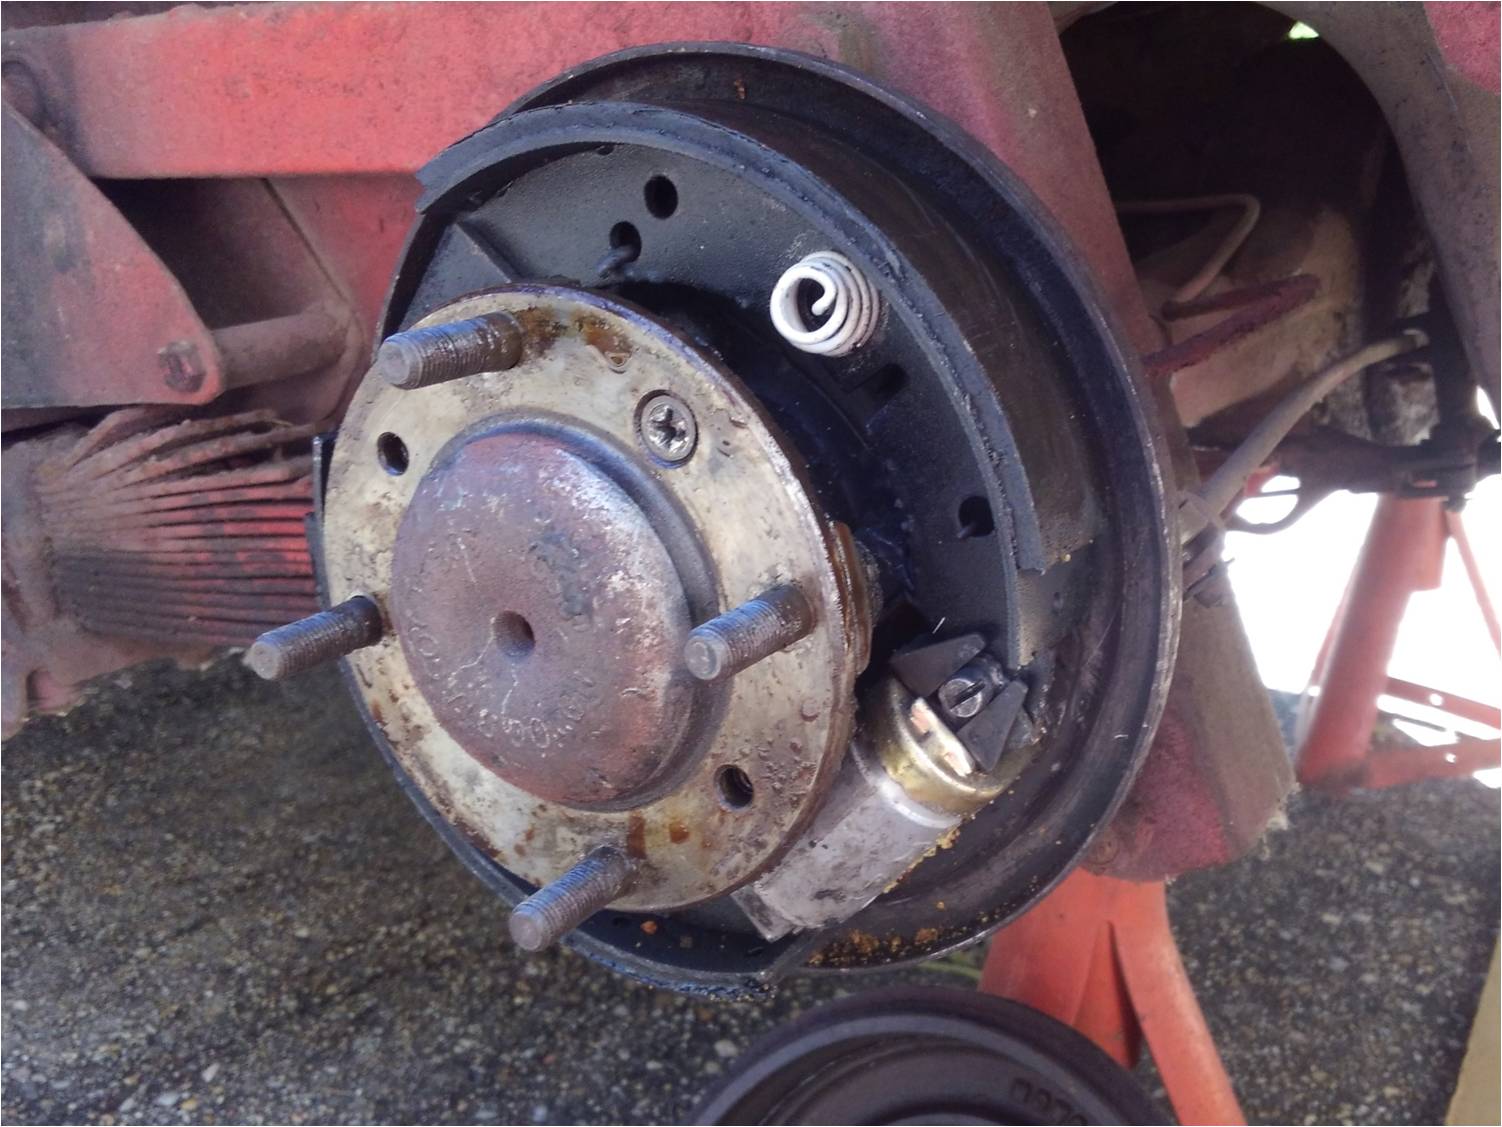
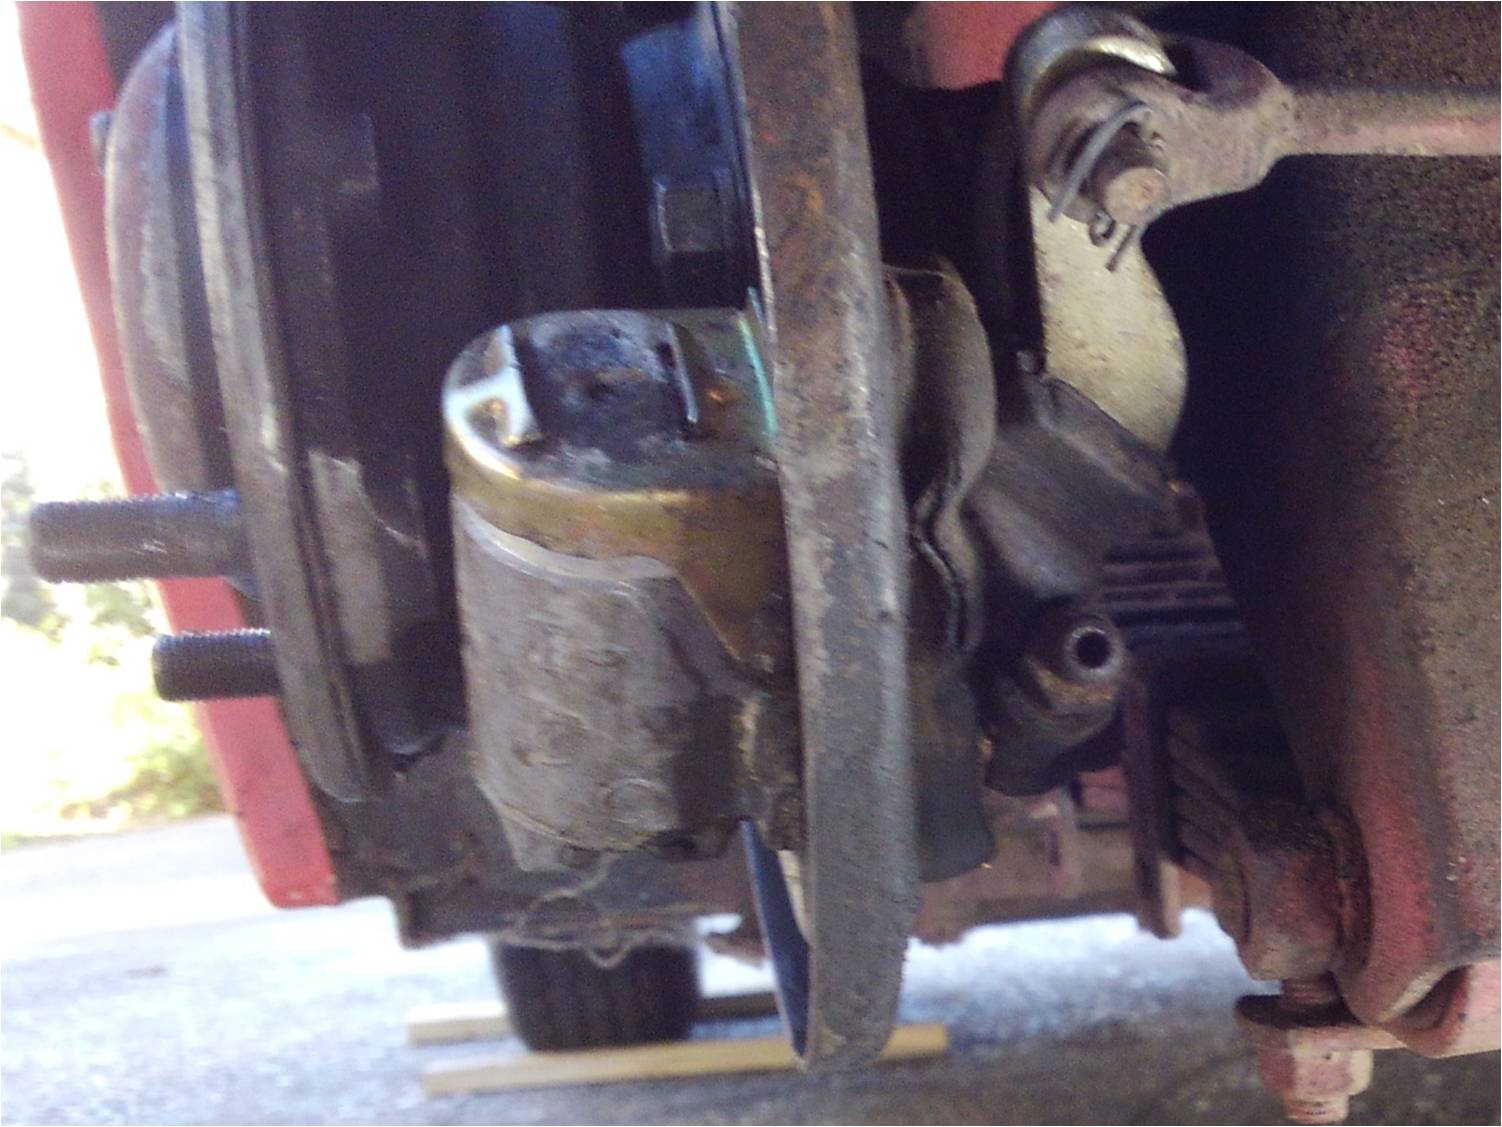
Water Pump, Brakes, and Rear Axel Hubs, Cont’d
Water Pump
August 8, 2020
Back doing some work on the bugeye again. The water pump replacement went well and I fired her up again to check for leaks. All is good. Back on the rear brakes now. I understand why most people recommend removing the hubs. The pictures show how tight it is to get the pads and springs installed. New bearings and seals should help stop the leaks.
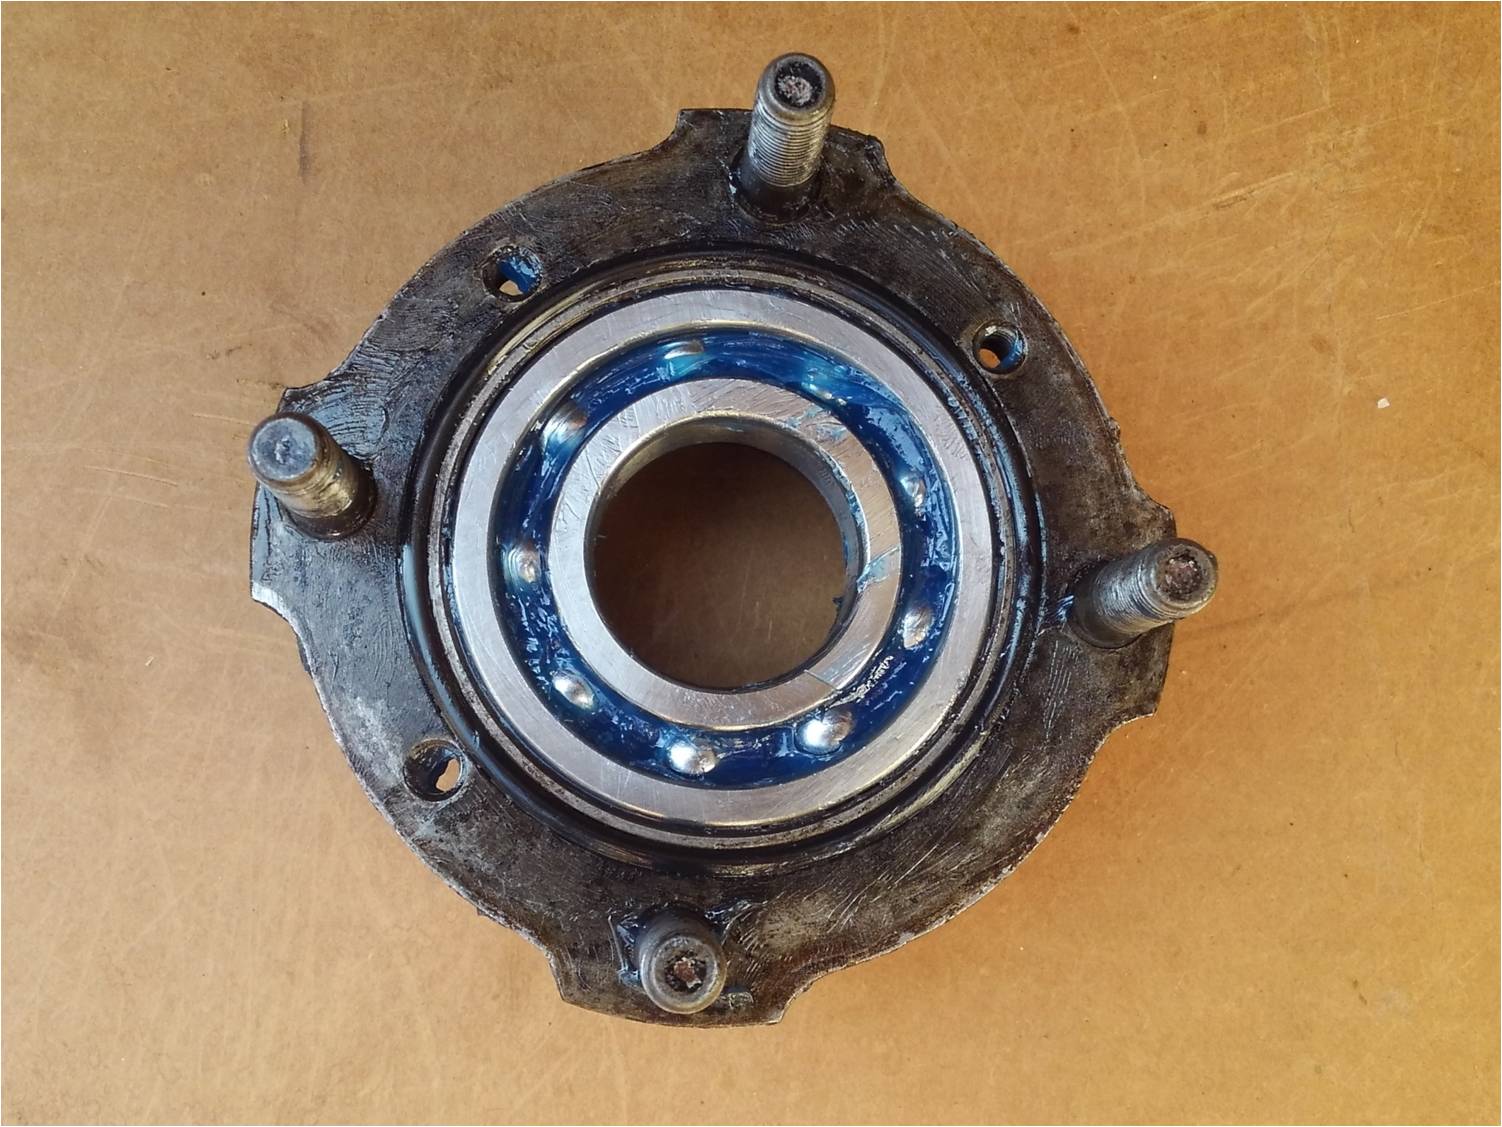
Hub & Bearing
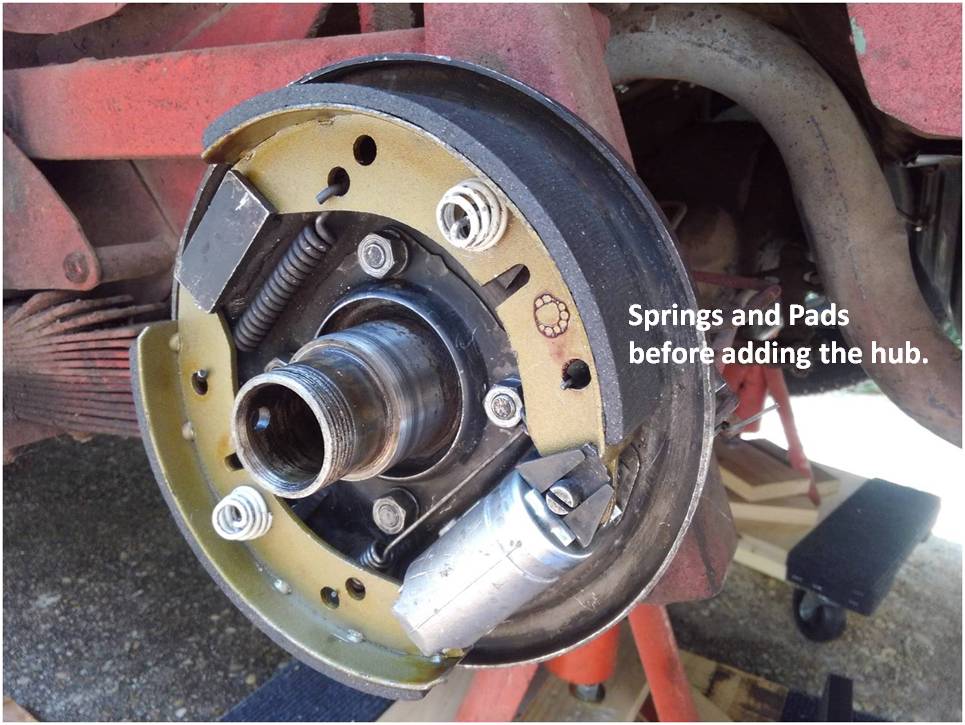
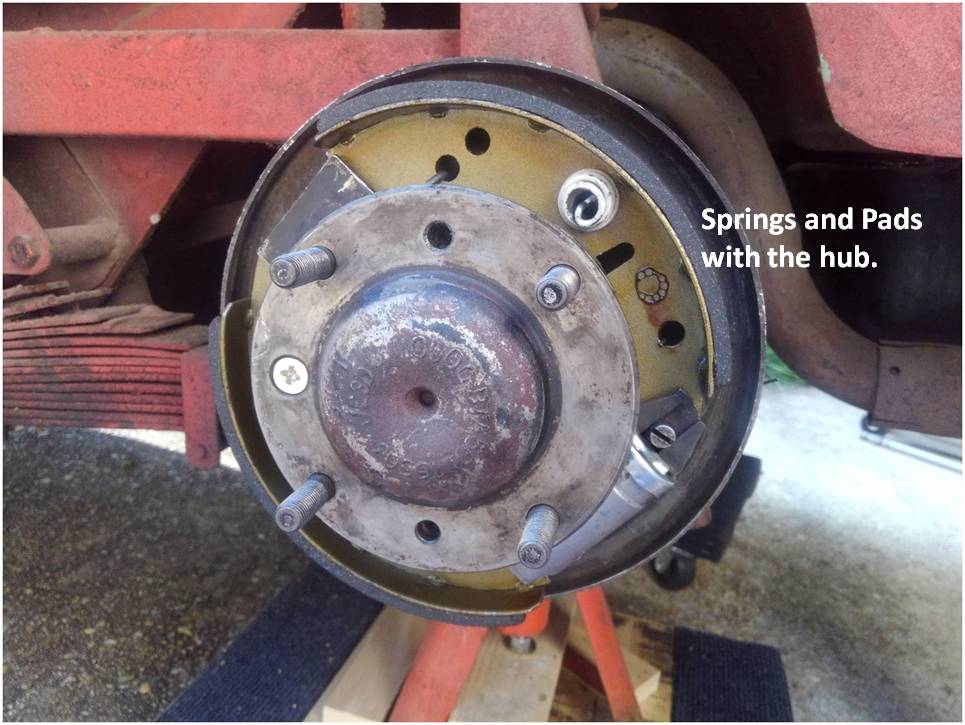 Back on the rear brakes now. I understand why most people recommend removing the hubs. The pictures show how tight it is to get the pads and springs installed. New bearings and seals should help stop the leaks. Left side is done, ready for the right. I learned a lot on the left side. Installing the pads and springs are still difficult even with the hub removed. Ready to get this baby going again (and stopping).
Working alone is slow, but I am learning a lot with this project.
Dawson
(Click on any of the images for a larger view)
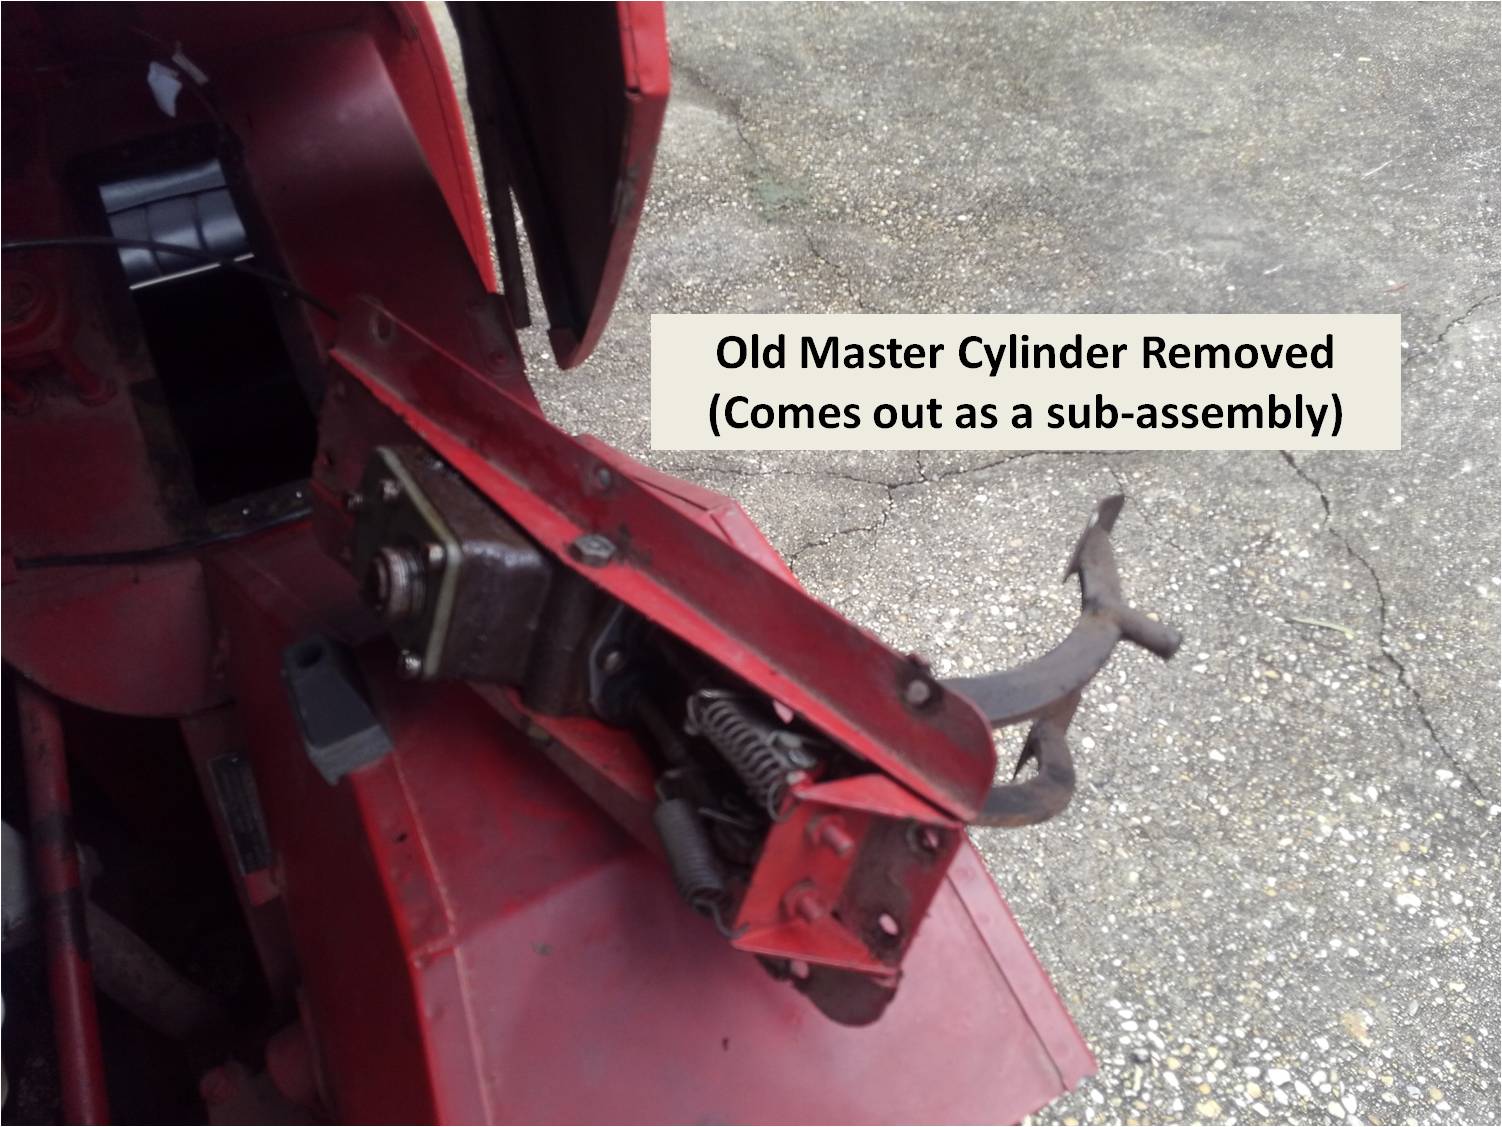
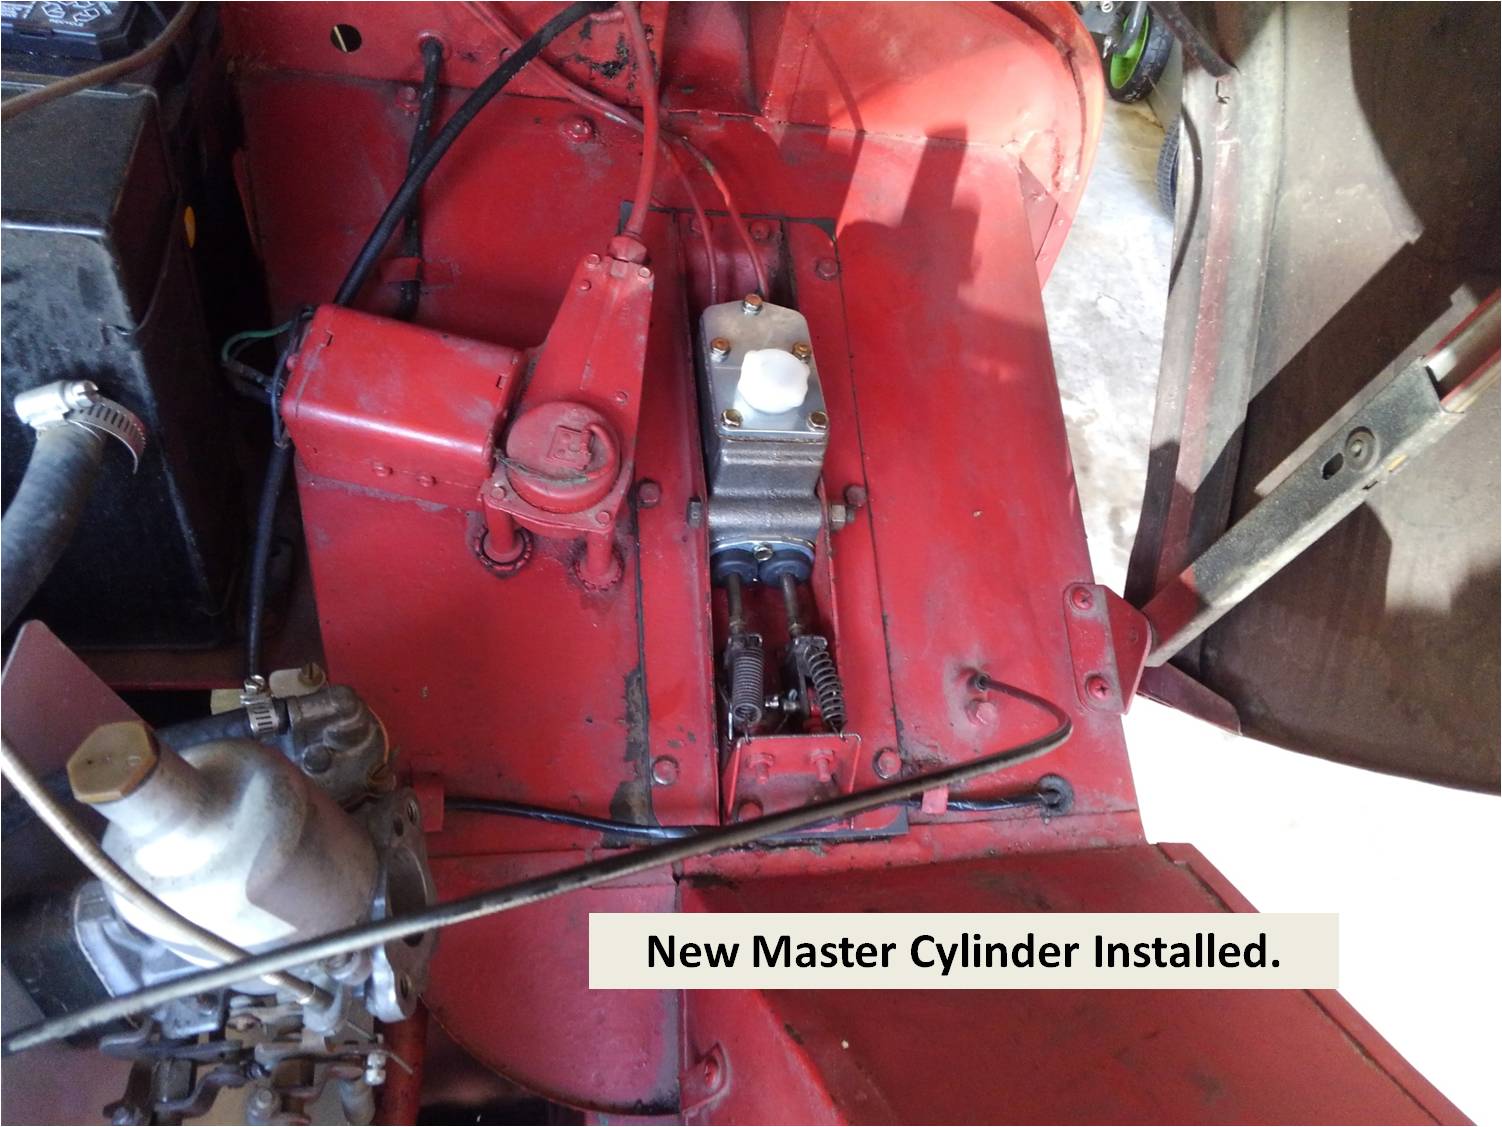
With brakes nearly wrapped up, it is almost time to replace the M/C and the clutch slave (if required) and get that Sprite on the road. It is killing me we can’t help out.
Tom
Master Cylinder
September 9, 2020
I replaced the master cylinder and bled the brakes. I still have a soft peddle so I must have air somewhere in the lines. Not sure the location yet. The clutch is very difficult to bleed because of the bleeder screw location. This is definitely a job that requires some assistance. It would also help if the reservoir held more fluid.
Russell, Wednesday September 9 2020 10:55:59AM: Which DOT fluid are you using? Tom taught me that DOT 5 (silicone fluid) is more reluctant to let go of its bubbles and may require an overnight rest between bleeds for the air to rise. Thanks again for the update and photos. Your captions really make my job a lot easier. 🙂 Keep us posted,
Tom, Wed, Sep 9 at 10:52 AM: If you did not bench bleed the master before installation, it will take some time to clear the air out of the system, but the trapped air will eventually work itself out.
Re the clutch slave, I feel your pain, AH’s really hate folks to work on the clutch hydraulic system, I am thinking Big Healeys have no more clearance than the Sprites in this area. Shameless bribes for your lady may motivate her to assist in filling and pedal pushing.
Good luck!
Dawson, Wed, Sep 9 at 12:17 PM: A couple friends came and helped me yesterday. After letting the bugeye sit overnight a leak at the LH rear caliper bango fitting revealed itself. I tightened it, but not sure it is good yet (hope so). I think a new fitting, bolt, and washers may be a good investment. The bugeye will reveal what’s the problem if I am patient. I may be able to try again tomorrow morning and find out if it is leak free. I bought a brake bleeder vacuum kit at Harbor Freight and first tried to bleed the brakes without help. The pump is small and the hose pulled enough air in at the bleeder fitting to loose the vacuum. It worked much better pushing the fluid from the master cylinder. The hoses and bleeder cup are handy though.
I tried adjusting the idle down. The linkage contacts the adjusting screws okay so I backed them off 4 turns (both screws), one turn at a time. It made a little difference, but it is still idling higher than I would like it to.
Working on getting the license plate and insurance next.
Tom, Wed, Sep 9 at 3:48 PM: Leaks around a banjo bolt are almost nearly always caused by the copper crush washers being unable to reseal. Replace those rascals, and your leak (at least in that location) should be fixed.
I have always had a hell of a time with my Mity Vac trying to bleed brakes. I purchased a push unit from Phoenix to use on a particularly heinous clutch install (early Ford Explorer) and had only a little more success. Pumping, holding, and bleeding have always worked for me.
Re the DOT fluid challenge Russell mentioned, normal, traditional, paint eating, hygroscopic, reasonably priced brake fluids DOT 3 and 4 don’t have this issue. Fancy-pants kind to paint, non water-absorbent, and hugely expensive silicone fluids (DOT 5) are infamous for creating a sea of bubbles that take a long time to remove. I suspect you are using normal brake fluid. If not, you have bigger fish to fry as the DOT 5 fluid is absolutely not compatible with its earlier brethren, and will ruin a perfectly good brake system if mixed. DOT 3 and 4 are perfectly compatible with each other, as they have a similar mineral oil base. Like Russell said, almost done, sir!
Dawson, Wed, Sep 9 at 4:12 PM: Dot 3 is what I am using. It appears tightening the bolt has stopped the leak. I’ll try again in the morning.
Tom, Wed, Sep 9 at 4:37 PM: Good – the copper washers have some “give” in them, and tightening can stop a leak if they are not too deformed. Fingers crossed. DOT 3 is fine – I use it and DOT 4, which has a slightly higher boiling point. Good luck!
Thursday, September 10, 2020 6:34 PM: More work is needed on bleeding the brakes. I still have a soft pedal. I think the leak is fixed though. The washers at the banjo fitting have one large and one small washer. I had a second large washer where I needed a small one. Other items that need attention include throttle sticking (cable problem), leaking under the valve cover (gasket problem), and the tachometer is not working. Getting closer.
On the Road Again
Following months of work, and yet a few more niggling issues to resolve, Dawson takes the Bugeye out for its first tentative steps in years.
I have heard about crossfire across undamaged spark leads, but have never witnessed it. More often, the leads themselves have breaks in their insulation, and the voltage grounds out to the nearest metal object, resulting in a misfire.
With the engine off, examine each lead to see if the insulation is cracked or compromised. Flexing them gently may expose cracks. If you see them, all the leads should be replaced, but for the short, short, short haul, a turn or two of quality electrical tape may stem the spark flow and prevent unwanted grounding.
Tom
October 16, 2020:
Okay, forget my theories below. The problem is the fuel filter. Should have planned on this with all the crud we got out of the fuel tank. I can get a new one tomorrow.
With 4 days to spare Dawson and his daughter take the Bugeye out for a final test run.
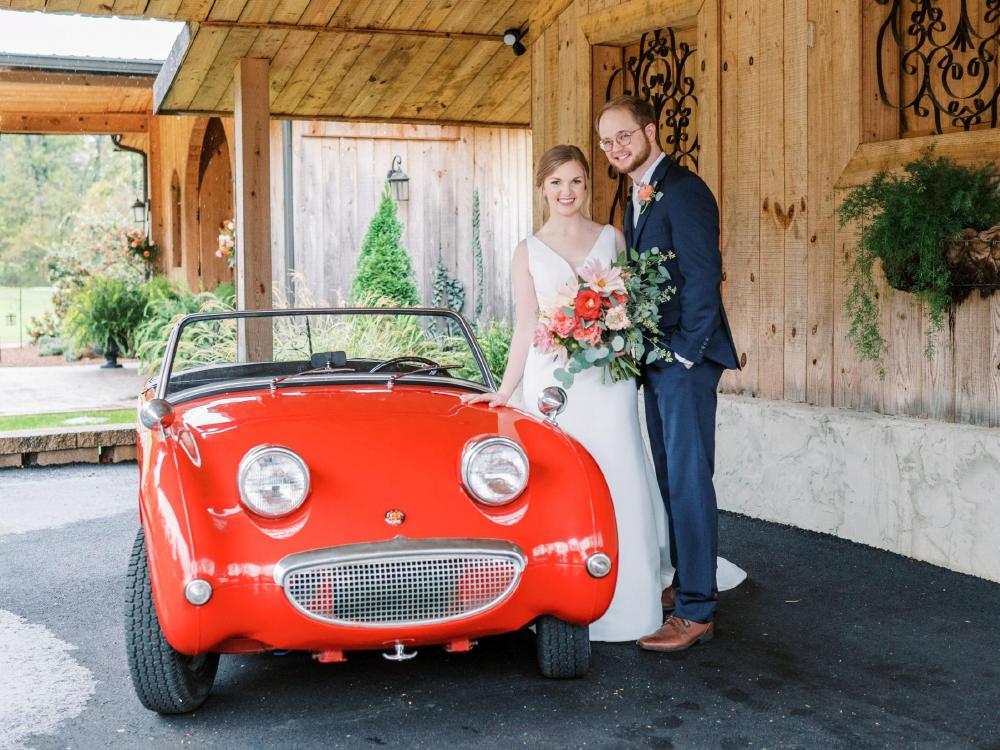
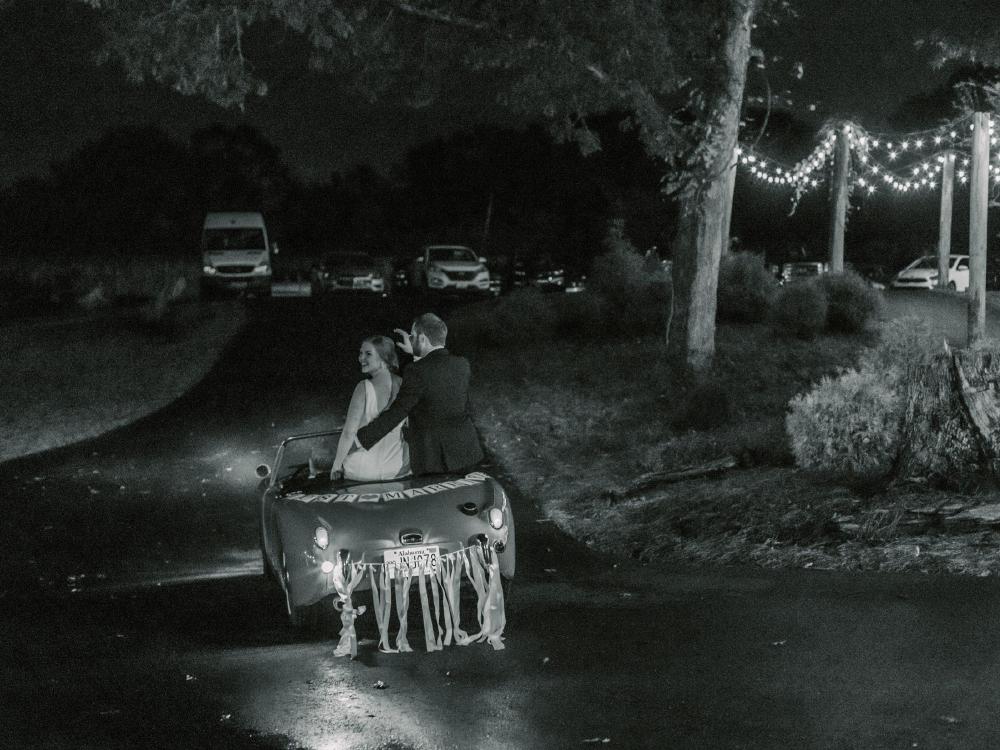
The “Best Car” at the Wedding
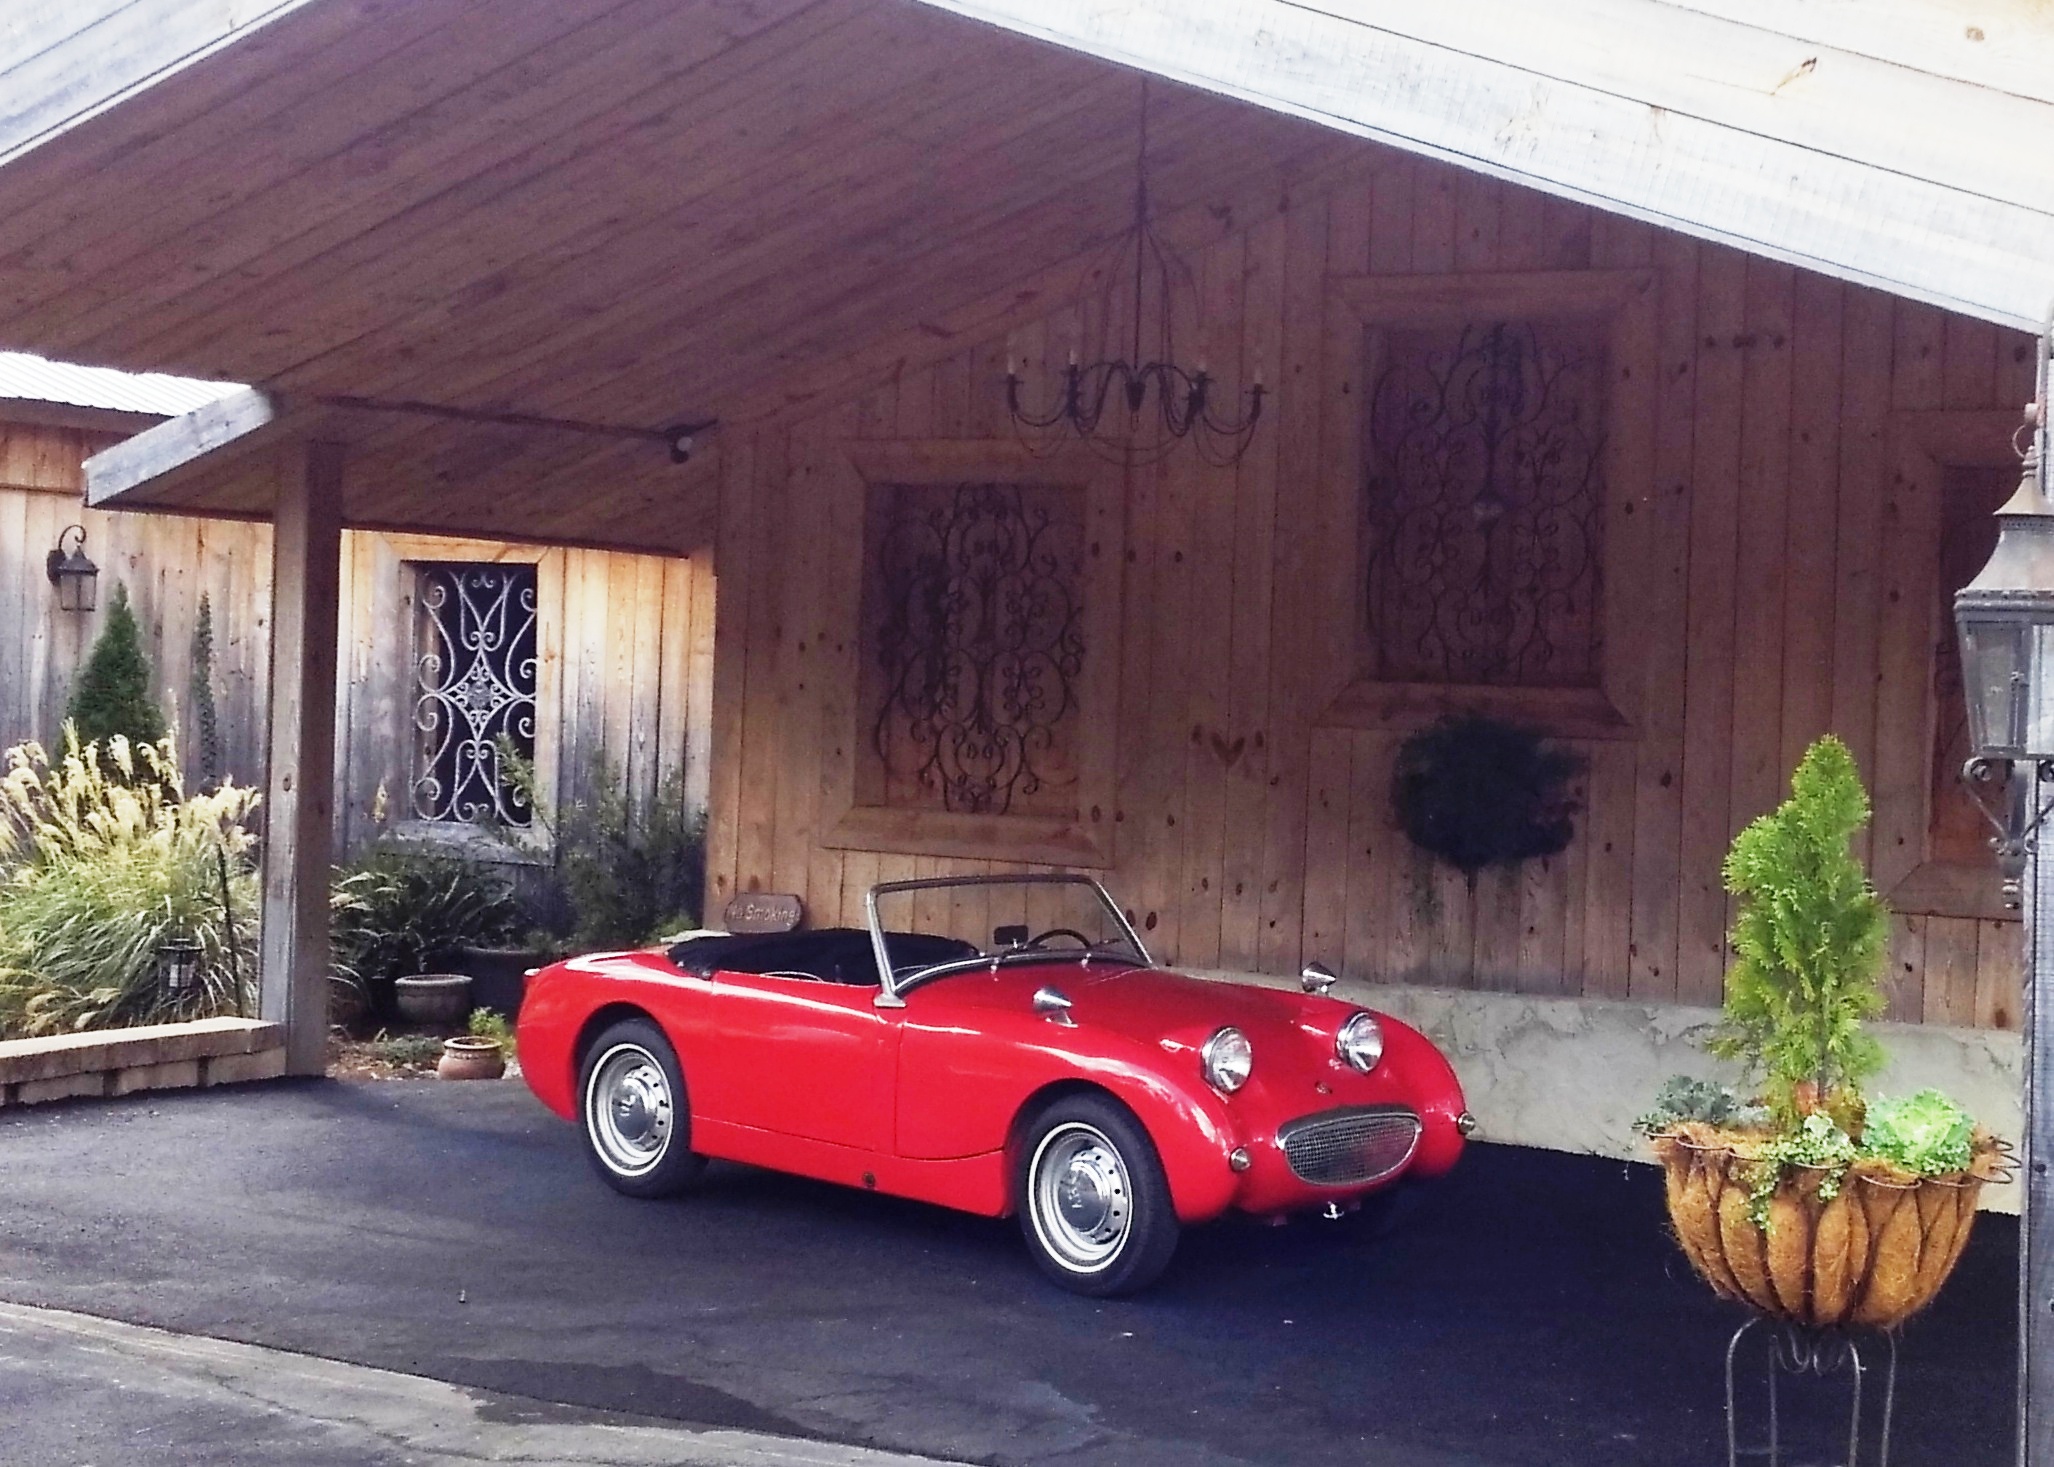
Dawson, October 24, 2020: The Bugeye made it to the wedding as planned. This picture was taken outside the wedding venue, Creekside Meadows, in Morris, Alabama before the wedding.
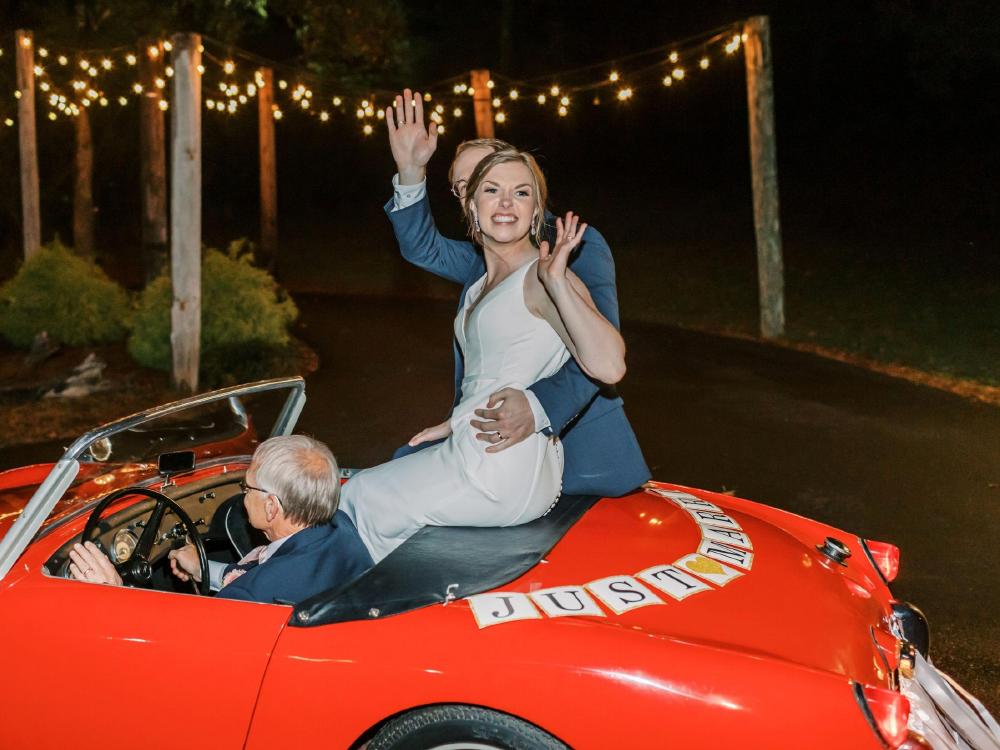
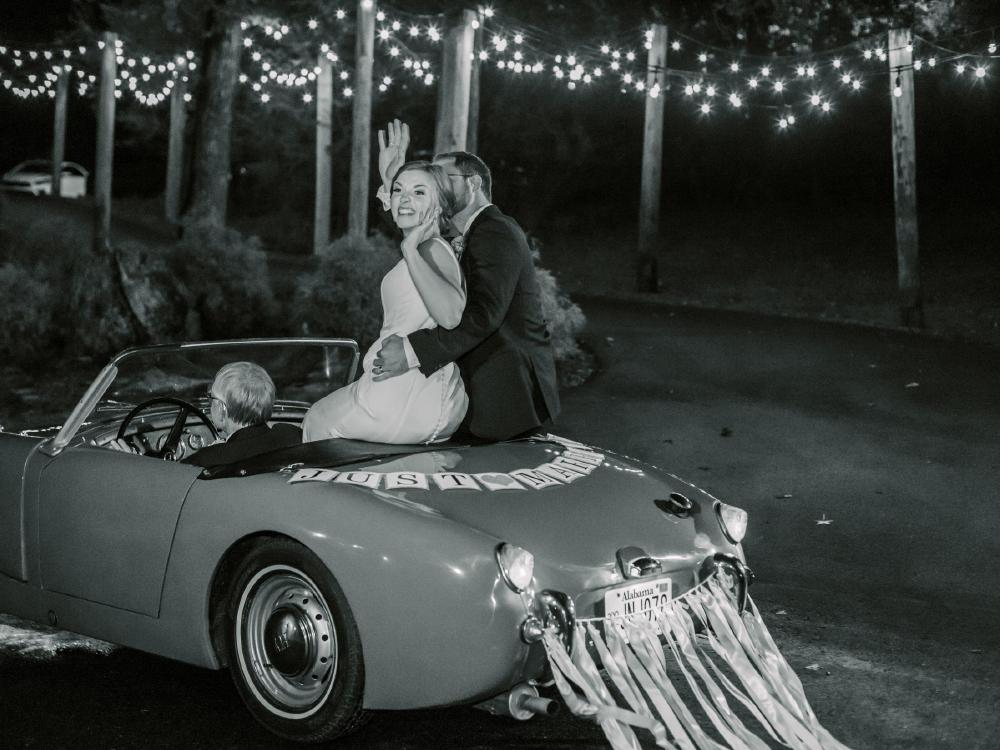
I appreciate your help to make this a success. They left the ceremony in the Bugeye sitting on the boot behind the seats parade style.